SmartThings Integration
We provide the following capabilities to interact with SmartThings:
- On/Off
- Percentage (light)
- Color Temperature (light)
- Fan Speed (fan)
Prerequisites
Upload Corresponding Information Model
Before using your connector, please upload a corresponding information model with Integration Schema filled in to the Admin Site.
- No device will be shown in the SmartThings app if there is no information model on the Admin Site.
- Make sure the content in your information model is correct. If your information model is incorrect, you cannot discover your device. For more details about the content of information models, you can refer to Using Information Models.
- We strongly suggest that you change the nickname for your device, not using a general name or device type as the device name.
- For more details about uploading information models to the Admin site, you can refer to Managing Information Models.
Create SmartThings Account and Enroll Your Company
Please create an account and login at Developer Center.
Once you've logged in, please enroll your organization for project distribution. 
Ask Exosite to Provide the Needed Info
You will need Exosite to provide the ExoHome's client ID and client secret to setup your project.
Step 1: Register New Schema App
First, you need to create a schema cloud connector for your devices.
- Go to Schema Cloud Connector
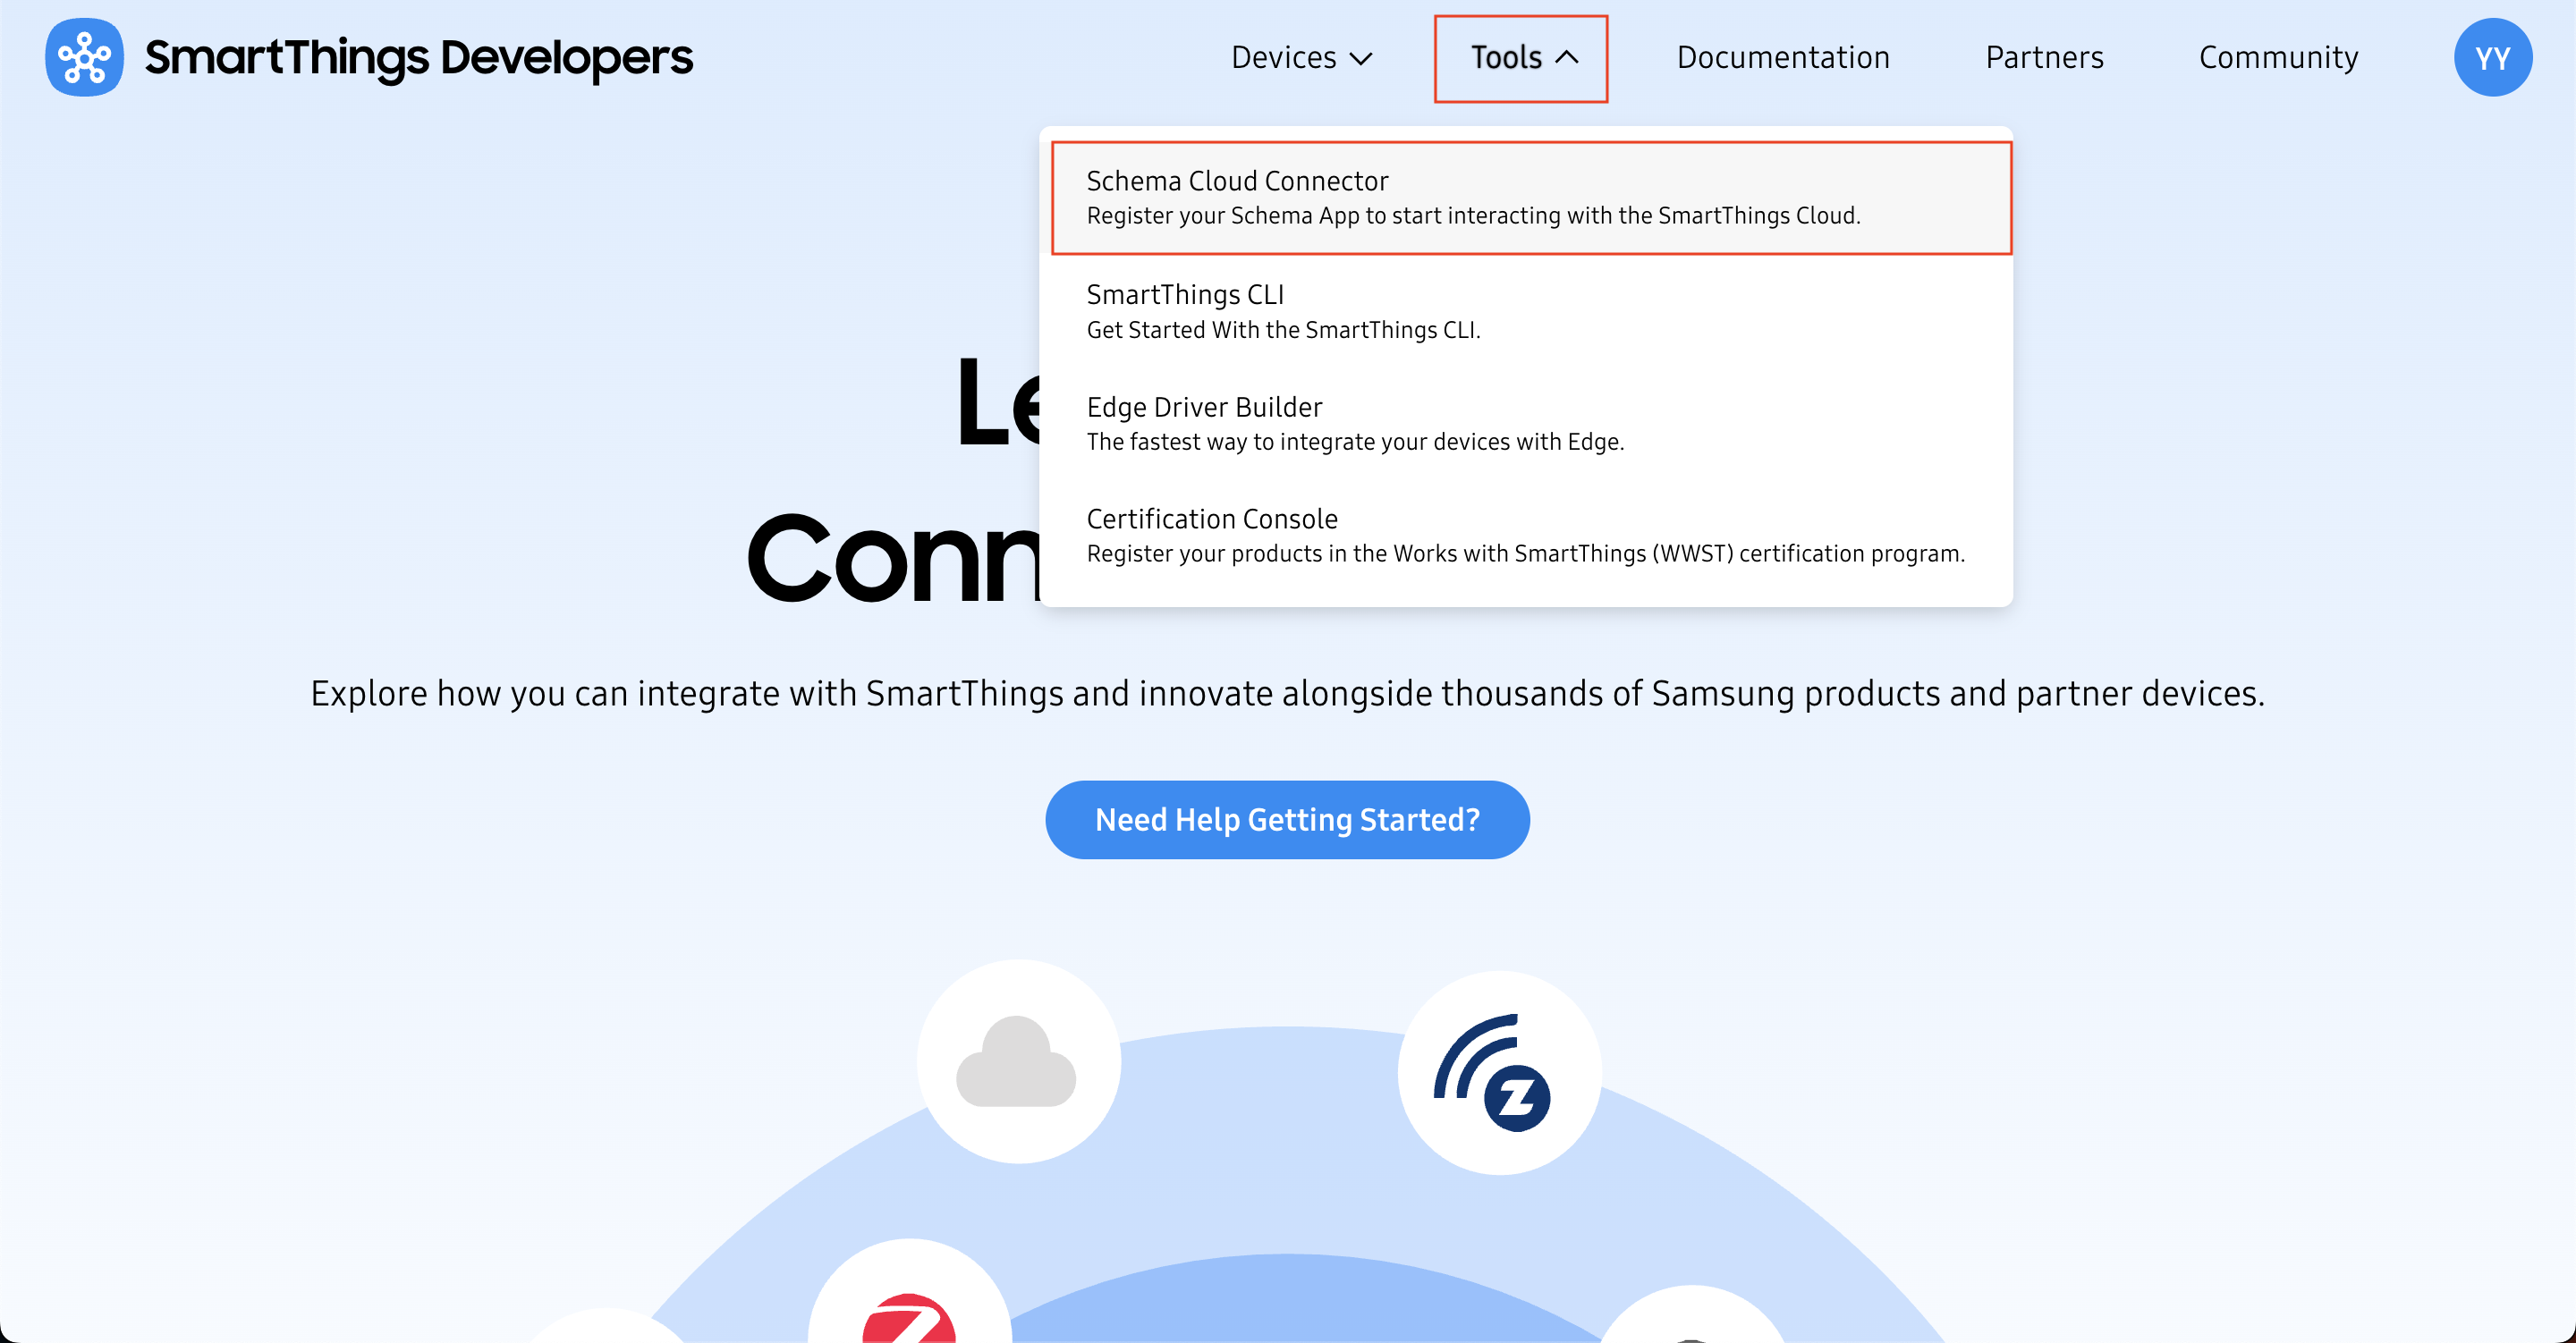
-
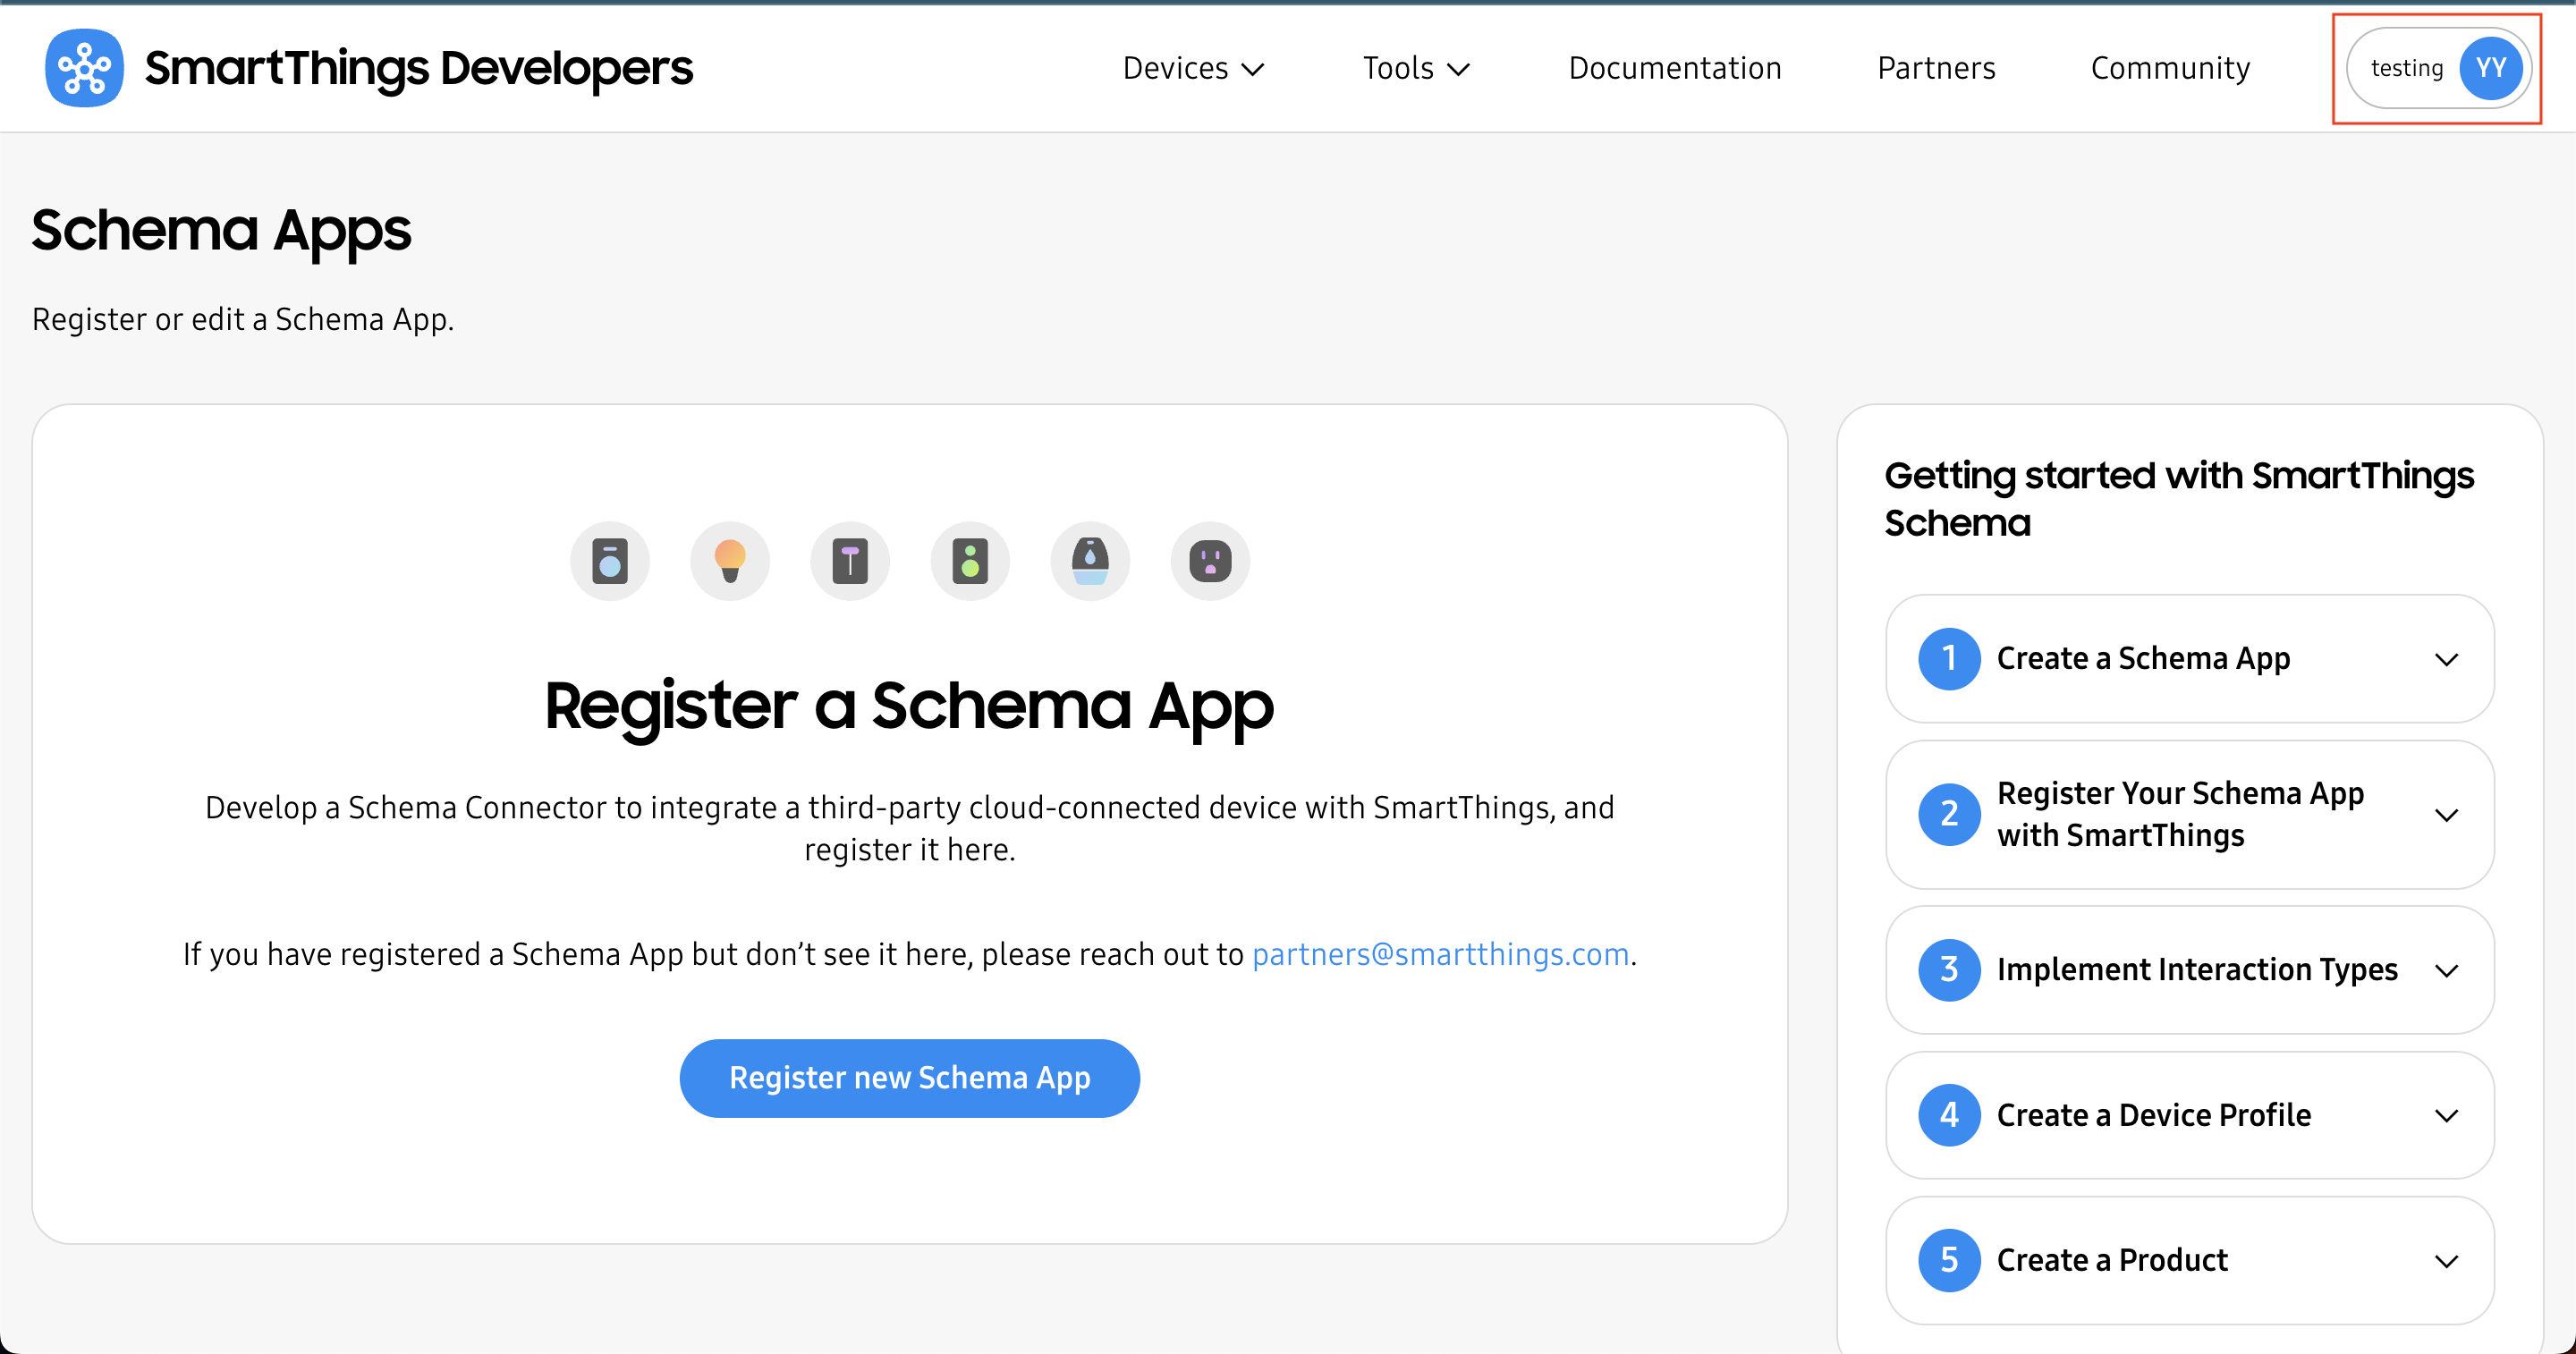
Click "Register New Schema App"
Please choose the correct organization (on the top right corner) to create your schema cloud connector.
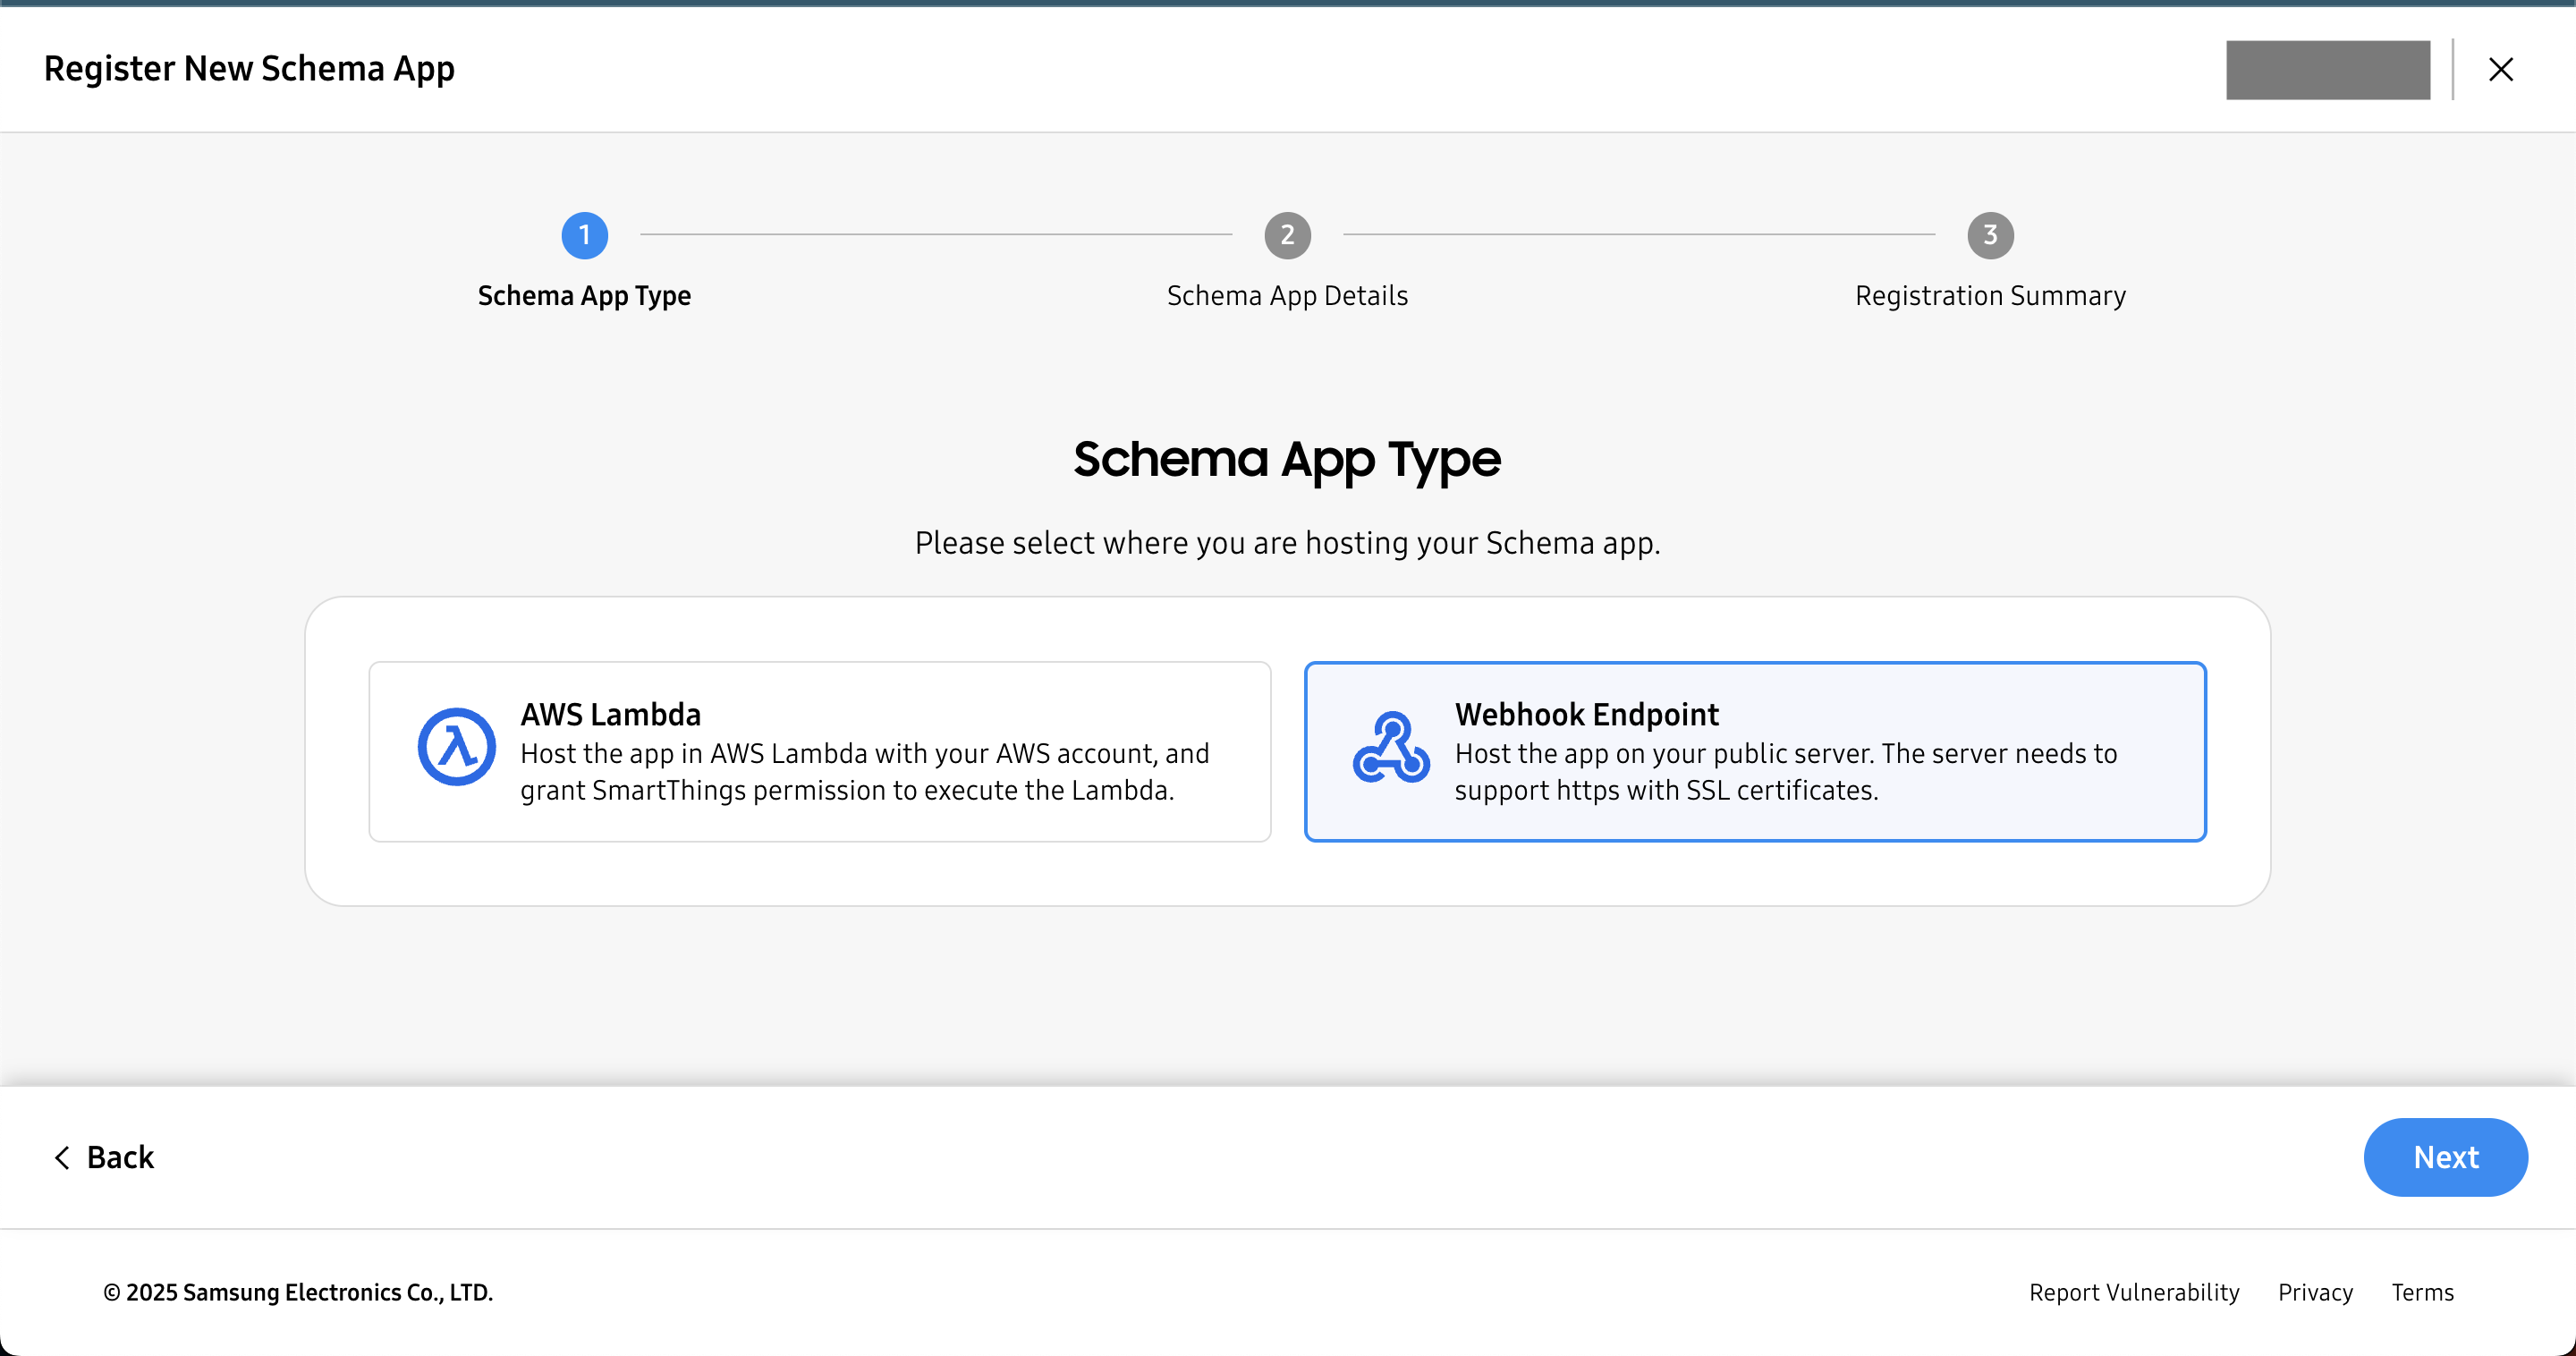
-
Choose "WebHook Endpoint" and click "Next"
-
Schema App Display Name: Fill in your desired connector name that is friendly to the end user
- Target URL: https://YOUR-DOMAIN-NAME.apps.exosite.io/api:1/smartthings
- Client ID: Fill in the client id provided by Exosite
- Client Secret: Fill in client secret provided by Exosite
- OAuth URL: https://YOUR-DOMAIN-NAME.apps.exosite.io/oauth2/authorize/smartthings
- OAuth Scope: Fill in "profile"
- Token Refresh URL: https://YOUR-DOMAIN-NAME.apps.exosite.io/oauth2/token/smartthings
- Alert Notification Email: Fill in your desired email contact
- Click "Register Schema App" and copy the
Client IDandClient Secretshown afterwards. Please provide the copied information to Exosite.
Step 2: Create Device Profile
After a schema app is registered, you need to define your device and its features by adding device profile. Go to Device Profile Builder, or simply expand the indicator "4 Create Device Profile" on the right of the Schema app builder page. 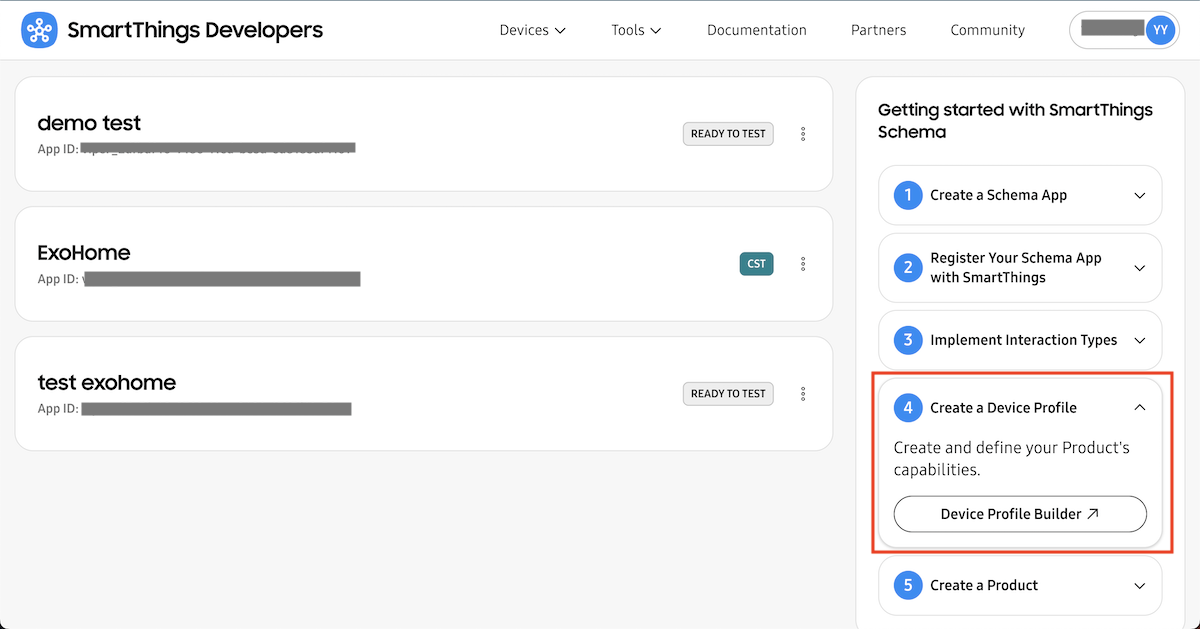 ExoHome supports various combinations of fan and light capabilities. If your device includes multiple fan or light components, or uses custom capabilities instead of the default SmartThings ones, refer to the customization examples below.
Information model for the duplicate capabilities
- If the device profile includes multiple fans, lights, switches, or any combination of these capabilities, you need to add the corresponding component keys in the information model.
- If the device profile contains only a single fan, a single light, or a fan with a light, the component key is NOT required in the information model.
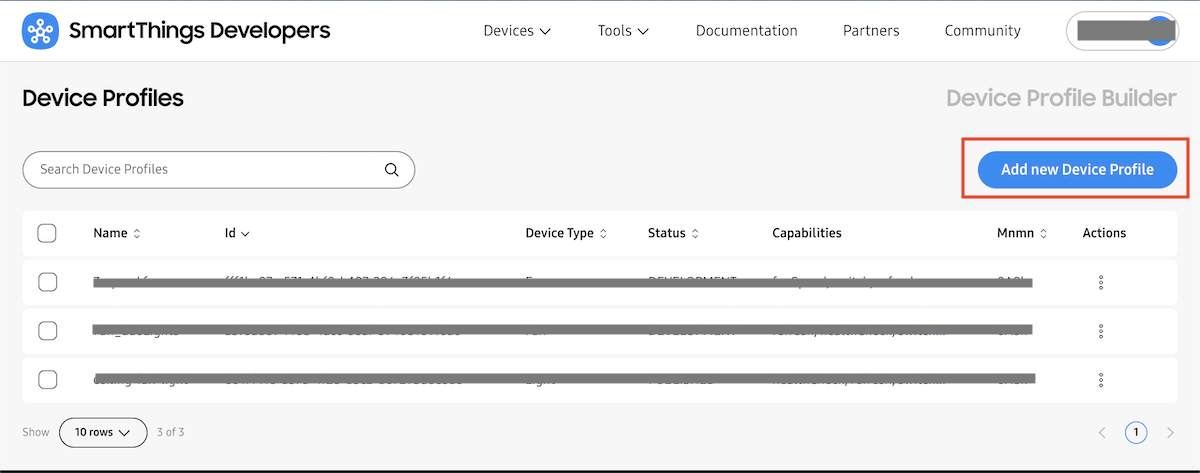
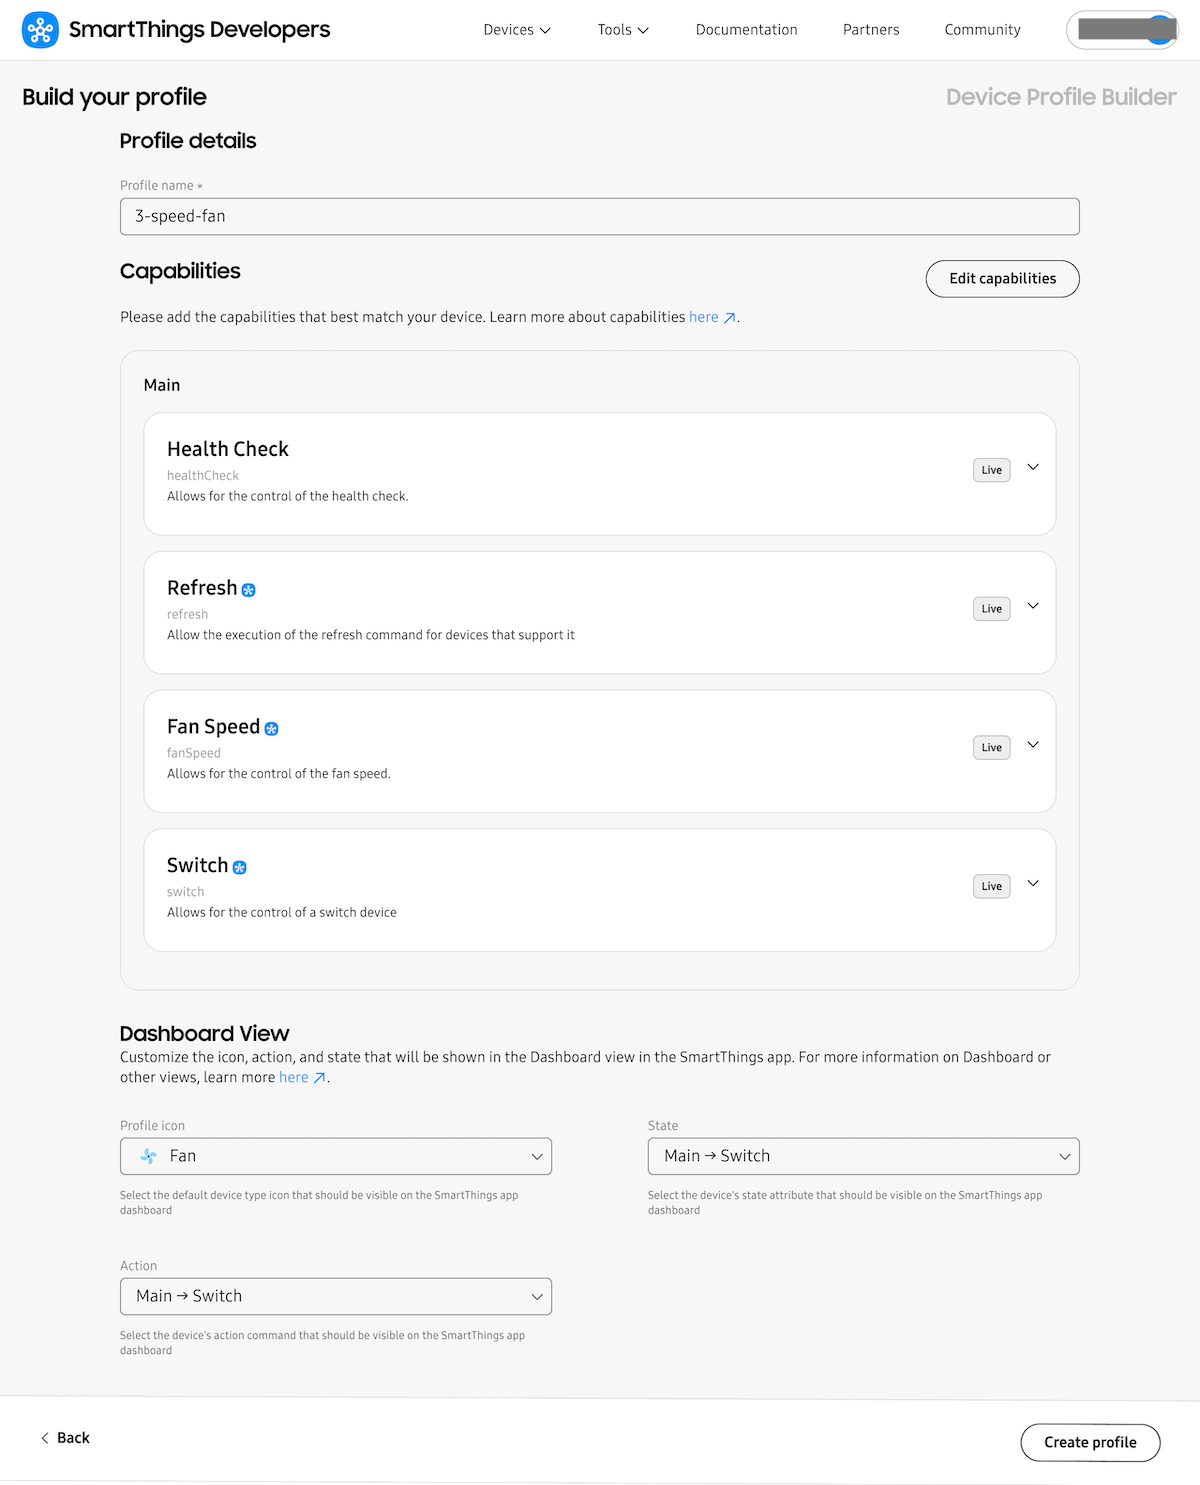
Single Feature Device (e.g. Fan)
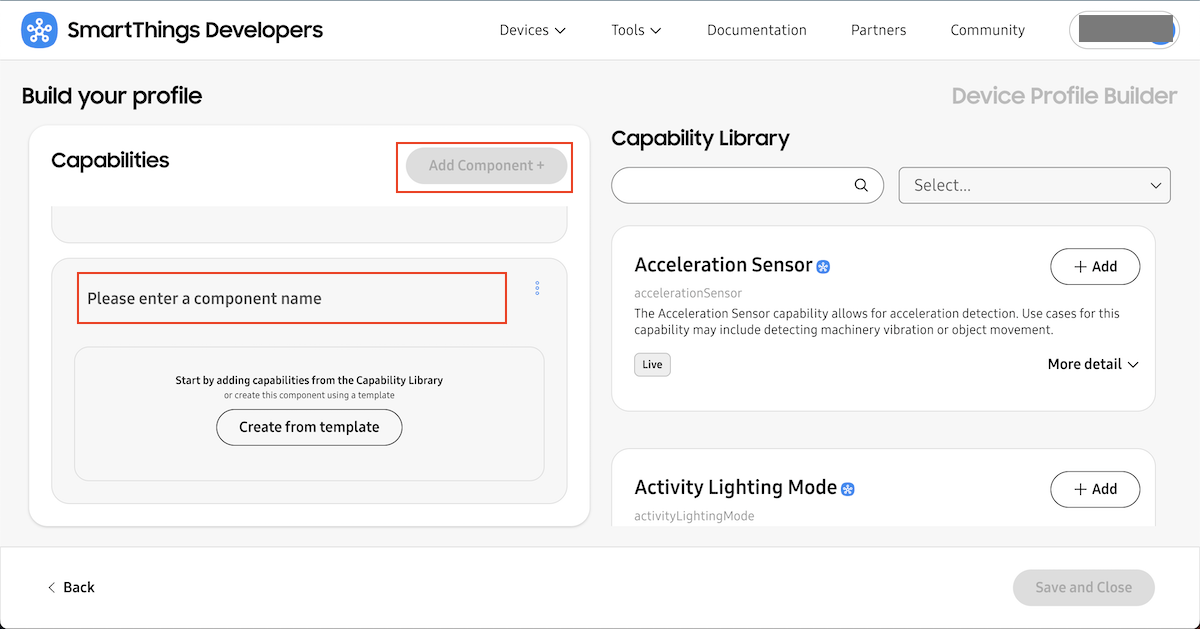
- Click "Add new Device Profile".
- Name this profile and click "Edit capabilities".
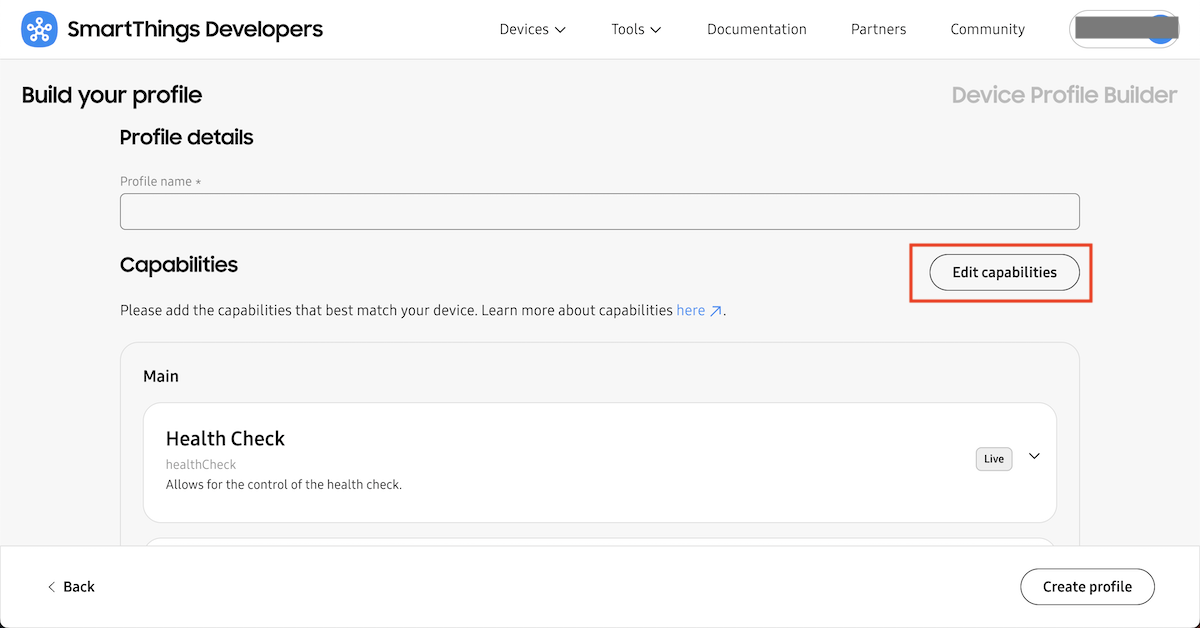
- Search
switchandfan speedin Capability Library and add them to the main component.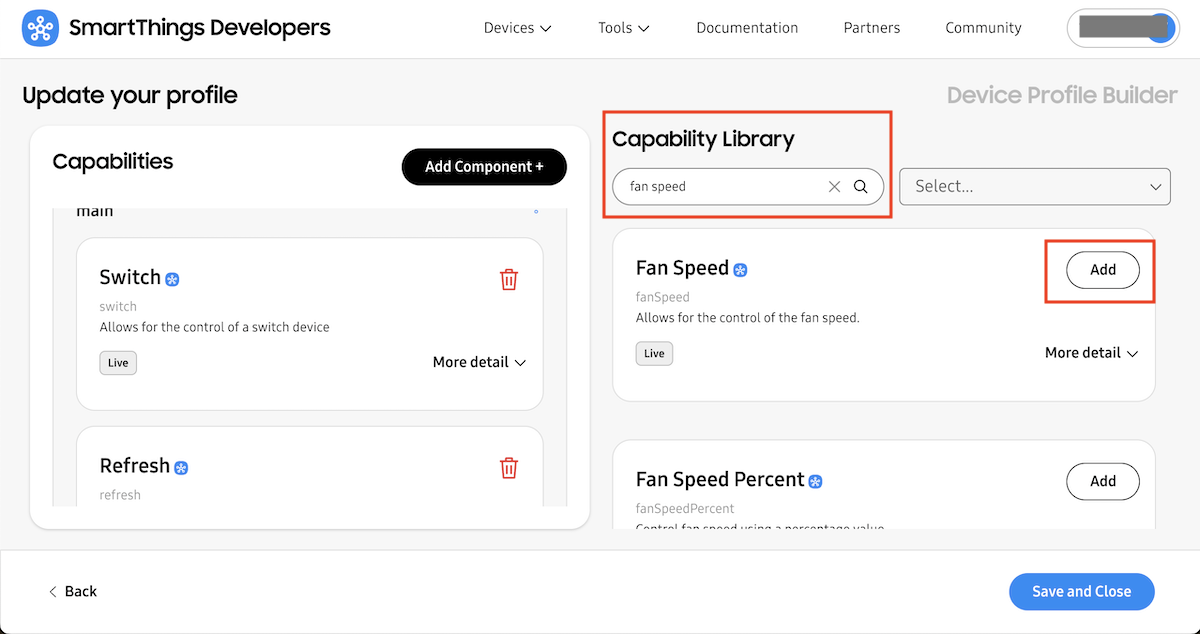
- Hit "Save and Close" and go back to profile details.
- On Dashboard View, choose
fanfor "Profile icon" andMain --> Switchto both "State" and "Action" then click "Create Profile".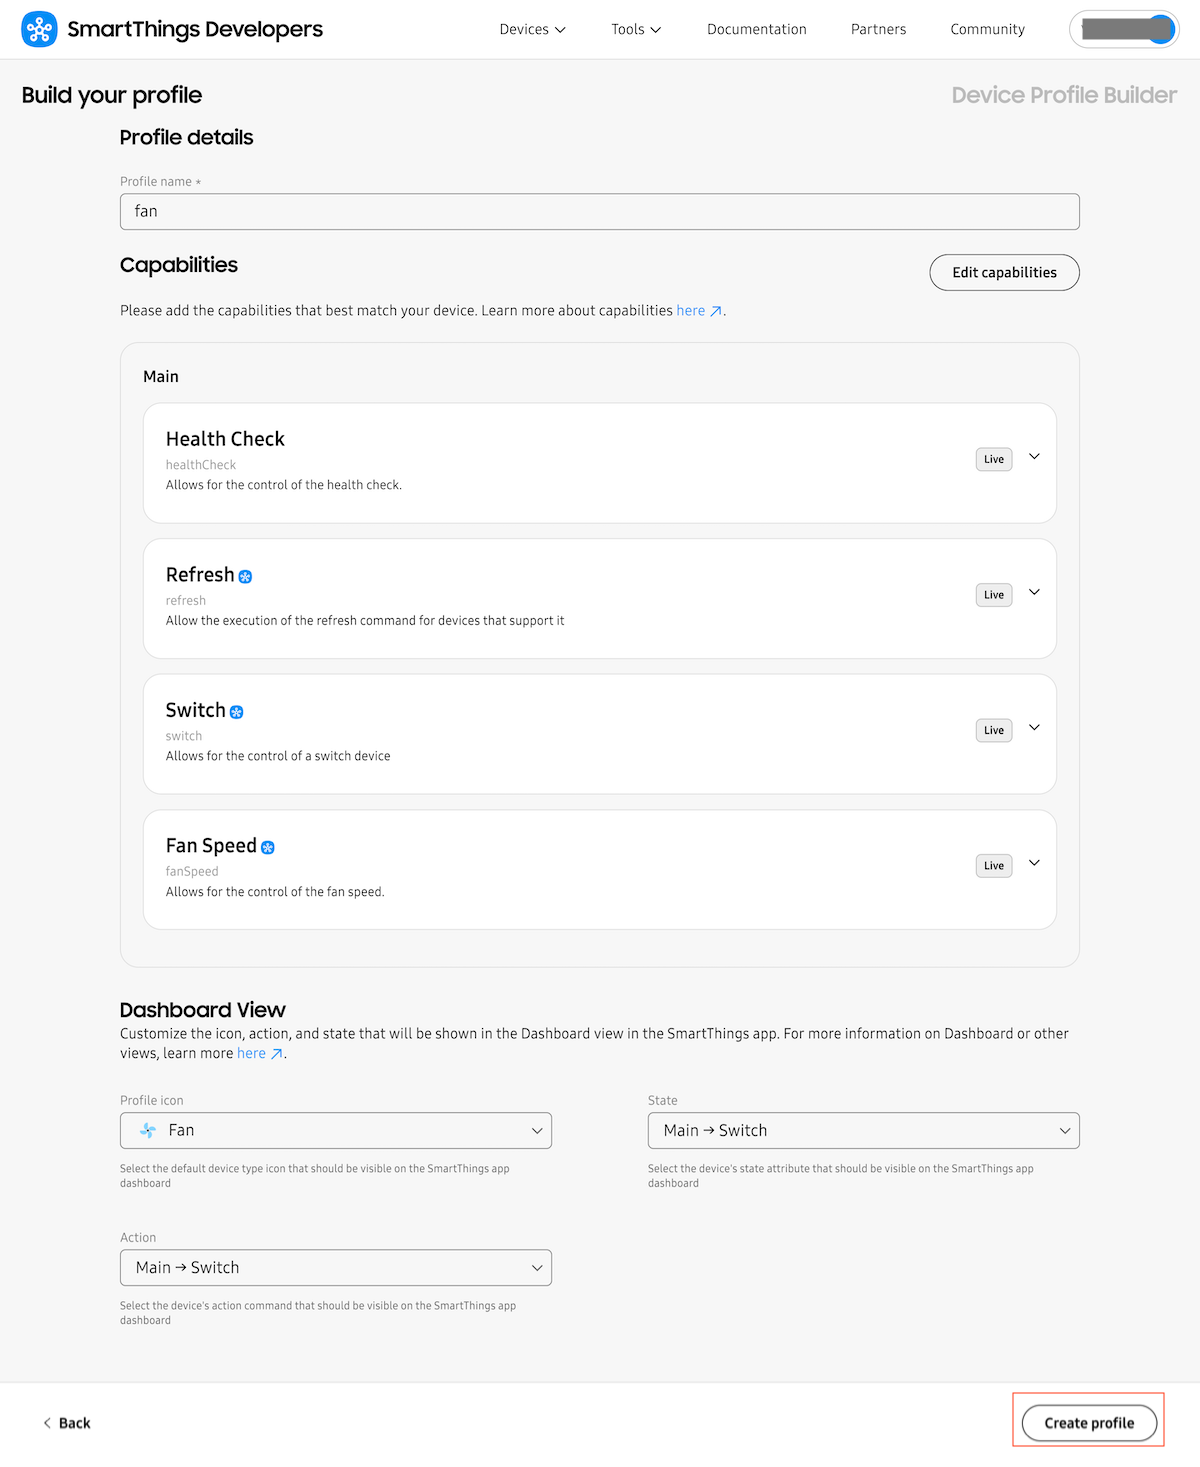
- Copy the Device Profile ID which needs to be placed in the information model's
deviceProfileIdfield.
3-speed Fan
For fan capability, SmartThings supports 4-speed fan as default. If your device is a 3-speed fan, please follow the steps below to customize the settings.
- Follow the steps 1 to 5 in Fan section above.
- Click the ellipses(…) of the device profile you just created and choose "Download file".
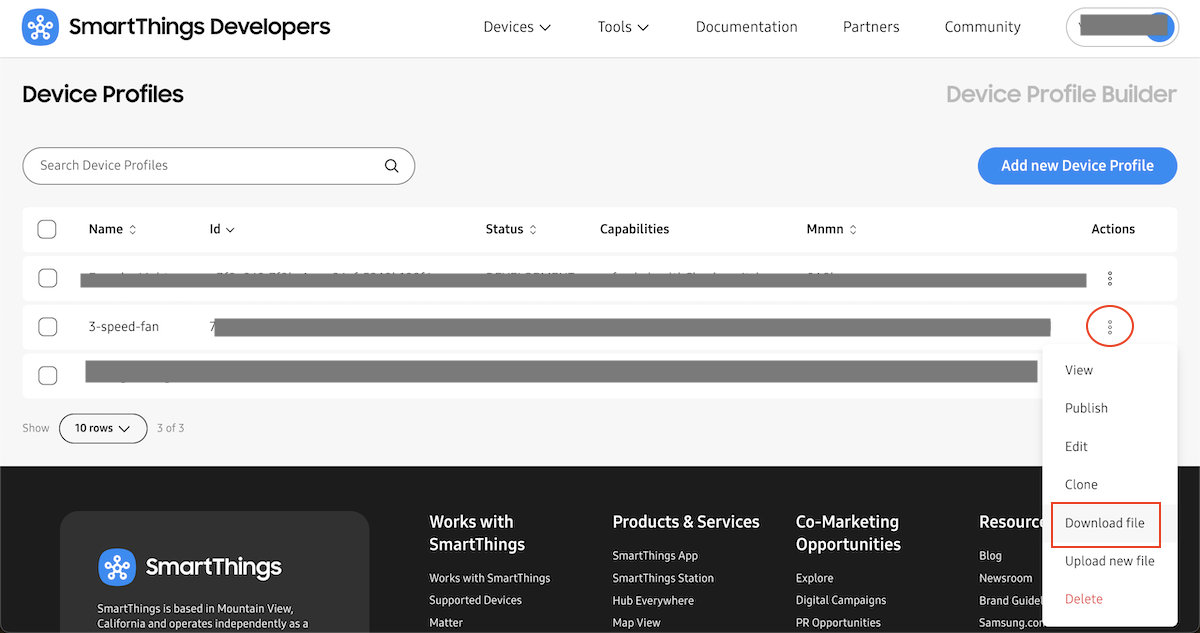
-
Edit device profile json file. In "detailView", "automation", and "action" section's fanSpeed capability, add
fanspeed.valueandrangeas below:{ "key": "fanSpeed.value", "range": [ 1.0, 3.0 ] }For example:
{ ...... "deviceConfiguration": { "mnmn": "xxxxx", "vid": "xxxxx", "version": "0.0.1", "type": "profile", "dashboard": { "states": [ { "component": "main", "capability": "switch", "version": 1, "idx": 0, "group": "main", "values": [], "composite": false } ], "actions": [ { "component": "main", "capability": "switch", "version": 1, "idx": 0, "group": "main" } ], "basicPlus": [] }, "detailView": [ { "component": "main", "capability": "healthCheck", "version": 1, "values": [], "patch": [] }, { "component": "main", "capability": "refresh", "version": 1, "values": [], "patch": [] }, { "component": "main", "capability": "switch", "version": 1, "values": [], "patch": [] }, { "component": "main", "capability": "fanSpeed", "version": 1, "values": [ { "key": "fanSpeed.value", "range":[ 1.0, 3.0 ] } ], "patch": [] } ], "automation": { "conditions": [ { "component": "main", "capability": "healthCheck", "version": 1, "values": [], "patch": [], "exclusion": [] }, { "component": "main", "capability": "switch", "version": 1, "values": [], "patch": [], "exclusion": [] }, { "component": "main", "capability": "fanSpeed", "version": 1, "values": [ { "key": "fanSpeed.value", "range":[ 1.0, 3.0 ] } ], "patch": [], "exclusion": [] } ], "actions": [ { "component": "main", "capability": "healthCheck", "version": 1, "values": [], "patch": [], "exclusion": [] }, { "component": "main", "capability": "refresh", "version": 1, "values": [], "patch": [], "exclusion": [] }, { "component": "main", "capability": "switch", "version": 1, "values": [], "patch": [], "exclusion": [] }, { "component": "main", "capability": "fanSpeed", "version": 1, "values": [ { "key": "fanSpeed.value", "range":[ 1.0, 3.0 ] } ], "patch": [], "exclusion": [] } ] }, "presentationId": "xxxxx", "manufacturerName": "xxxxx" } } -
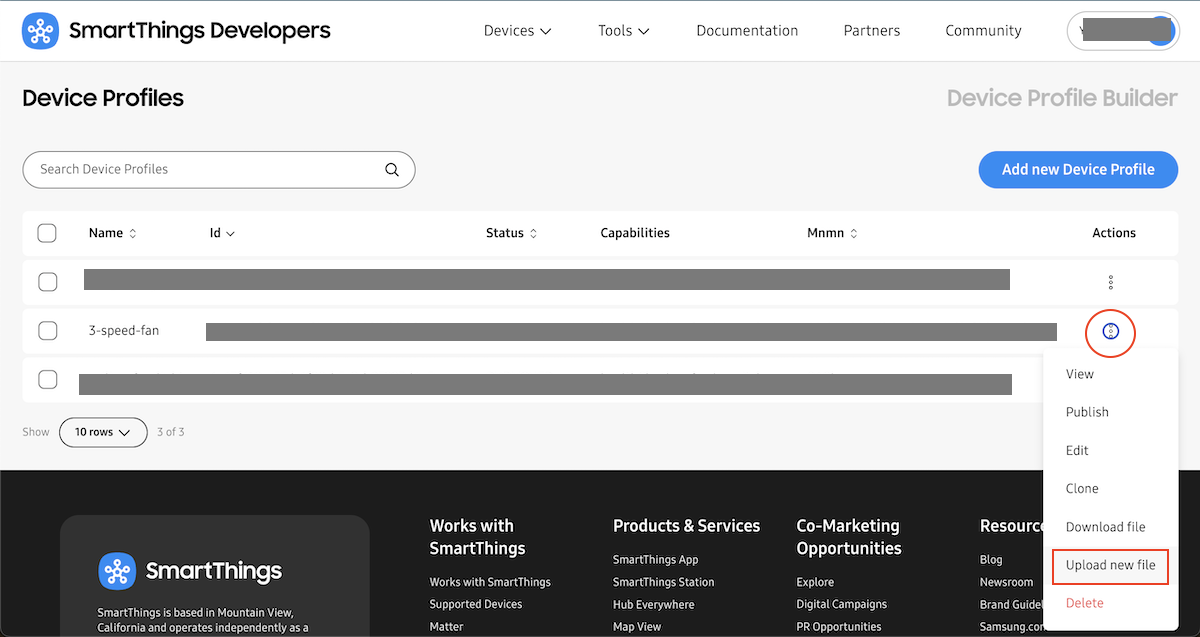
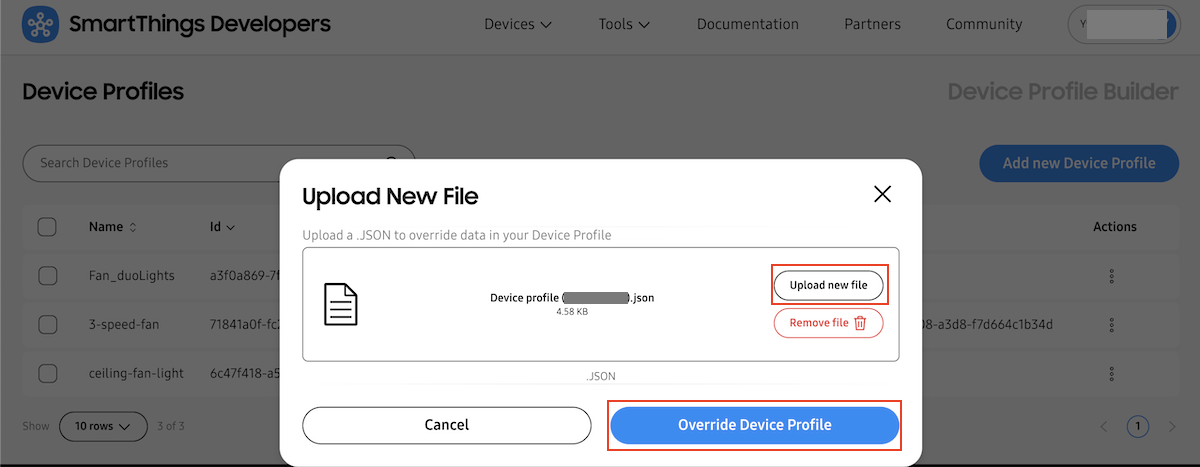
Click ellipses(…) of the device profile again and choose "Upload new file". Upload the modified json file and click "Override Device Profile".
- Copy the Device Profile ID which needs to be placed in the information model's
deviceProfileIdfield.
Ceiling fan with light
- Click "Add new Device Profile".
- Name this profile and click "Edit capabilities".
- Click "Add Component+" button and enter "fan" or a name that is easy to identify.
- Search
switchandfan speedin Capability Library and add them to the fan component you just added.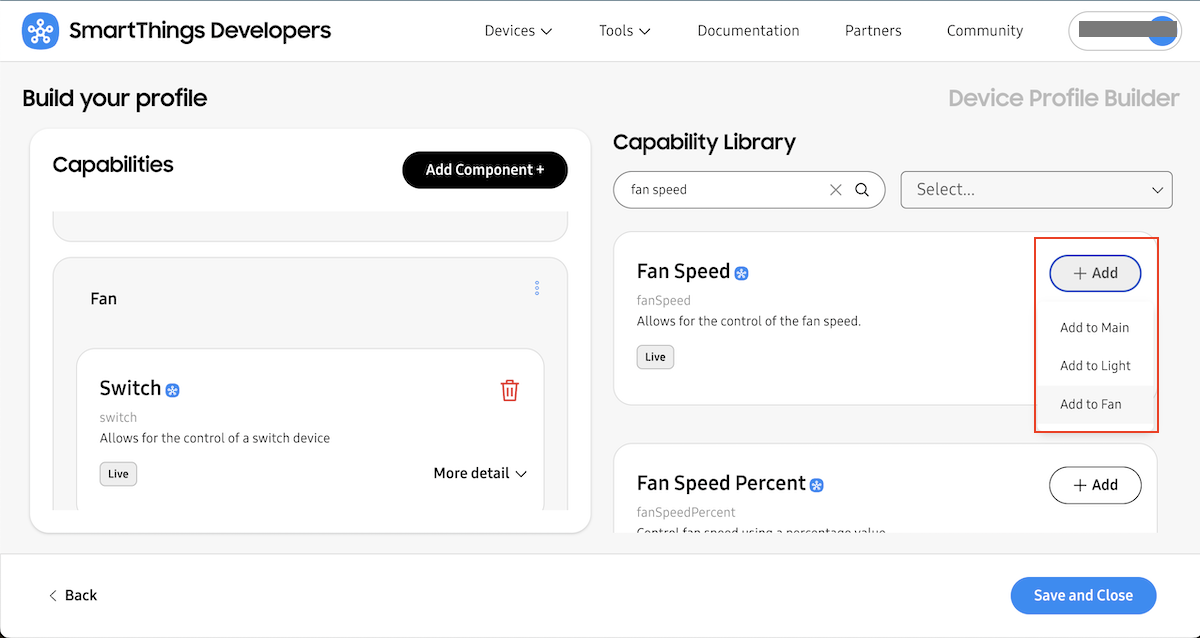
- Click "Add Component+" button and enter "light" or a name that is easy to identify.
- Search
switch,switch levelandcolor temperature(optional) in Capability Library and add them to the light component you just added. - Hit "Save and Close" to go back to the profile details page.
- Scroll down to the "Dashboard View", choose
lightfor Profile icon andlight --> Switchto both "State" and "Action" then click "Create Profile". Or if you prefer, choosefanfor the dashboard view.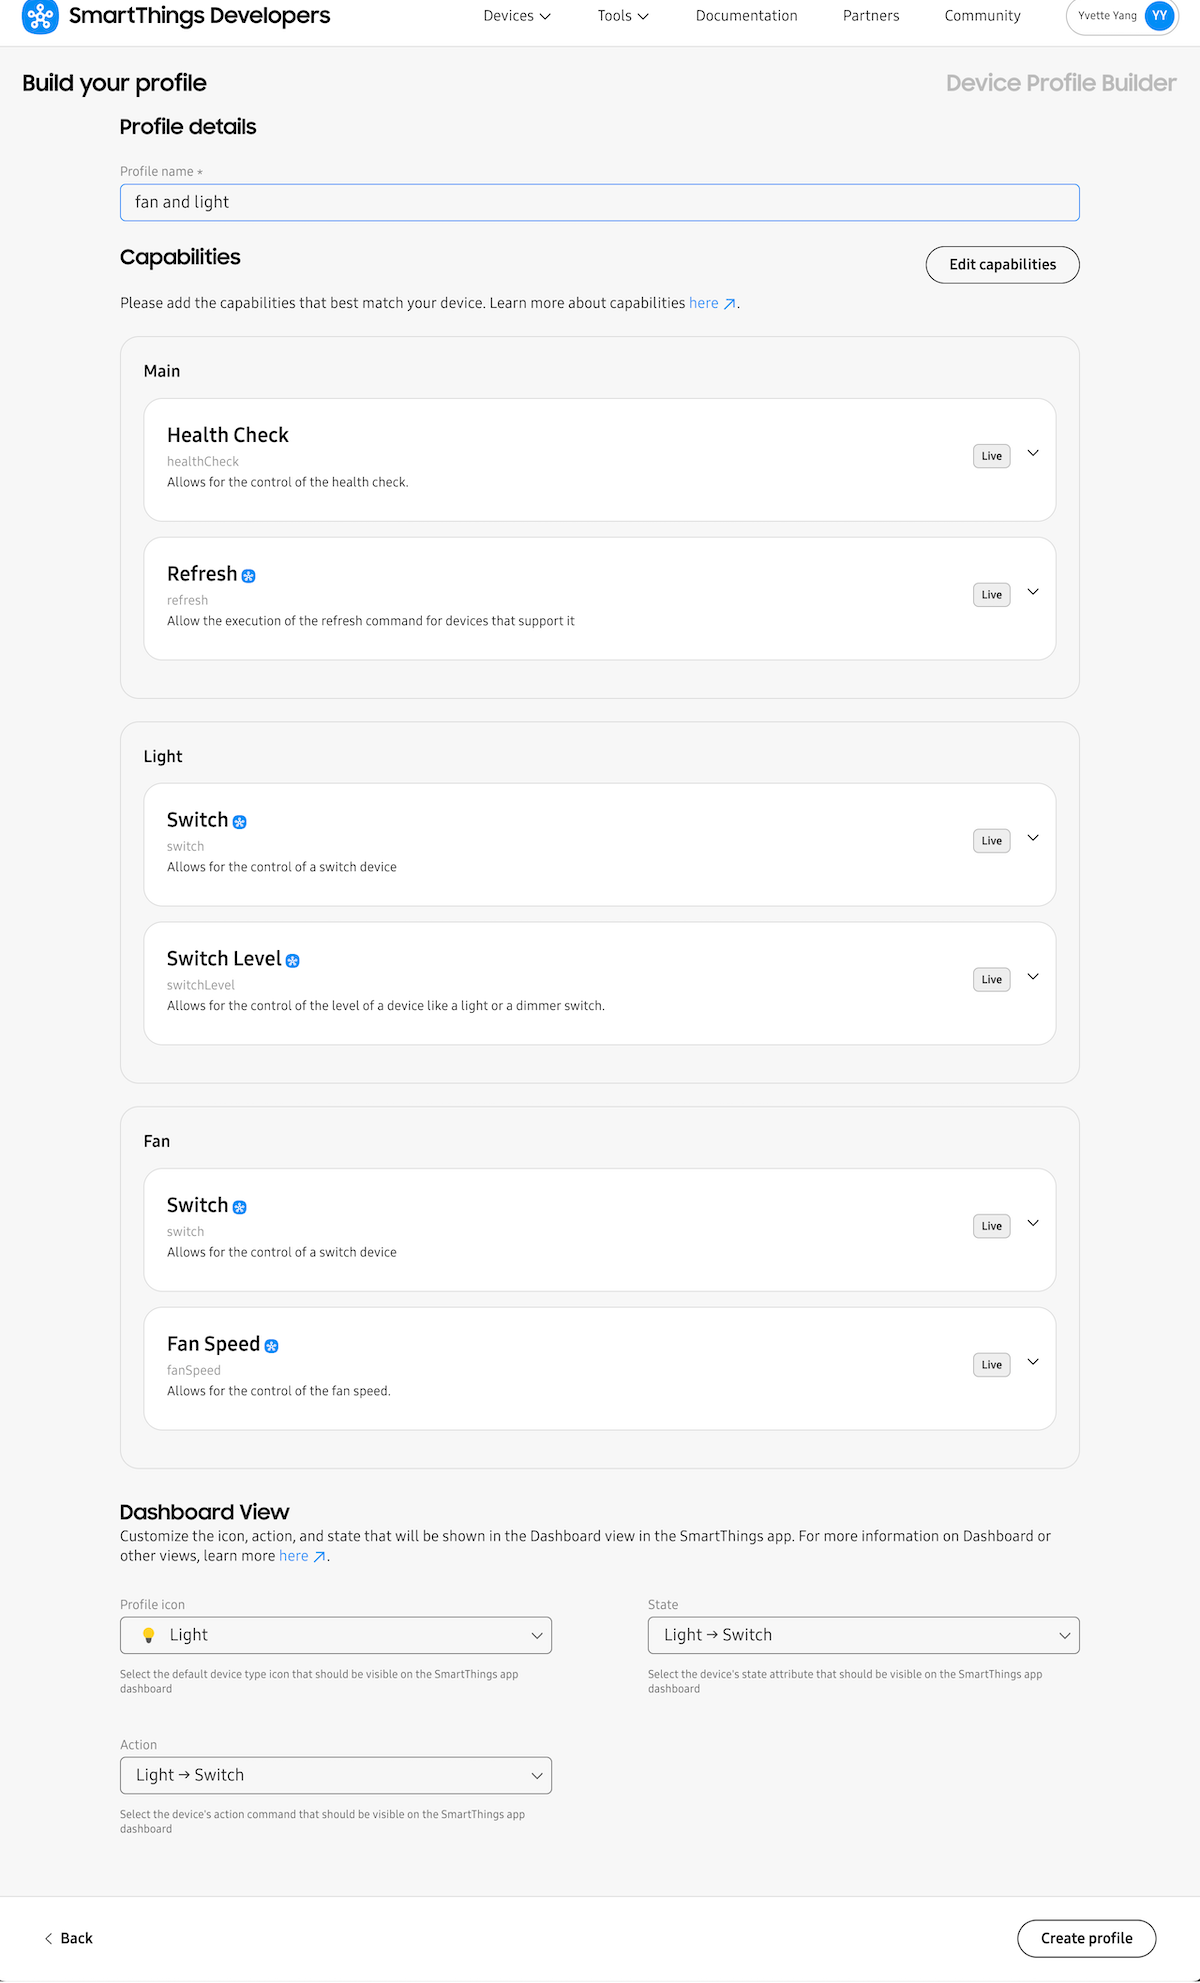
- Copy the device profile ID and add it to information model's
deviceProfileIdfield.
Ceiling fan with 2 lights and 1 switch control
- Click "Add new Device Profile".
- Name this profile and click "Edit capabilities".
- Click "Add Component+" button and enter "fan" or a name that is easy to identify.
- Search
switchandfan speedin Capability Library and add them to the fan component you just added. - Click "Add Component+" button and enter "light1" or a name that is easy to identify.
- Search
switch,switch levelandcolor temperature(optional) in Capability Library and add them to the component you just added. - Click "Add Component+" button and enter "light2" or a name that is easy to identify.
- Search
switch,switch levelandcolor temperature(optional) in Capability Library and add them to the component you just added. - Click "Add Component+" button and enter "switch" or a name that is easy to identify.
- Search
switchin Capability Library and add it to the component you just added. - Hit "Save and Close".
- Scroll down to the "Dashboard View", choose
fanfor Profile icon andfan --> Switchto both "State" and "Action" then click "Create Profile". Or if you prefer, choose eitherlight1,light2, orswitchfor the dashboard view.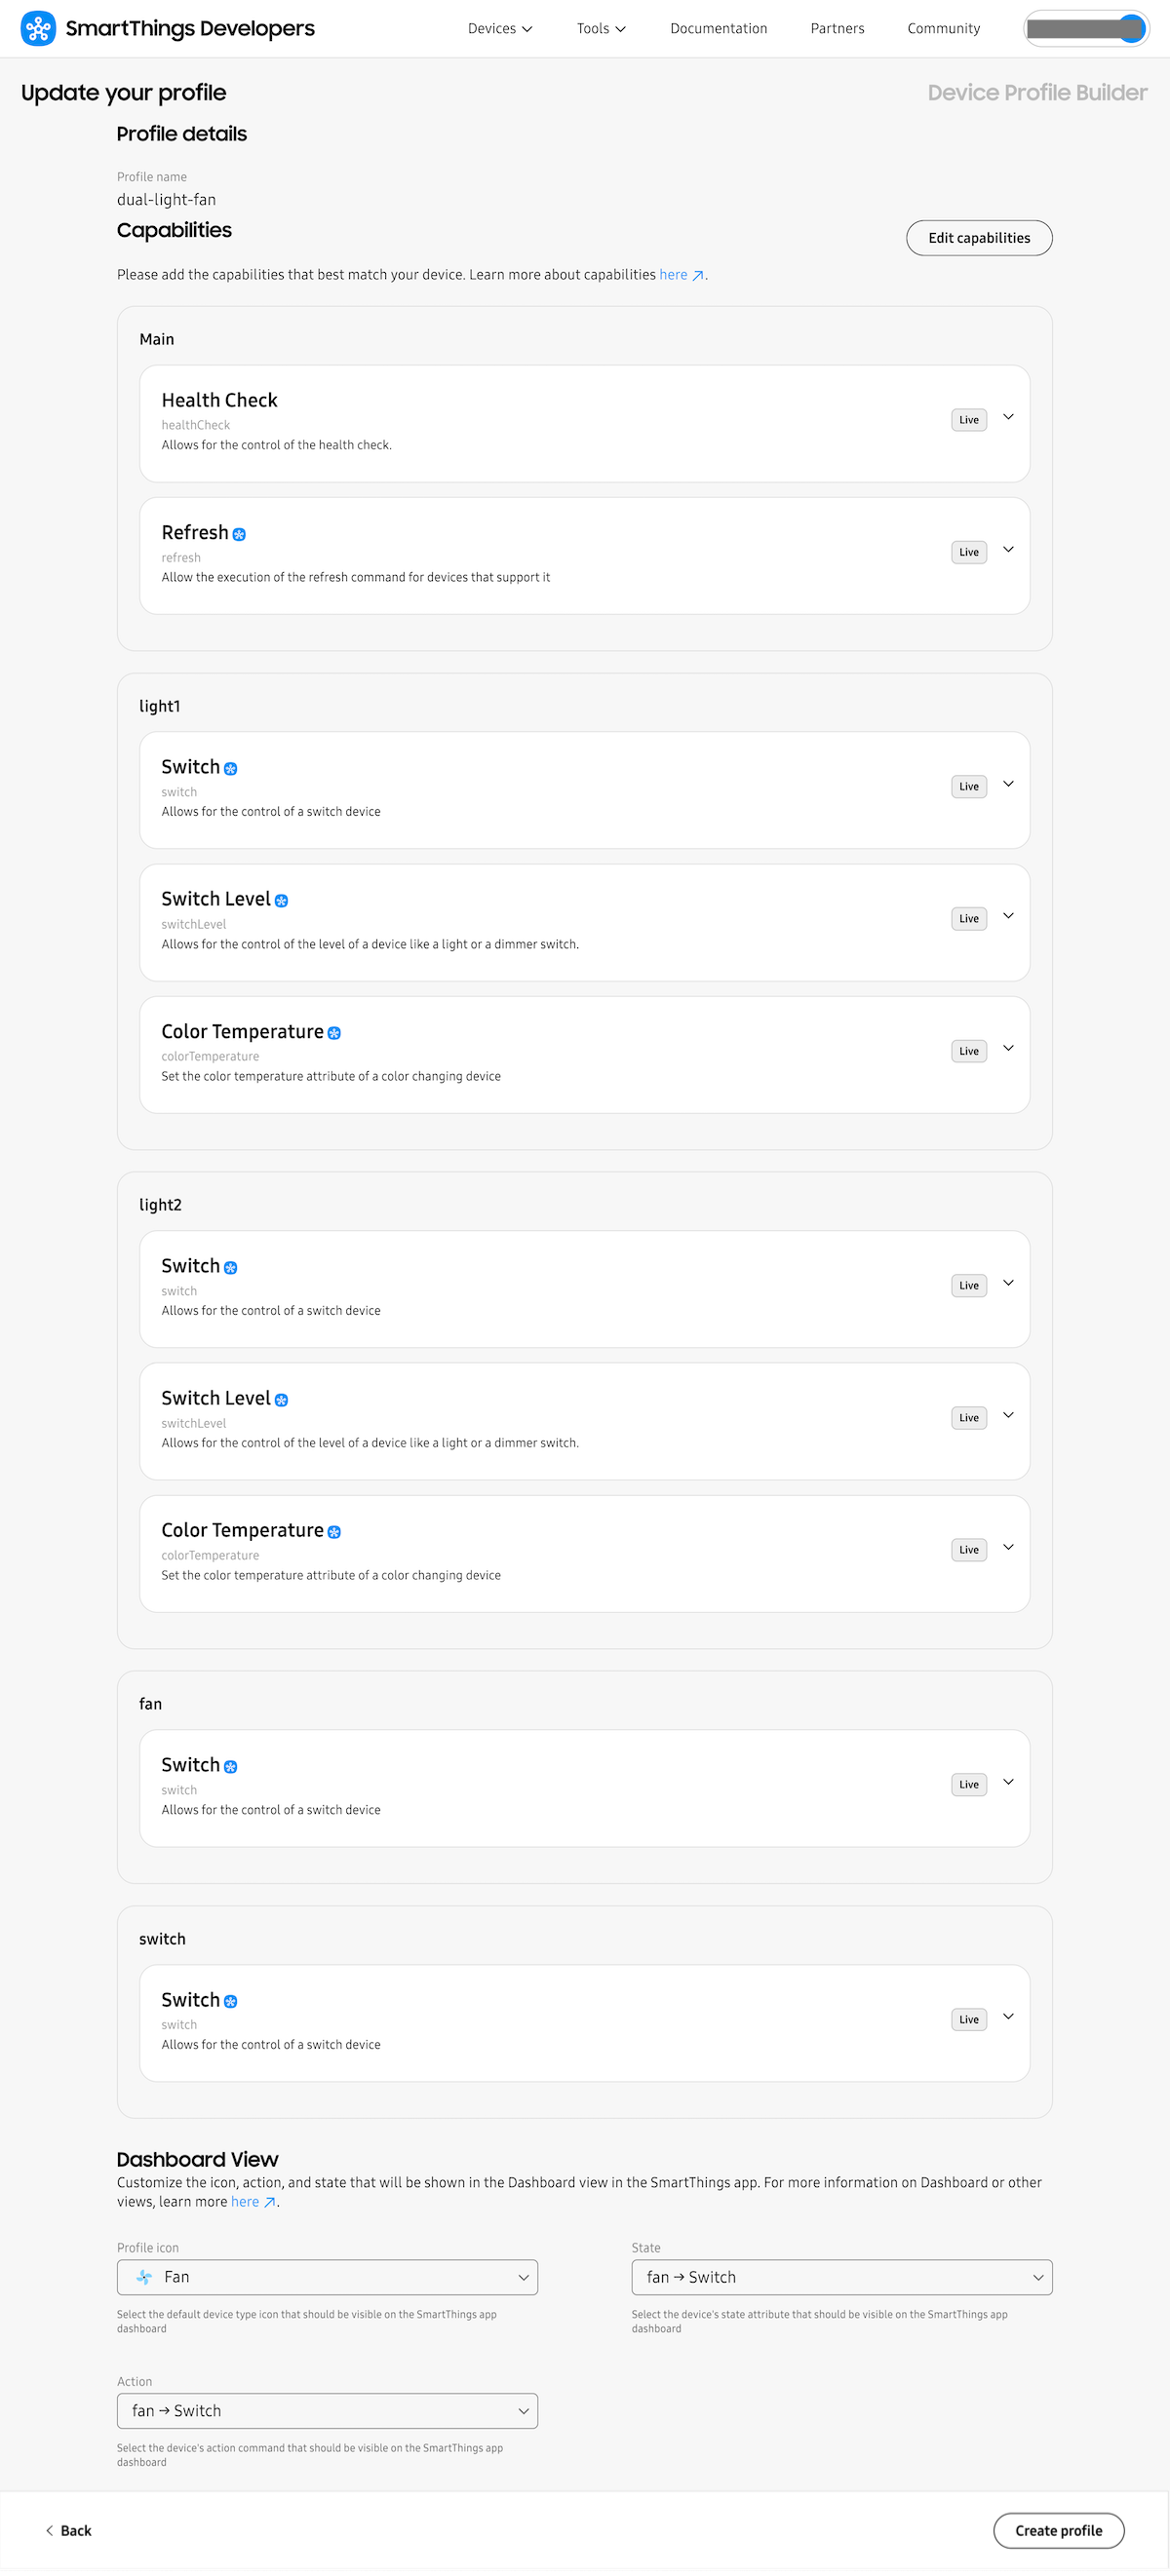
- Click the ellipses(…) of the device profile you just created and choose "Download file".
-
Edit device configuration json file. In "detailView" and "automation" section's colorTemperature capability, add "key" (
colorTemperature.value) and "range" under "values". In "action" section's colorTemperature capability, add "key" (setColorTemperature) and "range" values. For example, if the light's color temperature can be adjusted between 3000K to 6500K, please put 3000 and 6500 in the range field.{ "key": "colorTemperature.value", "range": [ 3000, 6500 ] }You may download an device profile example for reference.
For devices with a color temperature setting, the key in the action (
setColorTemperature) section differs from that in the detailView and automation (colorTemperature.value). -
Click ellipses(…) of the device profile again and choose "Upload new file". Upload the modified json file and click "Override Device Profile".
- Add the
componentkey to each SmartThings capability in the information model. Here's an example:{ "appliedDomain": [ "smartthings" ], "id": "STFAN1", "type": "fan", "append_name": " fan1", "component": "fan", "attributes": { "fan_speed": { "before": [ { "key": "H0B", "value": 1 } ], "key": "H0C", "max": 100, "min": 1, "on_off": { "key": "H0B", "values": { "off": 0, "on": 1 } } }, "description": "Dual Light FAN" }, { "appliedDomain": [ "smartthings" ], "id": "STLIGHT1", "type": "light", "component": "light1", "append_name": "Light1", "attributes": { "percentage": { "max": 100, "key": "H0C", "min": 1, "before": [ { "key": "H0B", "value": 1 } ] }, "on_off": { "key": "H0B", "values": { "on": 1, "off": 0 } }, "color_temperature": { "key": "H0C", "max": 6500, "min": 3000, "before": [ { "key": "H0B", "value": 1 } ] } }, "description": "Dual LIGHT Fan 1" }, { "appliedDomain": [ "smartthings" ], "id": "STLIGHT2", "type": "light", "component": "light2", "append_name": " Light2", "attributes": { "percentage": { "before": [ { "key": "H0B", "value": 1 } ], "key": "H0C", "max": 100, "min": 1 }, "on_off": { "key": "H0B", "values": { "on": 1, "off": 0 } }, "color_temperature": { "key": "H0C", "max": 6500, "min": 3000, "before": [ { "key": "H0B", "value": 1 } ] } }, "description": "Dual LIGHT Fan 2" }, { "appliedDomain": [ "smartthings" ], "append_name": " switch1", "id": "STSWITCH1", "component": "switch", "type": "switch", "attributes": { "on_off": { "key": "H0D", "values": { "on": 1, "off": 0 } } }, "description": "A Switch" }
Note
Ensure the information model includes the correct device profile ID and matching component names before proceeding.
Step 3: Create a Product and Brand Info
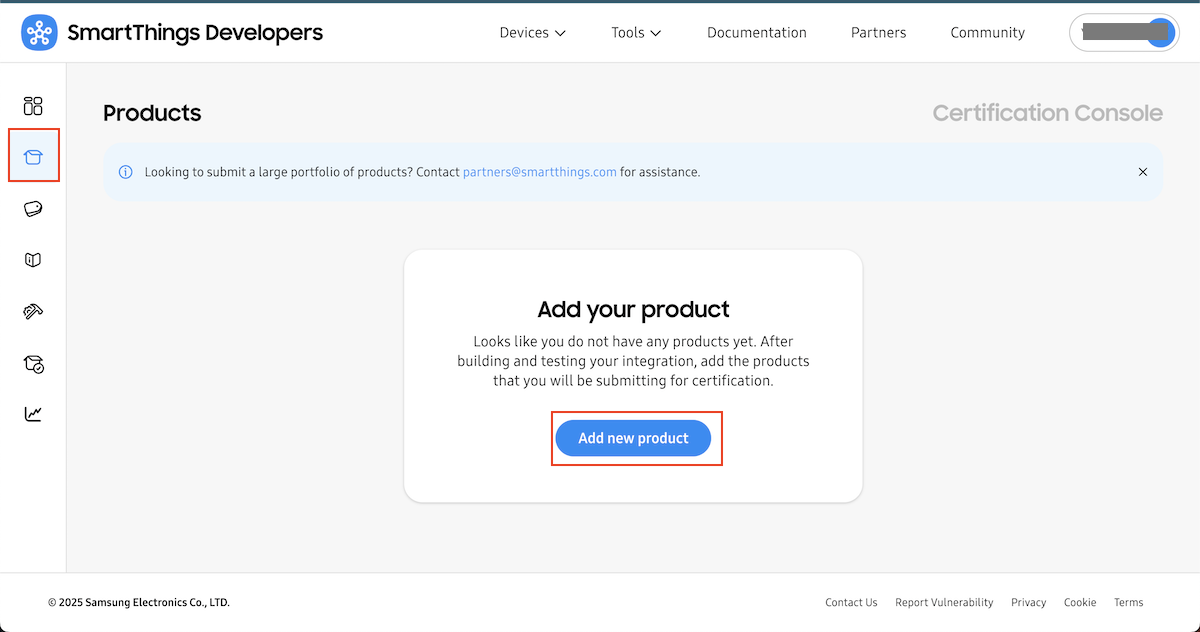
- Go to Certification Console.
- Click "Products" on the side navigator to add a new product.
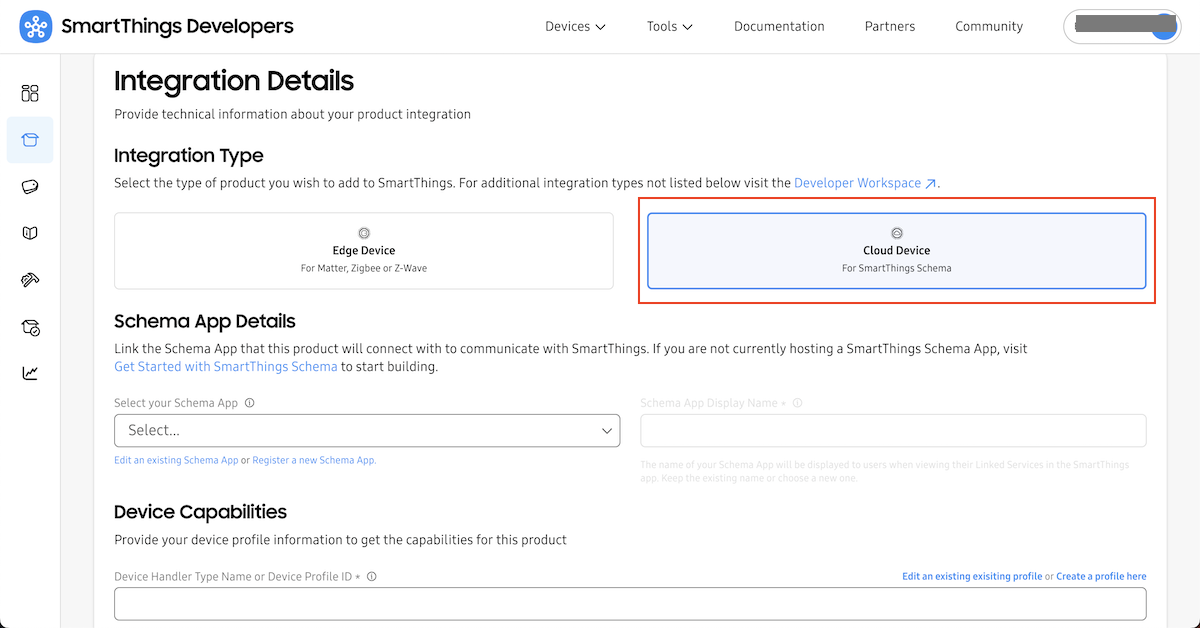
- Fill in the required info as instructed. For the "Integration Details", please choose "Cloud Device". Select the schema app from the drop down list and enter the device profile ID you created in step 1 and 2.
- Click "Create Product"
- Click "Brands" on the side navigator to add your brand info.
Step 4: Connect Your Device On Mobile to Test
You may follow this document for more detail.
- Sign in ExoHome App with your admin account and add a device .
- Install app "SmartThings" and login to your SmartThings developer account.
- You can follow Test your device App to:
- Enable developer mode
- Link your device
- Choose your testing connector:
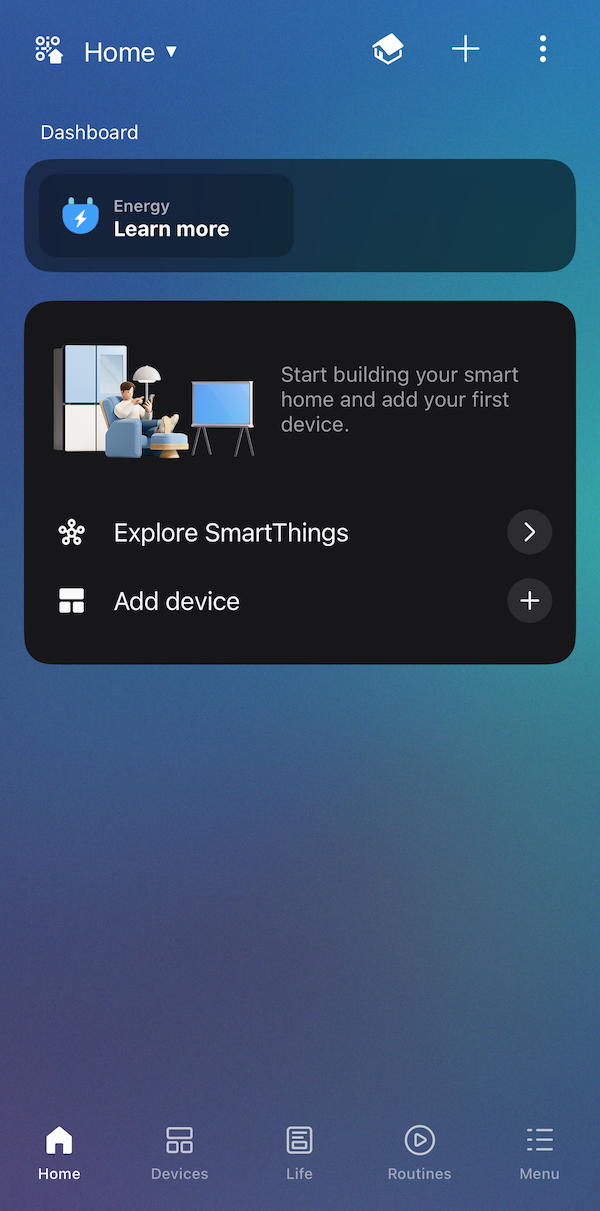
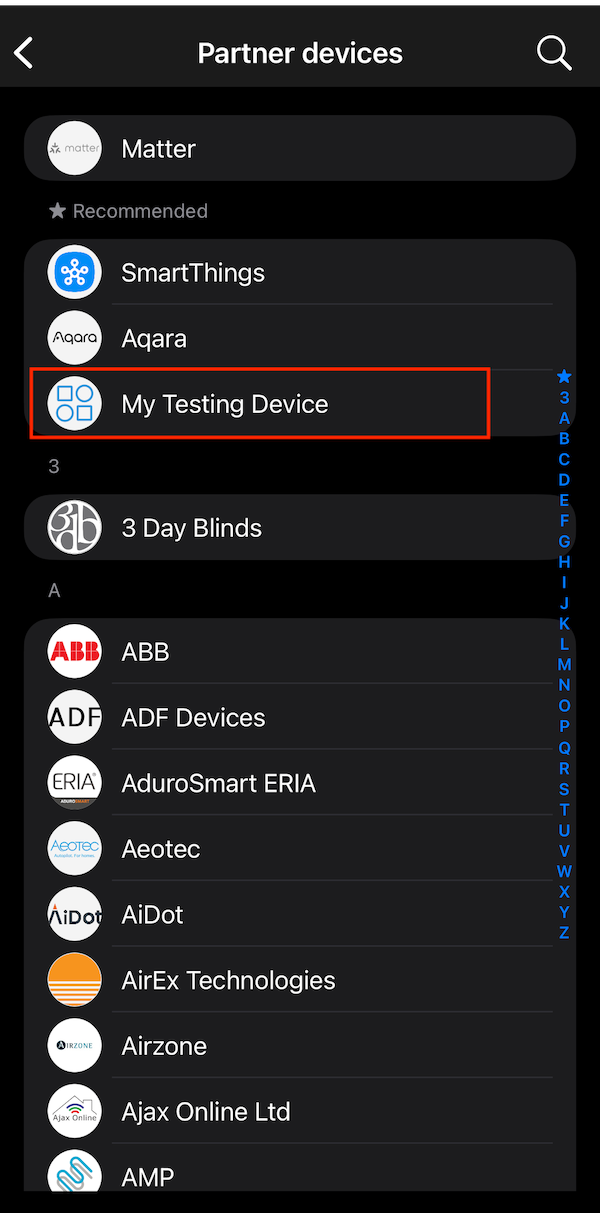
- Tap Add device on the Dashboard, or in the Devices tab. Tap Partner Devices.
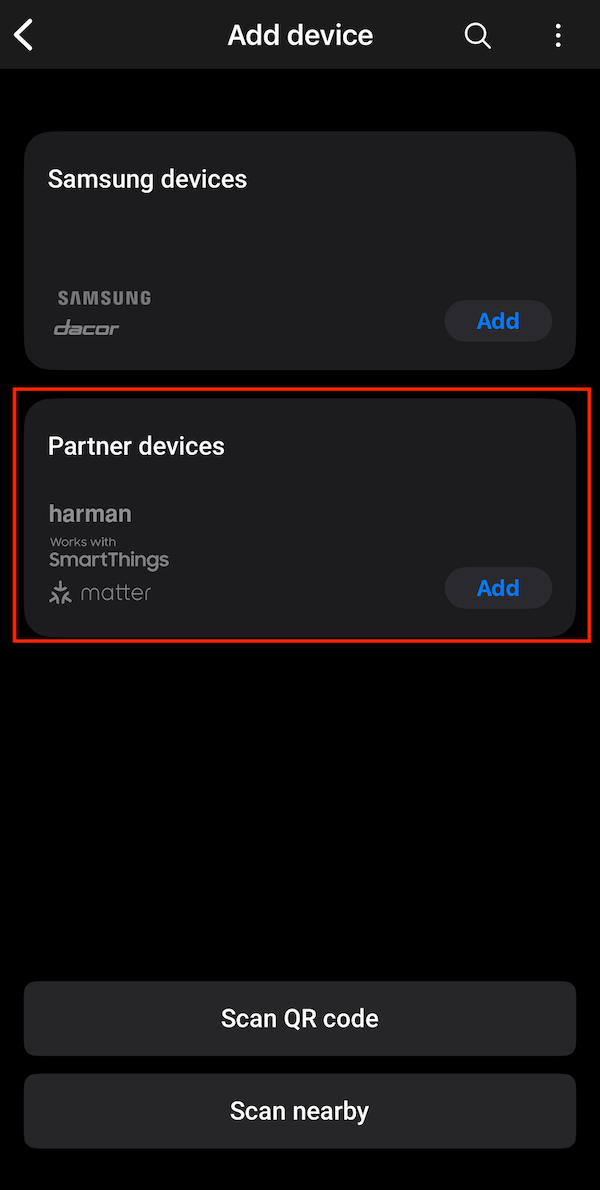
- Click "My testing device"
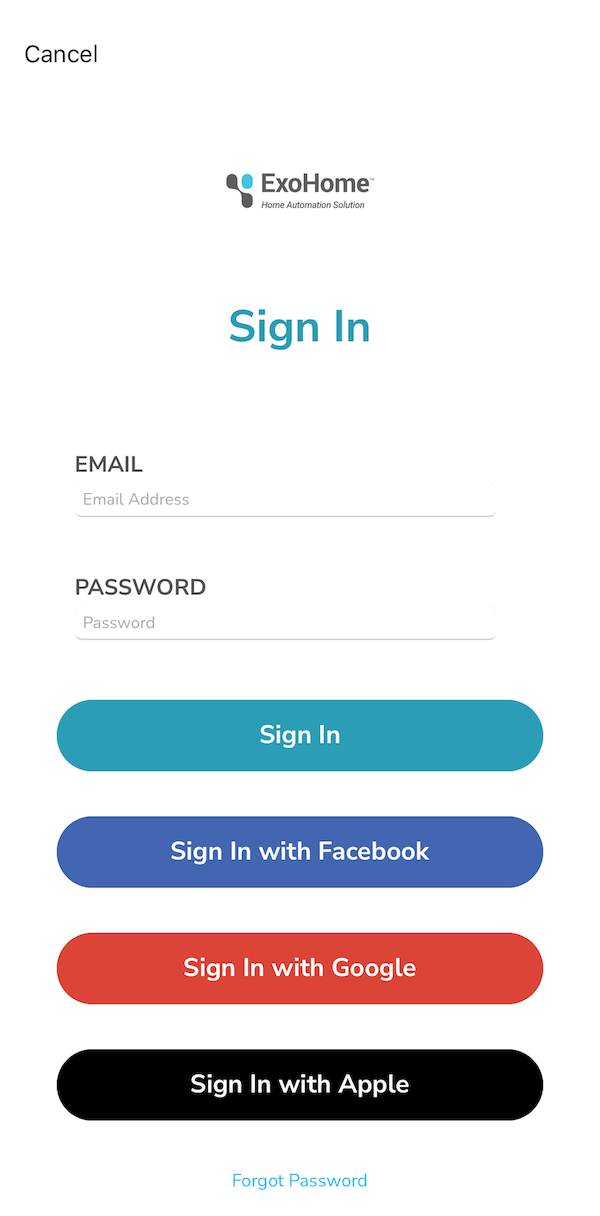
- Choose the product's schema app name you set in the SmartThings Developer.

- Tap Add device on the Dashboard, or in the Devices tab. Tap Partner Devices.
- Login ExoHome for authentication
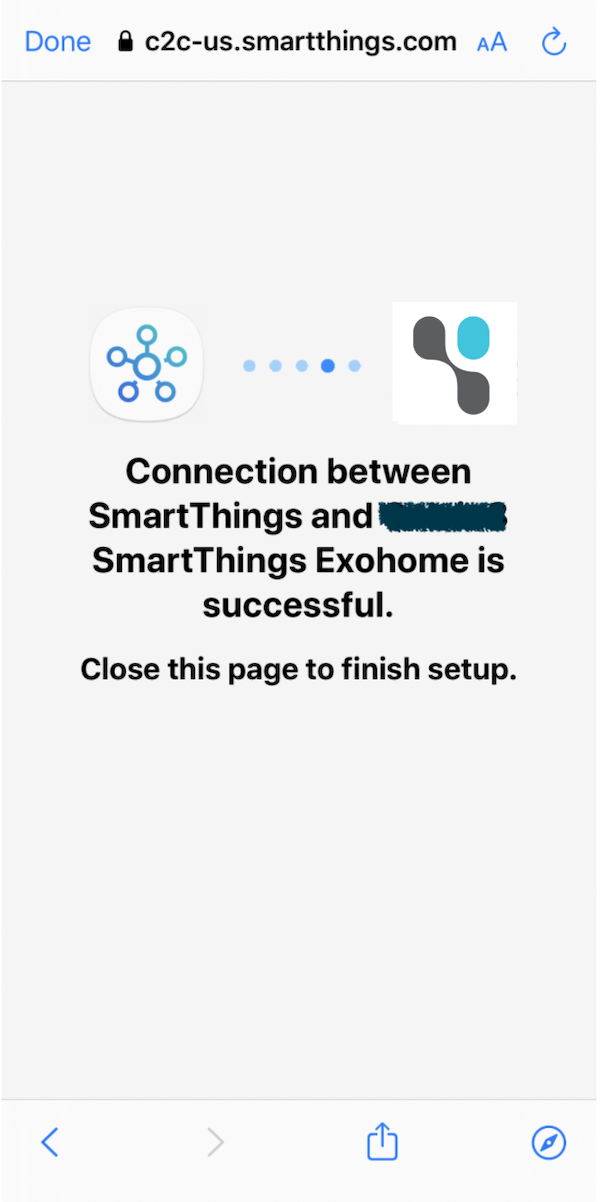
- Authentication succeeds
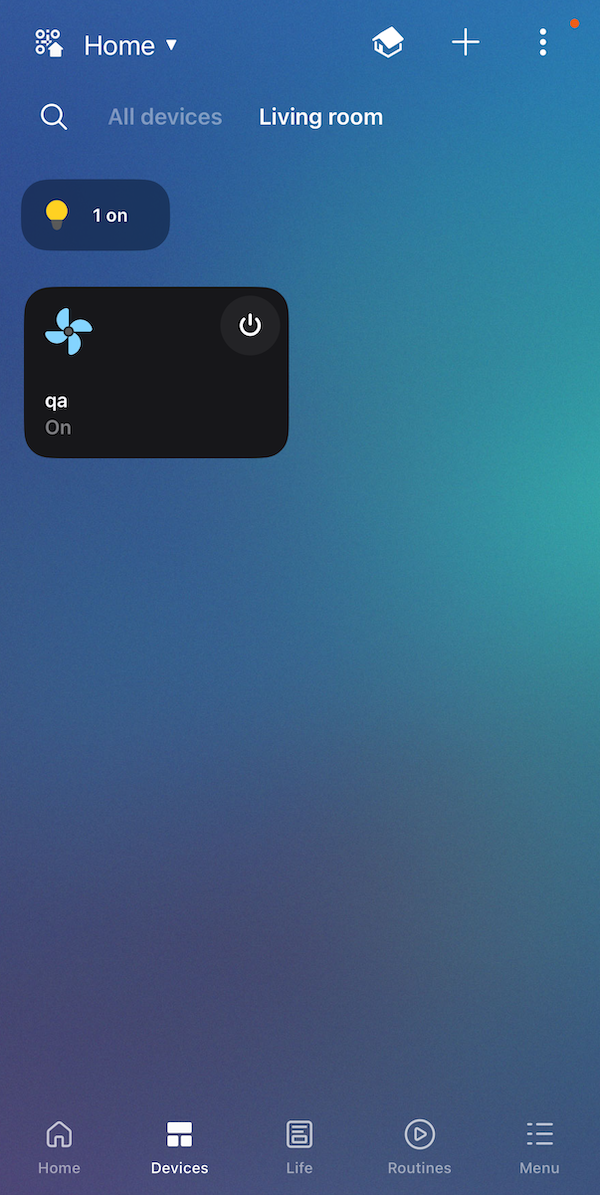
- All linked devices will be listed
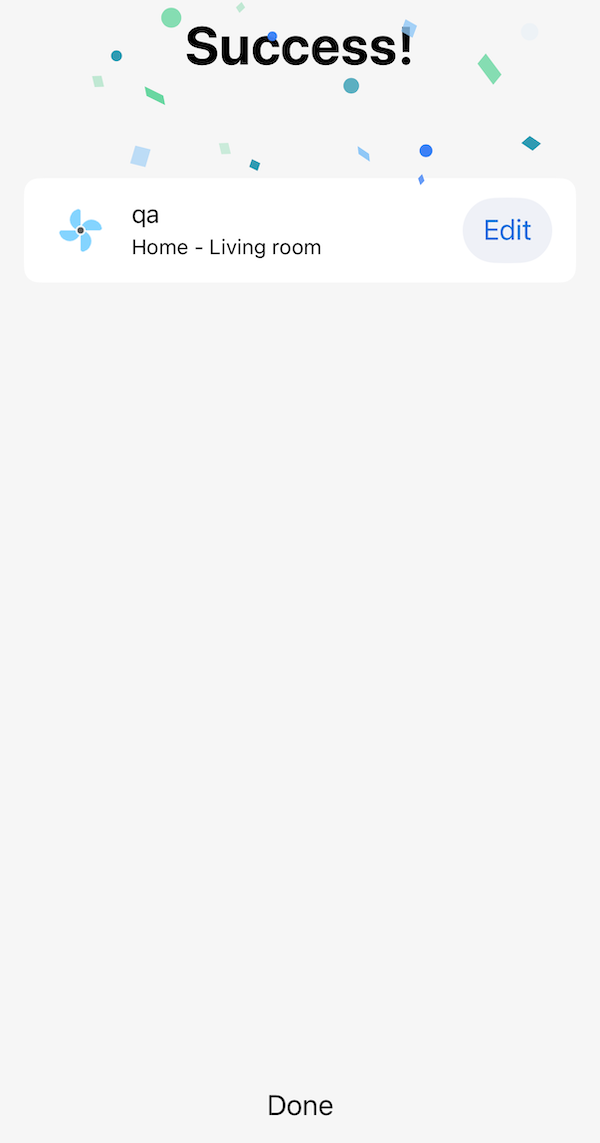
- You could refresh current status of devices and operate them
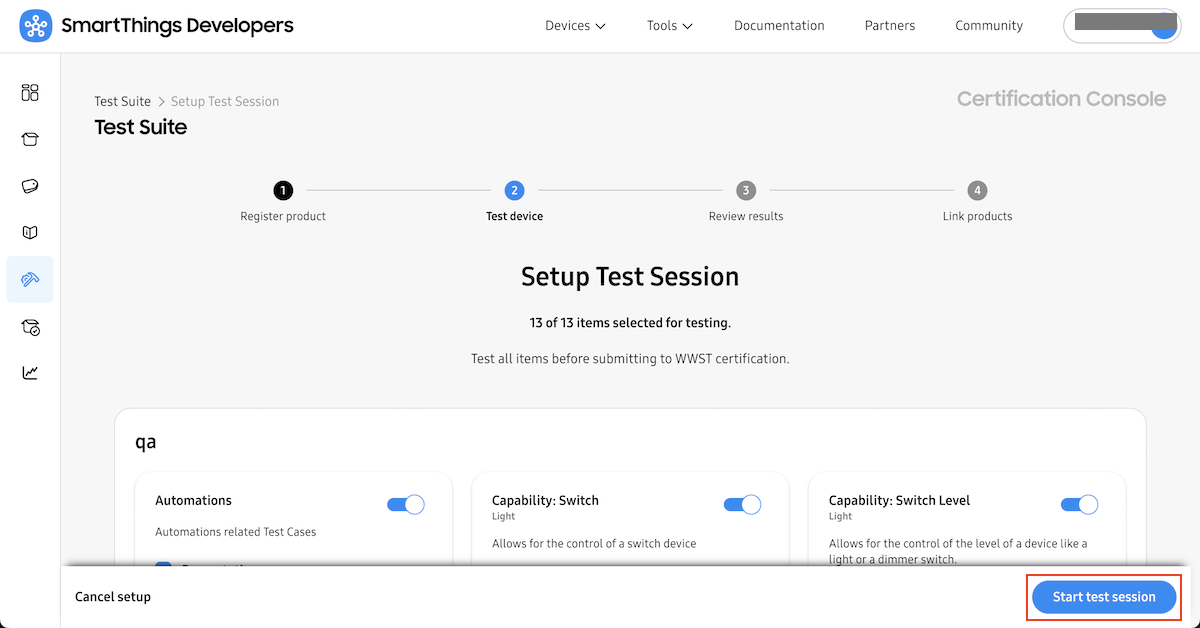
- Go to Test Suite and you'll see the device you added.
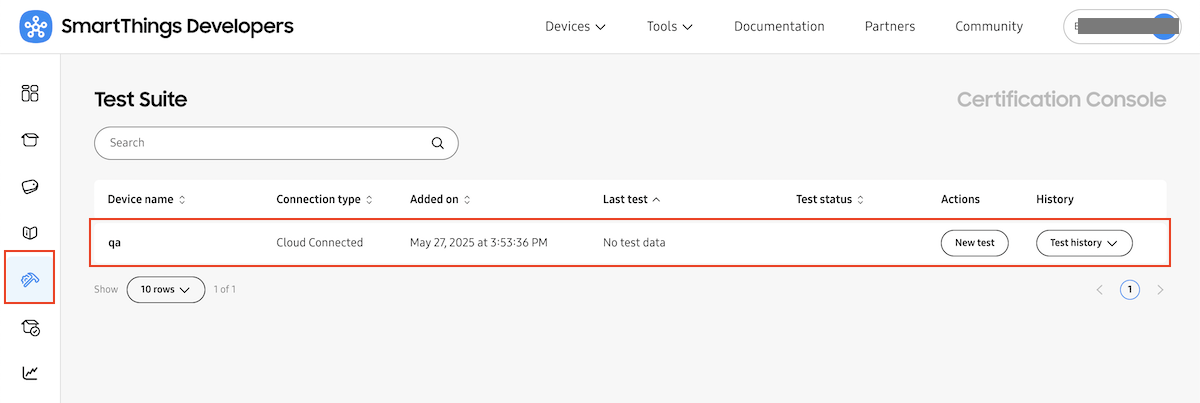
- Try to run the automated self-test.
Publish
After completing your self-testing in developer mode, you can submit the certification request.
Have more questions? Submit a request