IFTTT Integration
IFTTT (If This Then That) is a service to create chains of simple conditional statements, called applets. You can create your triggers and actions, enabling your device to interact with other services like Alexa, Gmail, Facebook...etc.
Become IFTTT partner
To create and publish a service on IFTTT platform, you have to become their partner. Please go to the IFTTT platform website (https://platform.ifttt.com/) and follow the steps to sign up an IFTTT developer account.
Create Your Service
Services are the basic building blocks of IFTTT. Some example services are Email, Google Drive, and SMS.
If you’re building a service on the IFTTT platform, you will need to have at least one trigger or action.
Steps
- Log in to IFTTT platform (https://platform.ifttt.com/).
- Click "+ Add Service".
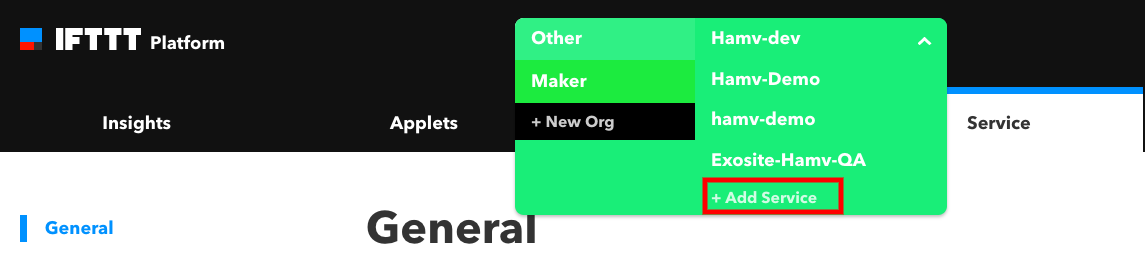
- Enter the service name and ID and click "Create" button. You can see the service created on the dashboard.
You can leave out the details of service before publishing it, but be sure to fill out the API.
Setup the API
General
Enter https://<domain\>.apps.exosite.io/api:1 to IFTTT API URL and click "Save" button. 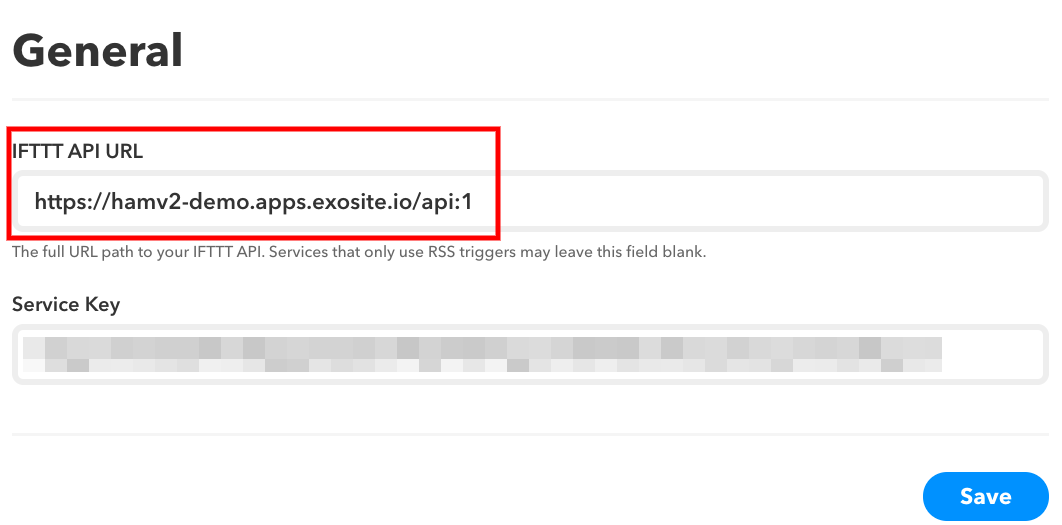
Authentication
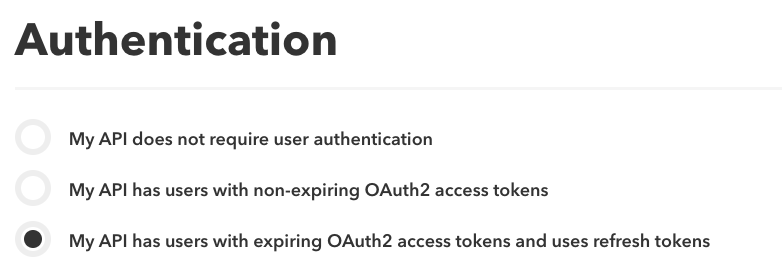
Choose "My API has users with expiring OAuth2 access tokens and uses refresh tokens"
Note
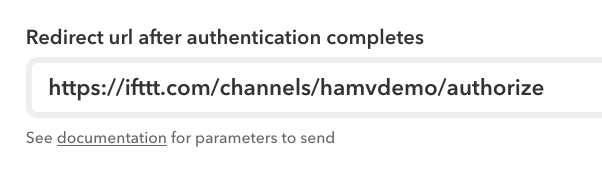
Before starting this step, provide your "Service Key" in General section and "Redirect URLs" in Authentication section to Exosite. Please also create a demo account and add at least 1 device under the account. Provide its account and password by sending a mail to support+hamv@exosite.com. 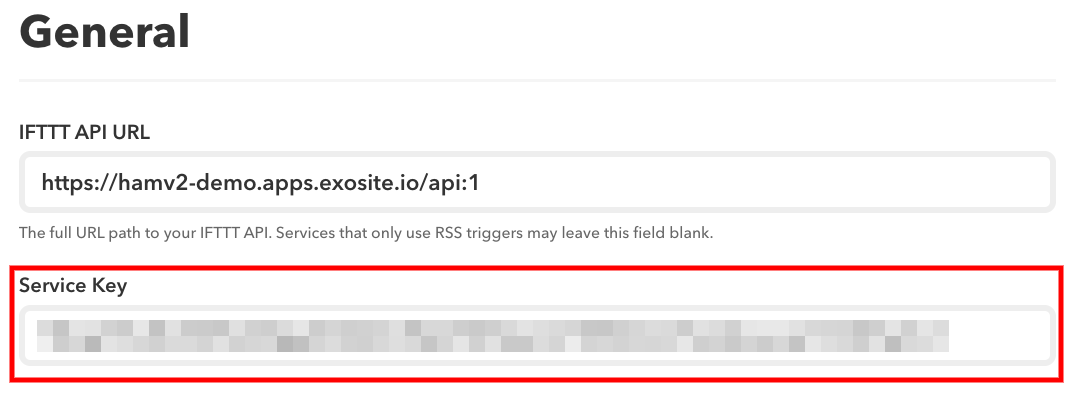
Configure the IFTTT service.
IFTTT Service Settings
- Client ID: Provided by Exosite
- Client Secret: Provided by Exosite
- Authorization URL:
https://<domain>.apps.exosite.io/oauth2/authorize/ifttt - Token URL:
https://<domain>.apps.exosite.io/oauth2/token/ifttt - Demo account login/password: The tester account and password you provided to Exosite.
- Demo account notes: You can enter additional information for IFTTT when they test your service.
Create Triggers and Actions
You can design the triggers and actions for your device. One service has to include at least one trigger or one action. It is not necessary to have both triggers and actions.
For the definition of triggers and actions, you can refer to IFTTT Glossary for more details.
Set up Triggers
Upload information model with "Event Collections" for the device you are going to create triggers for. For more details about "Event Collections", you can refer to Using Information Models.
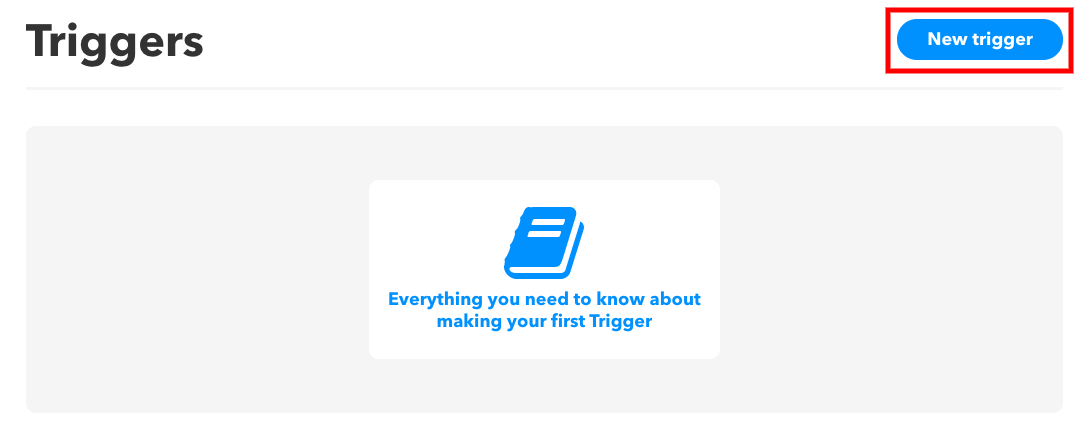
Click the "New trigger" button.
Enter the information of the trigger and choose API in Endpoint section.
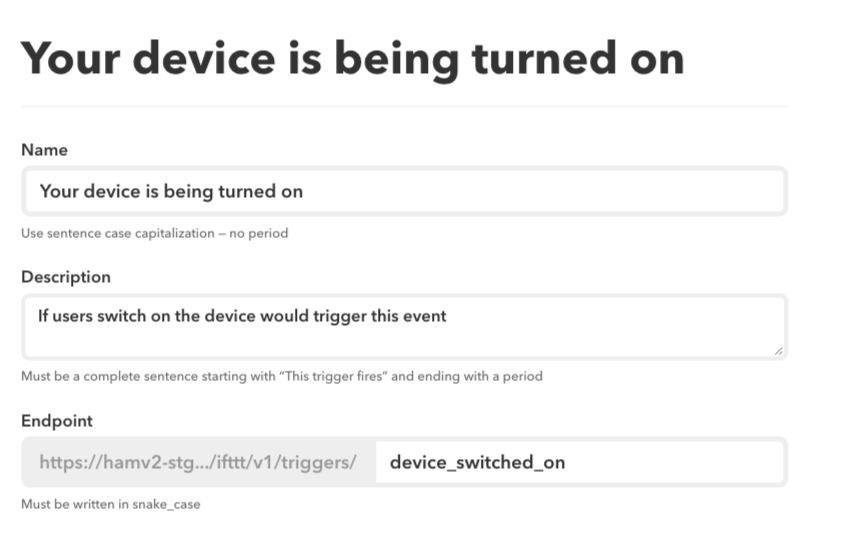
The Endpoint must be the same as the name of eventObject in the information model.
Click "Save" button.
Click "Add trigger field +" button 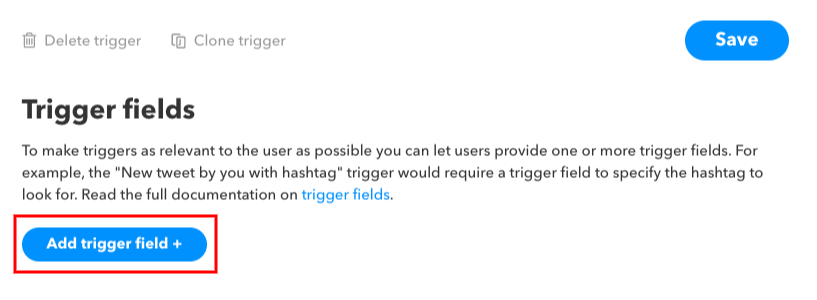
Enter information to the trigger field.
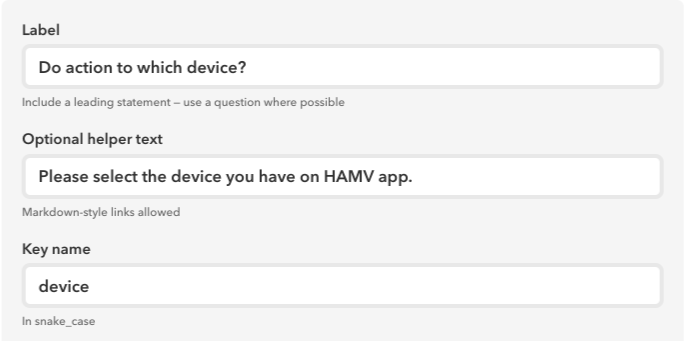
- Key name: device
- Input Type: Dropdown list
- Data source for dropdown list: Retrieve list items from my service
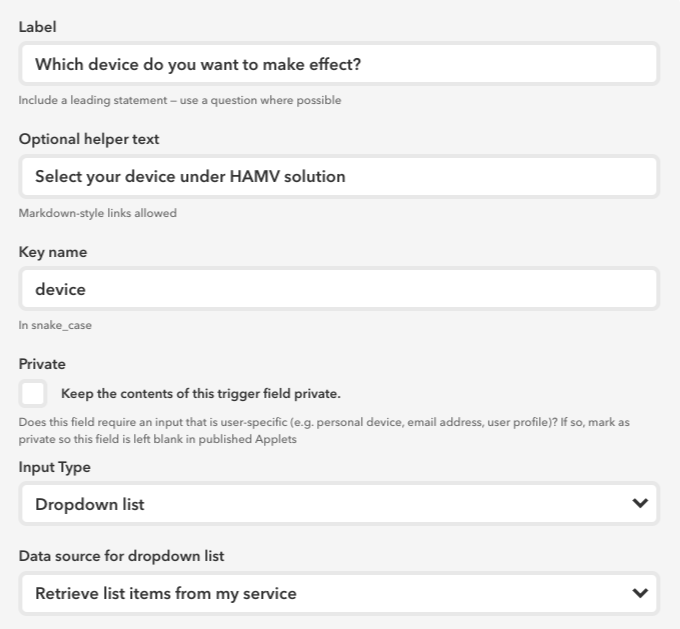
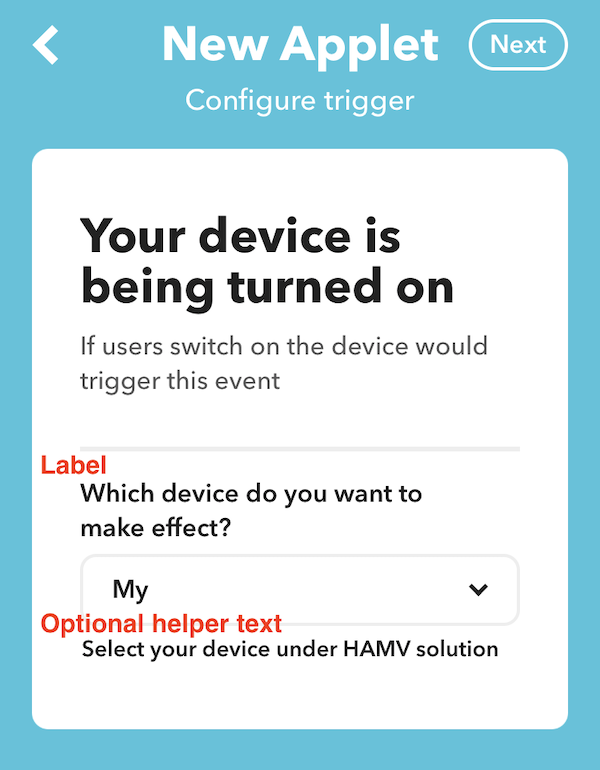
The "Label" and "Optional helper text" will be shown in the Applet creation page correspondingly as the picture below.
Click "Save" button.
Set up Actions
- Upload information model with "Integration schema" for the device you are going to create actions for. For more details about "Integration schema", you can refer to Using Information Models.
- Click "New action" button.
- Enter the information of the action. The Endpoint must be the same as the attributes defined in the information model.
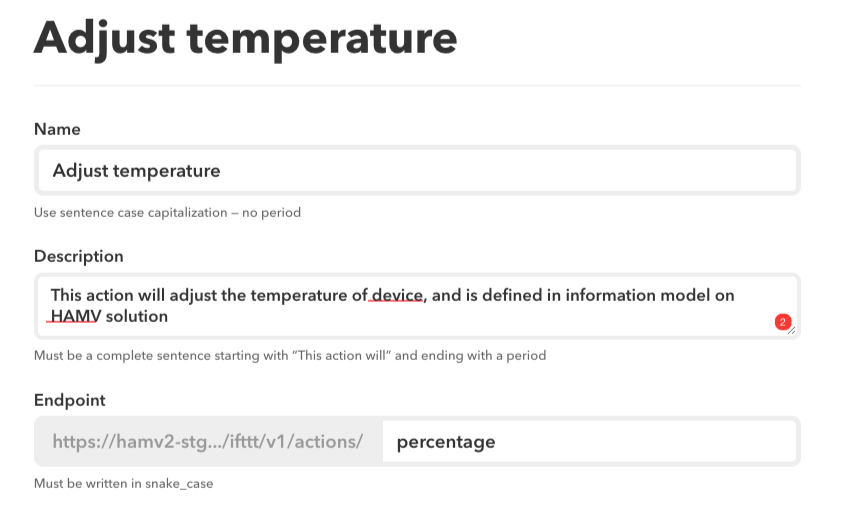
Note: The attributes we currently support are: on_off, percentage, brightness
- Click "Save" button.
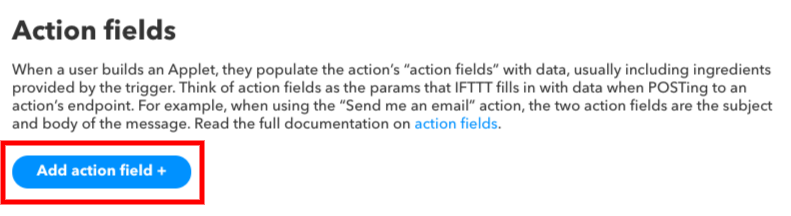
- Click "Add action field +" button
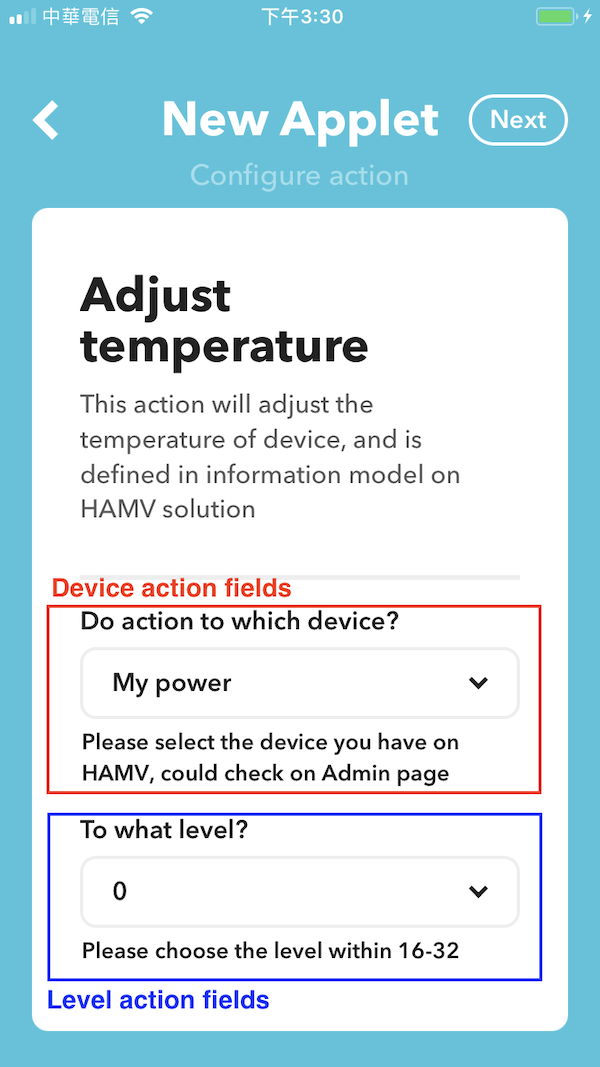
Set up the Action Fields There are always at least 2 action fields in 1 action. The first one (Device action field) defines the which device will receive the action. The second one defines what action the device will execute.
There are three kinds of action fields: device, on/off and level.
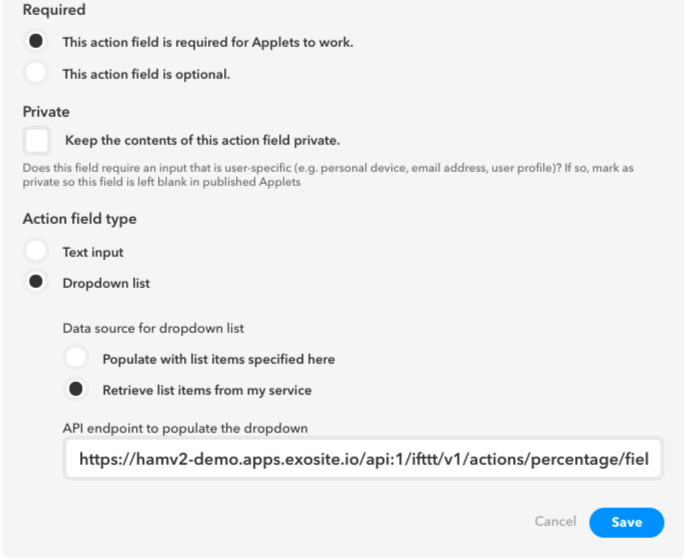
Device action fields (Required)
- Key name: device
- Required: This action field is required for Applets to work.
- Action field type: Dropdown list.
- Data source for dropdown list: Retrieve list items from my service.
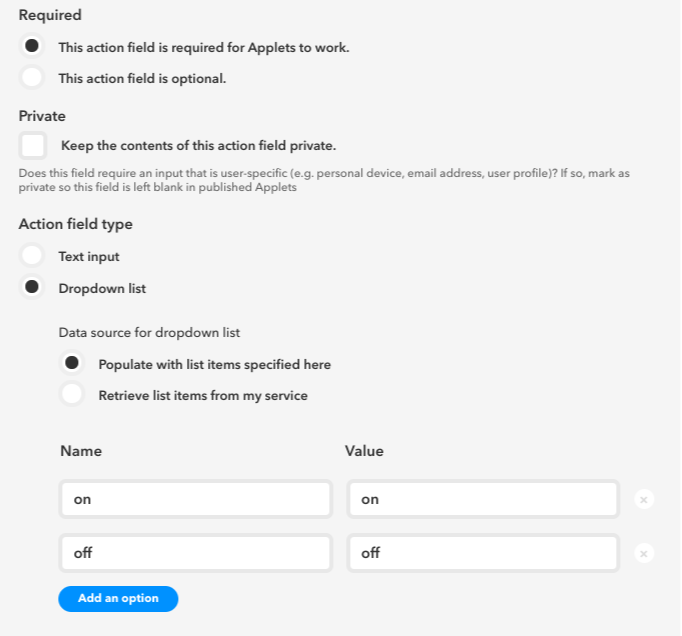
On/off action fields
If the endpoint maps to "on_off" attributes, please follow the settings below. You can apply on/off action to both devices and groups.
- Key name: on_off
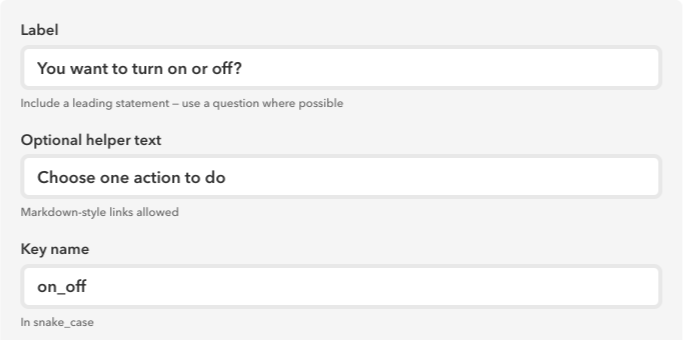
- Required: This action field is required for Applets to work.
- Action field type: Dropdown list.
- Data source for dropdown list: Populate with list items specified here.
Level action fields
If the endpoint maps to "percentage" or "brightness" attributes, please follow the settings below.
- Key name: percentage or brightness (same as the endpoint you set)
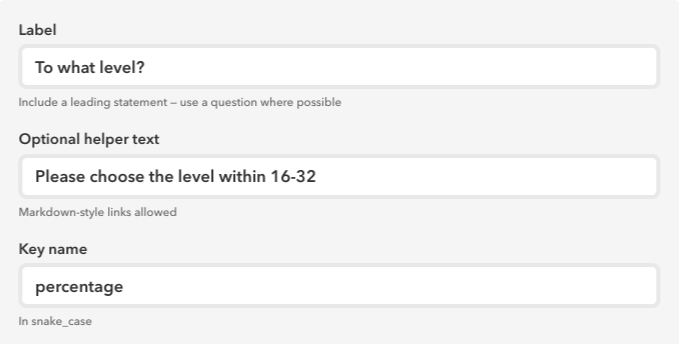
- Required: This action field is required for Applets to work.
- Action field type: Dropdown list.
- Data source for dropdown list: Retrieve list items from my service.
The information will be shown in the Applet creation page correspondingly as the picture below.
Click "Save" button to finish.
IFTTT Online Testing
To check the API settings, you can run the online testing for Endpoint and Connection.
Before you do this, make sure you complete the tasks below.
- Please link to the demo account you set in "Authentication" section.
- Add testing devices under the demo account.
- Upload the information model for the corresponding devices to the admin site.
Connection Test
After you finish "Authentication" settings, you can run connection test to check if your setting is good.
Endpoint Tests
- Status: After Exosite set "Service Key" and "Demo account" for your solution, you can run Endpoint tests to check if you pass the "status" test.
- Test/setup: You should also pass "test/setup" test if you have added device under your demo account and uploaded the corresponding information model to admin site.
- User/info: After Exosite set "Service Key" and "Demo account" for your solution, you can run Endpoint tests to check if you pass the "user/info" test.
- Triggers testing
On the device that IFTTT uses for testing, set the event you define as a trigger for at least 3 times from false state to true state in order for the event to become effective. You can find the device that IFTTT is using for testing in the "valid request" section of "test/setup". For example, if you define a trigger - air clean is on. You need to use the mobile app to turn off air clean and turn on air clean on the device for at least 3 times. This is necessary for IFTTT to recognize the trigger input.
- Actions testing
You can find the device IFTTT using for testing in "valid request" section of "test/setup". Make sure your testing device is online or the test result will fail.
We strongly suggest that you don't change the device status and the demo account after you pass all the online testing to make sure you can pass the IFTTT's review process.
Add New Users to Service
There are two roles on IFTTT platform: admin and tester.
After adding to the service, you can log in to IFTTT app and create an applet with your service to test.
Add Admin Role
Steps
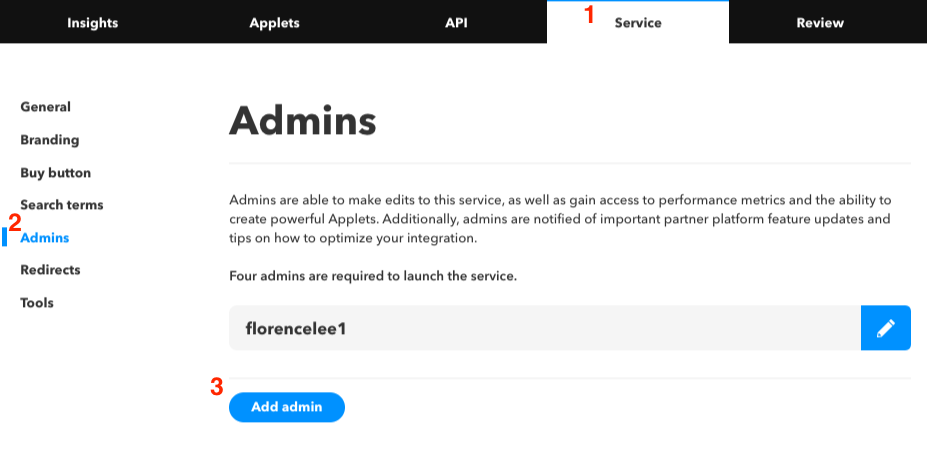
- Go to "Service" section.
- Go to "Admin" tab.
-
Click "Add admin" button.
-
Enter the information for this account. The reviewer of IFTTT publishing service will contact to the admin users set in the page, if he has any questions about the service you submitted for review.
Share Service to Testers
Steps
- Go to "Service" section.
- Go to "General" tab.
- Copy the invite URL and send to the user you want to share the testing service with.
Before the service is published, only the admin and testers can access this service.

IFTTT user account and ExoHome™ app user account should be the same.
Service Branding
Fill the service details based on the instruction described on the page and you can see the preview at the bottom of the page. You can provide testing information first and update it before making the service public.