Enabling Facebook Login
Note this step may be done any time before publishing your app, but your Facebook Login will not work until then.
To enable Facebook Login in your app, please follow below steps.
Set Up Facebook App
Steps
-
Log into Meta for developers and click
Create Appon the top right of the page.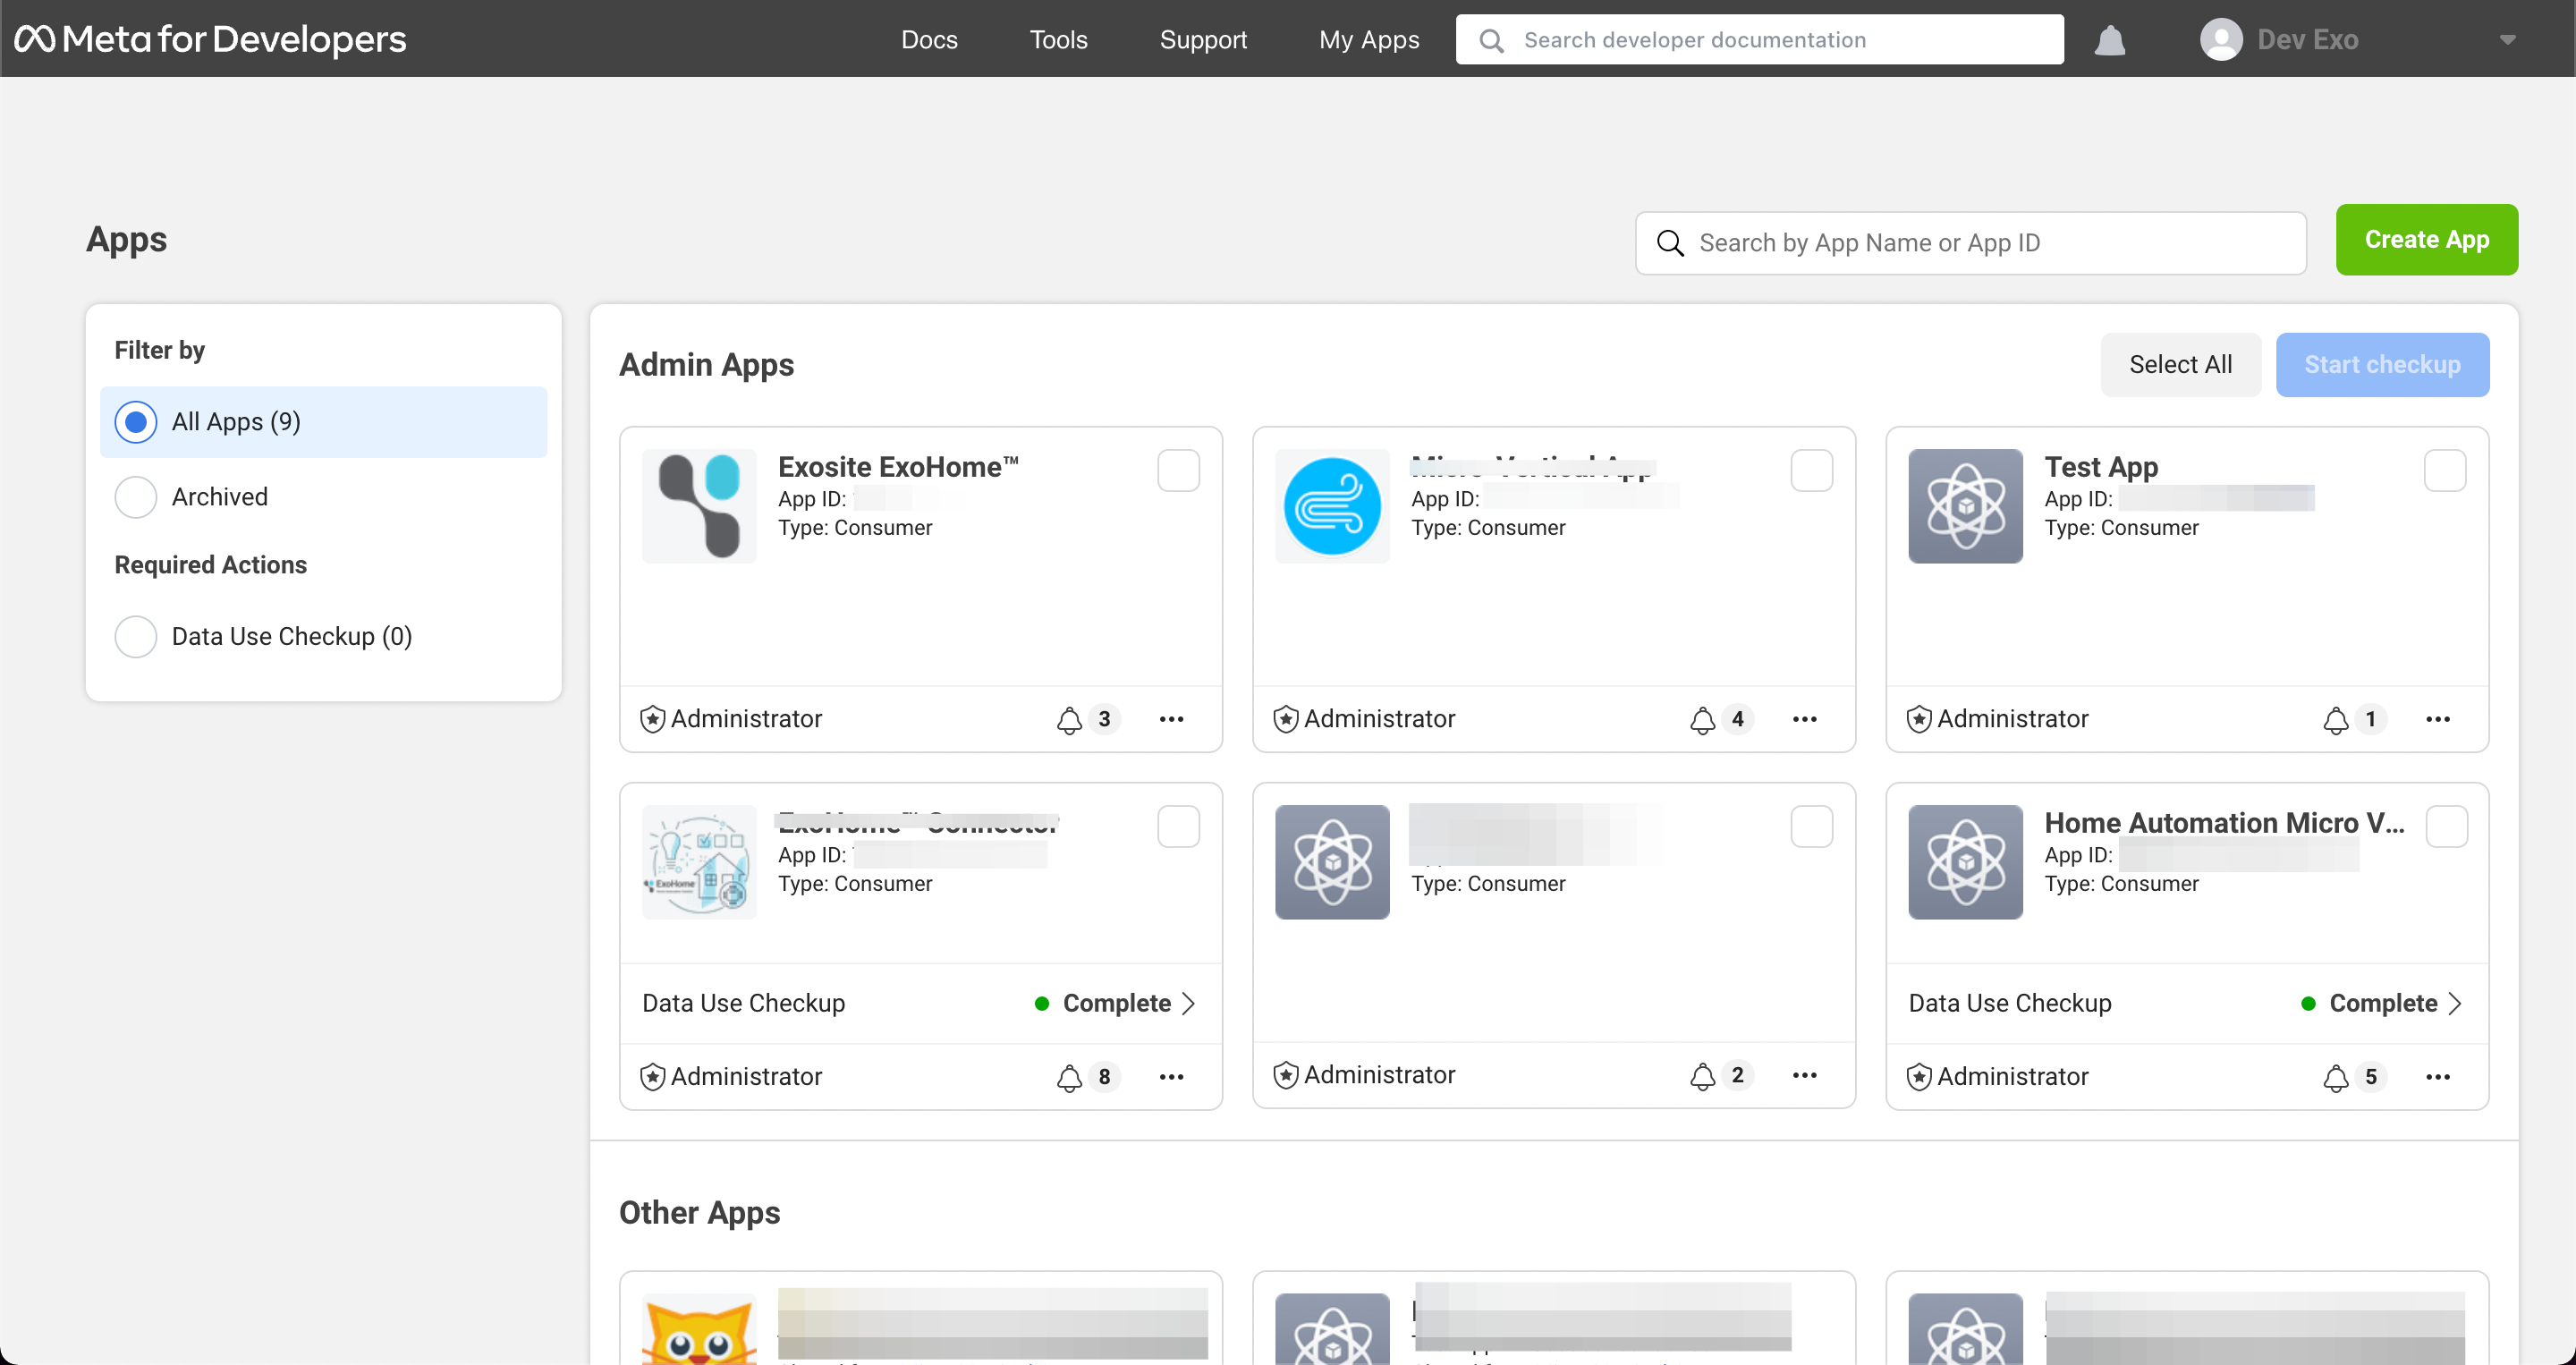
-
Select
Consumerand clickNext.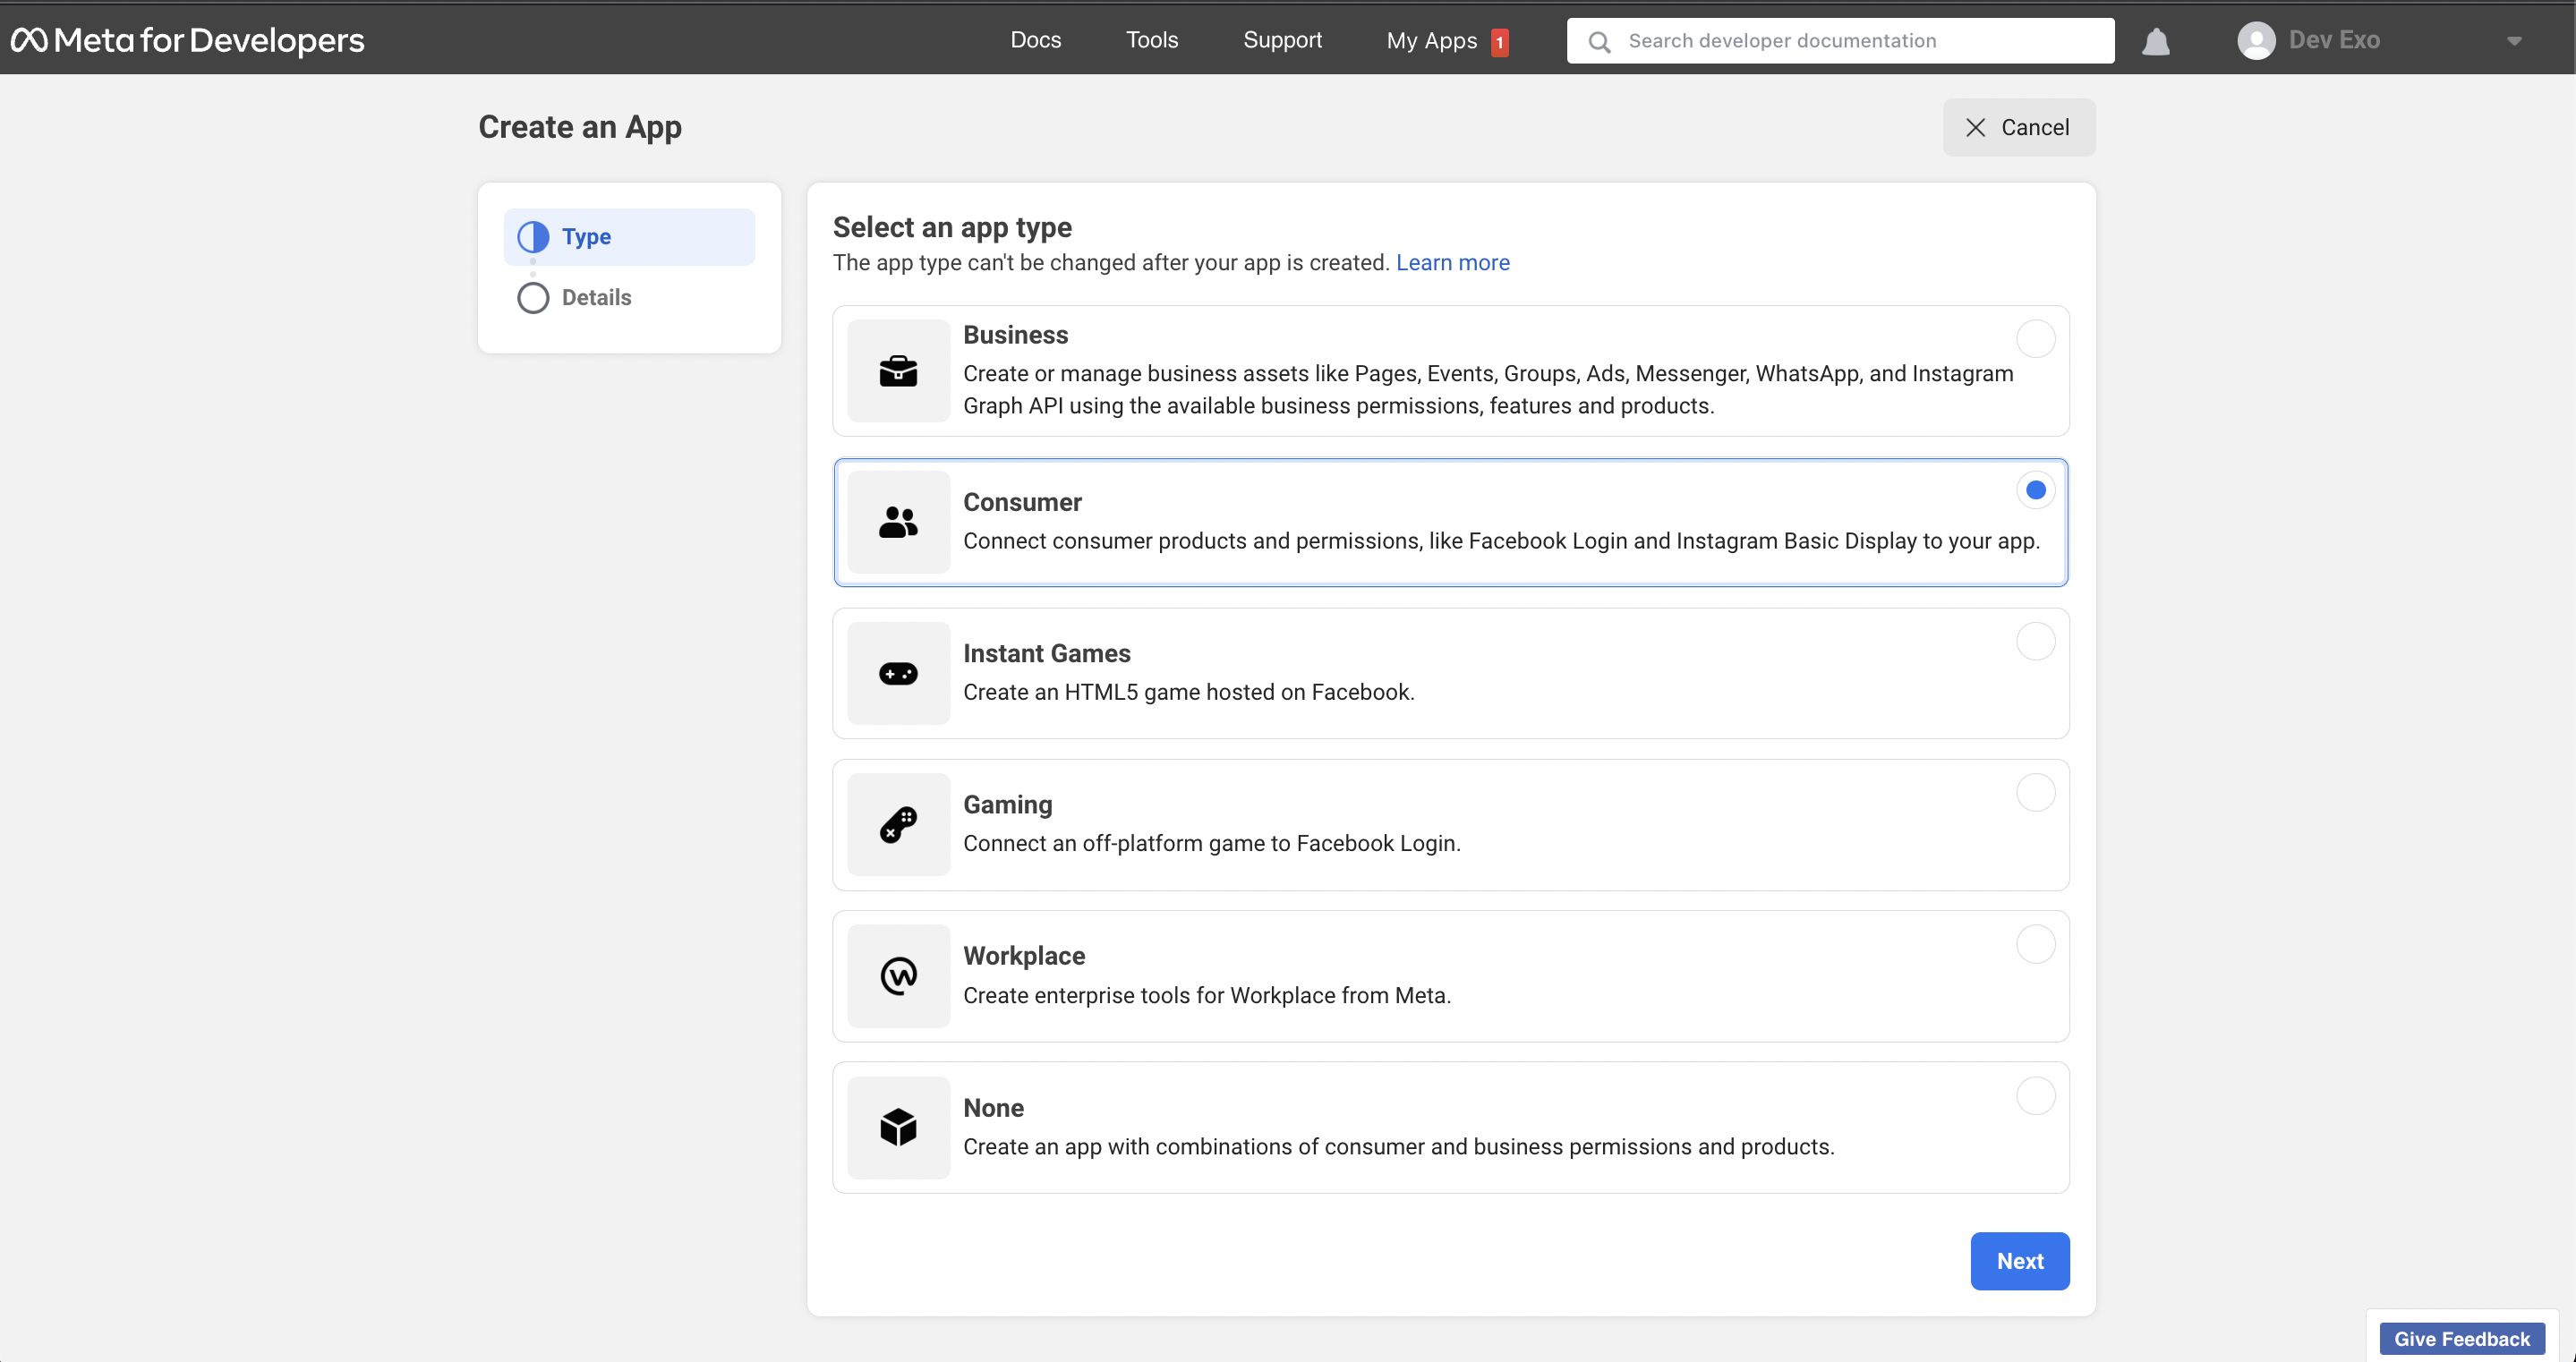
-
Fill out your
Display nameandAPP contact emailthen clickCreate App. Note you can change this later in the Settings.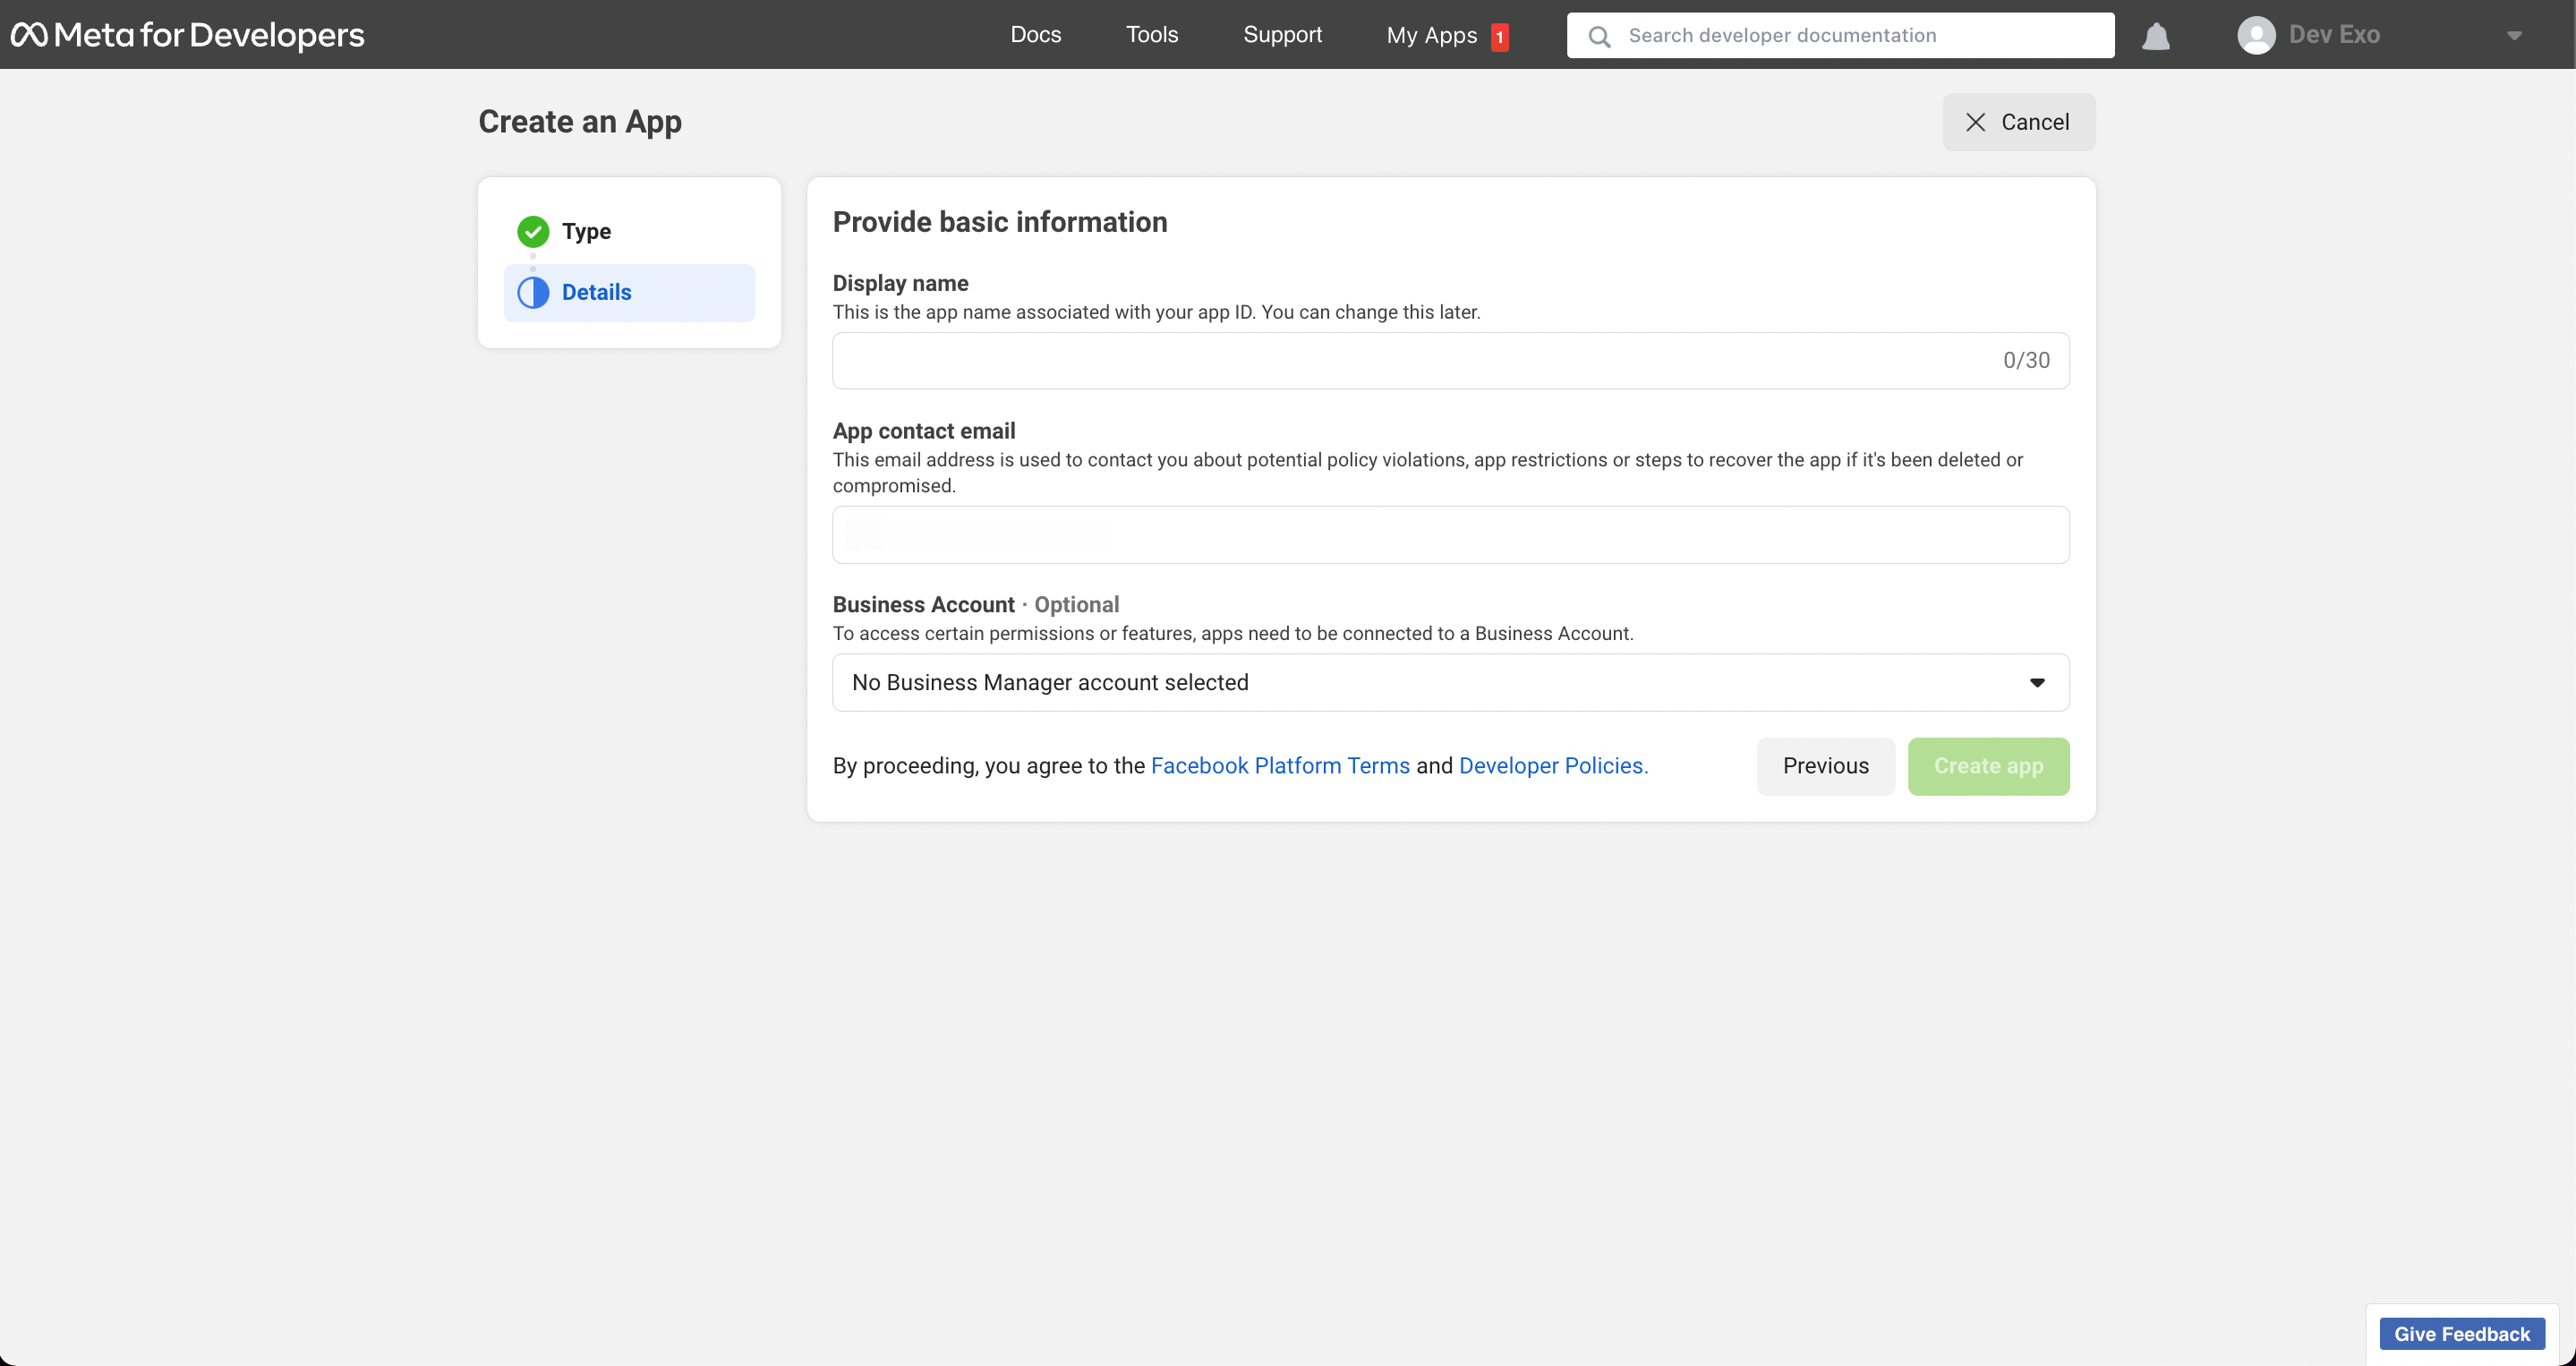
-
Re-enter your developer's password and click
Submit.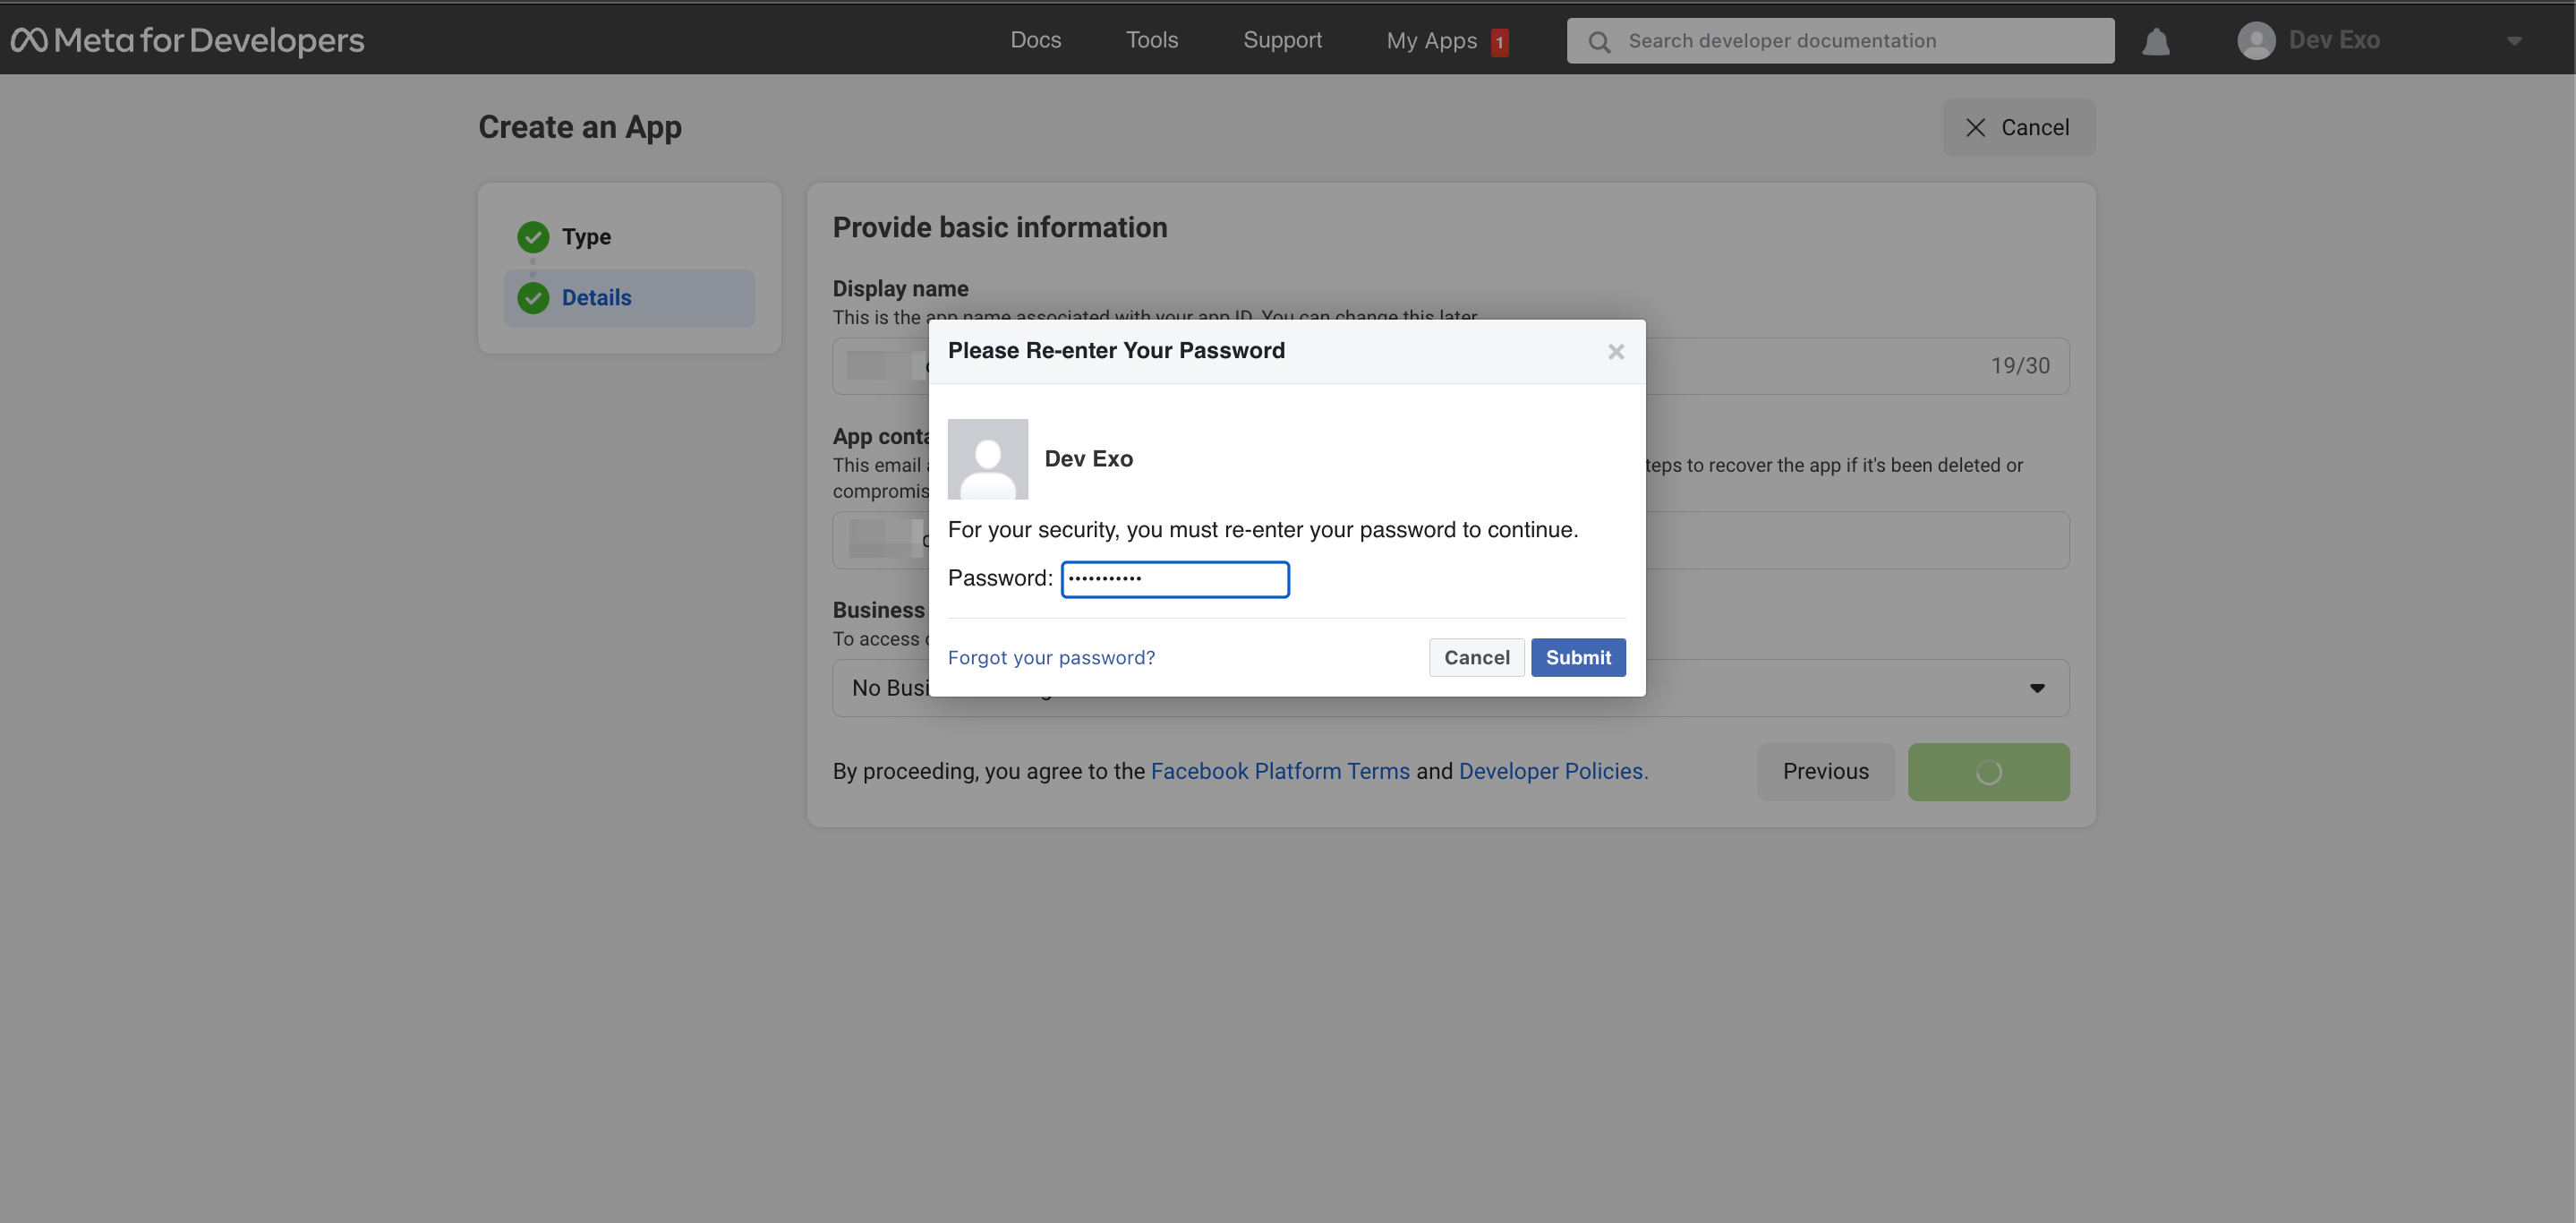
-
After turning to the main page, please click
set upicon on theFacebook Loginfunction.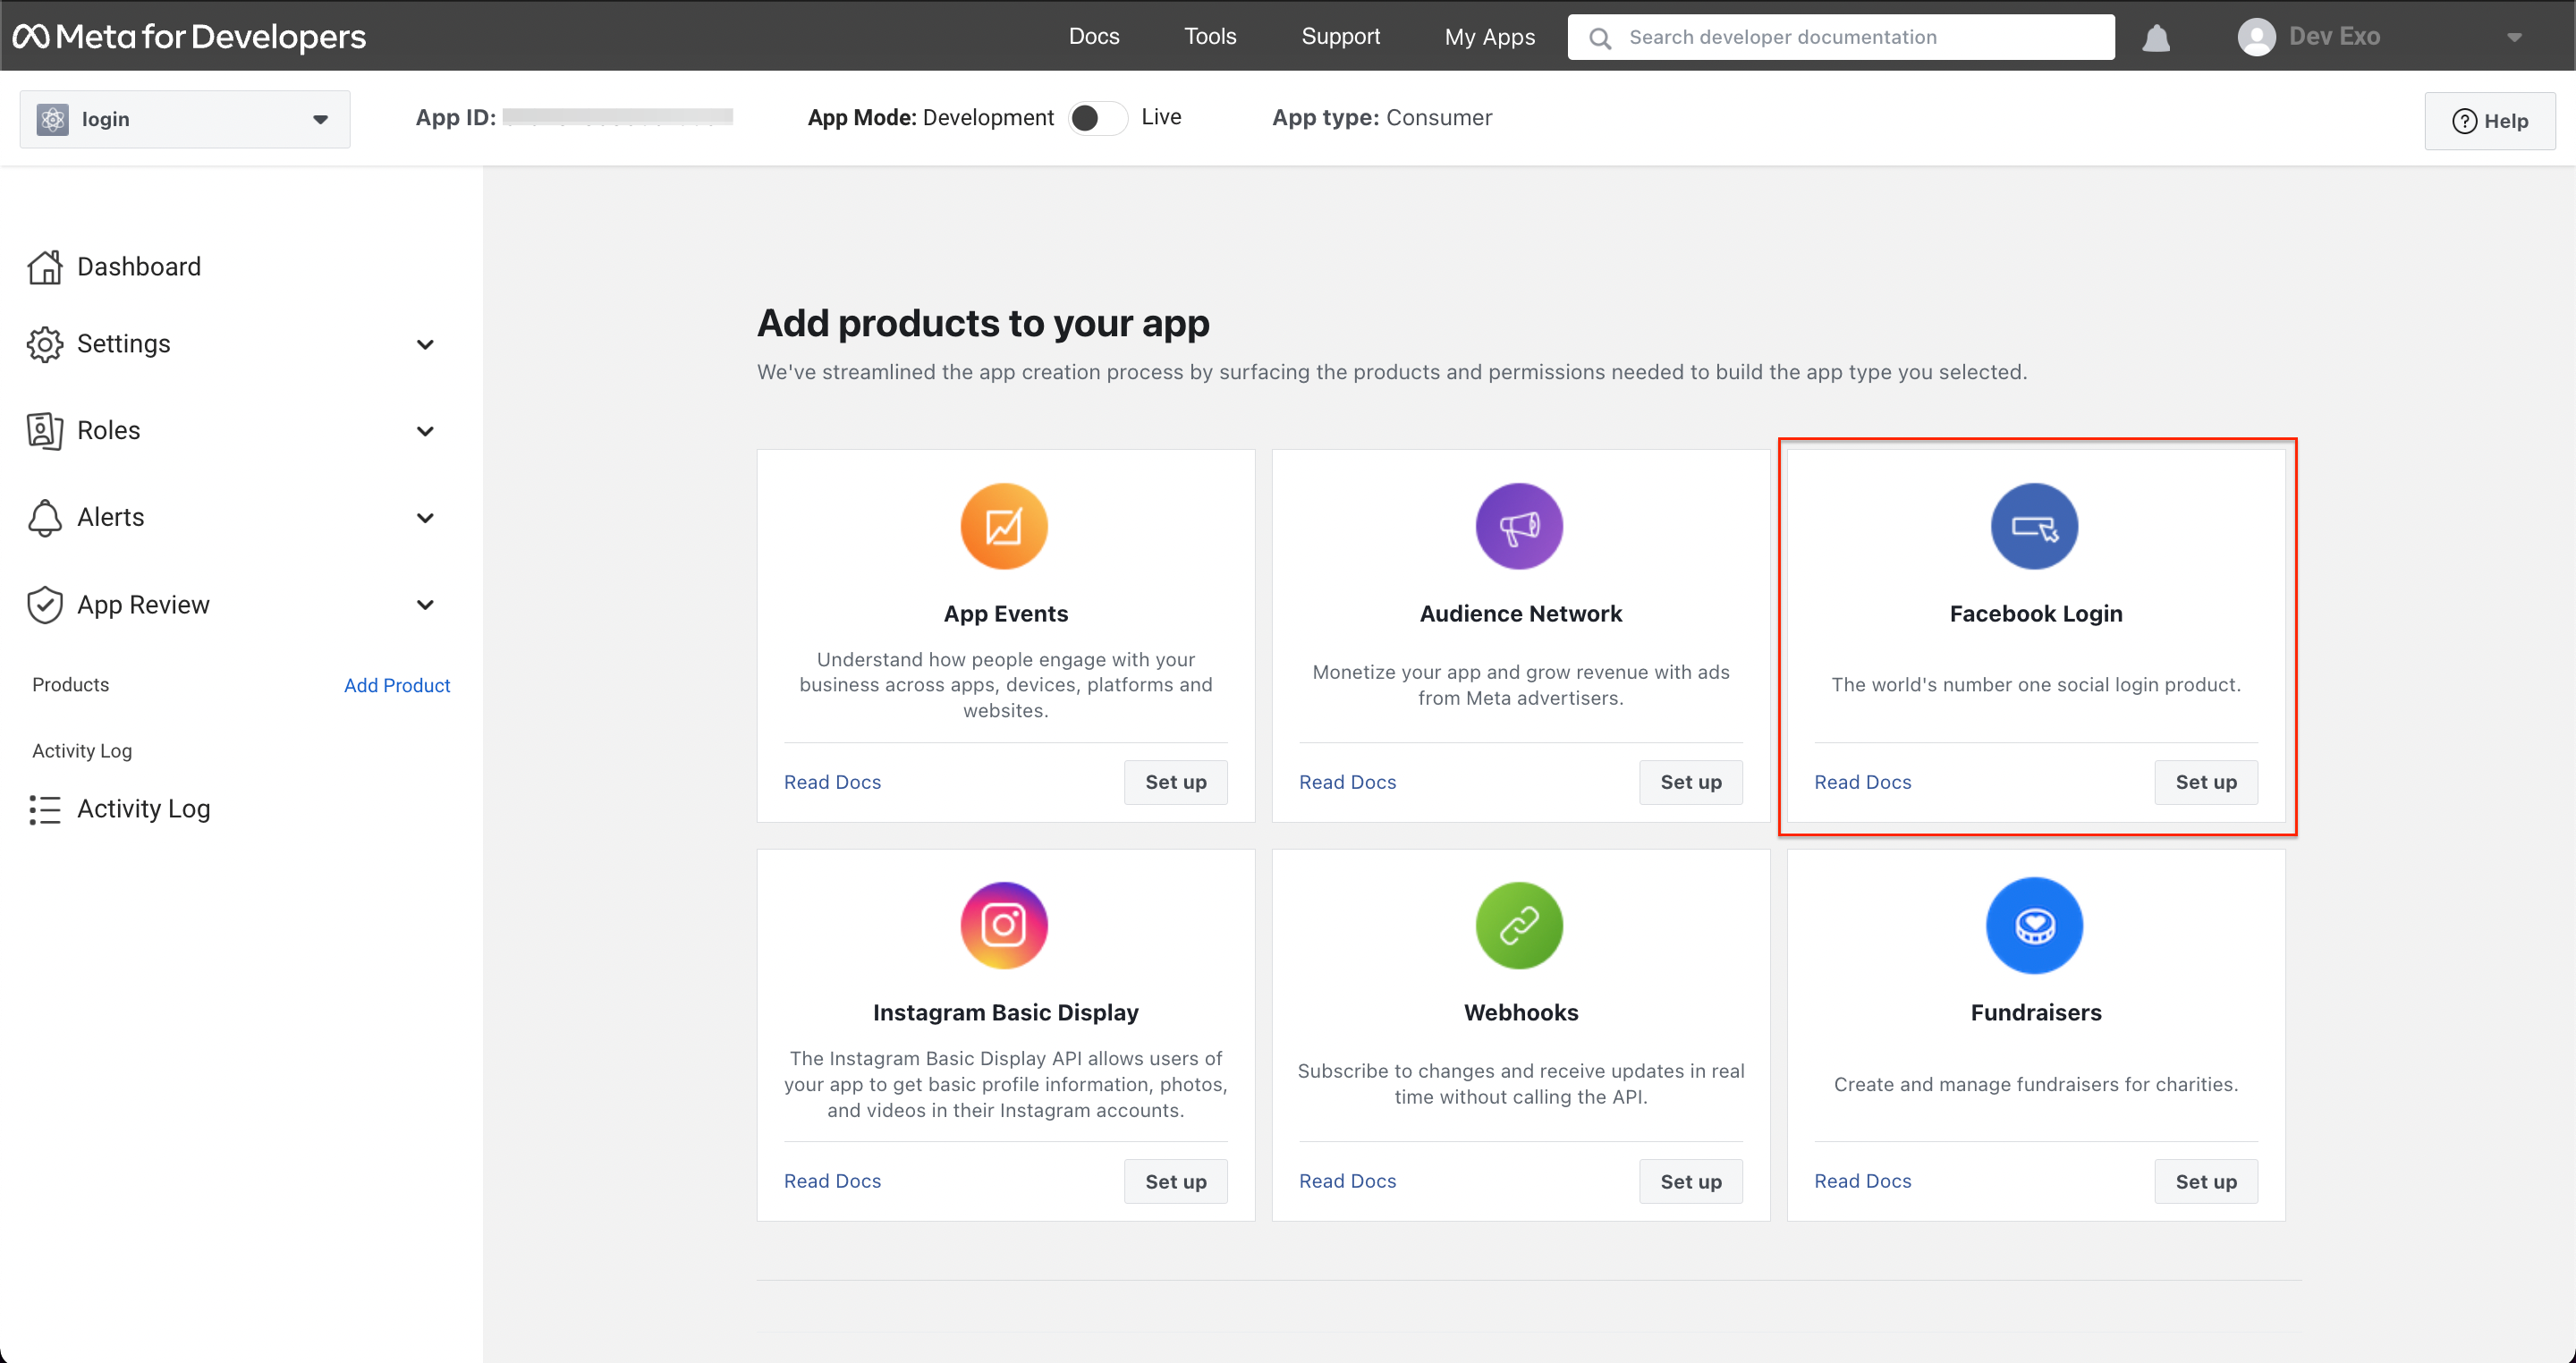
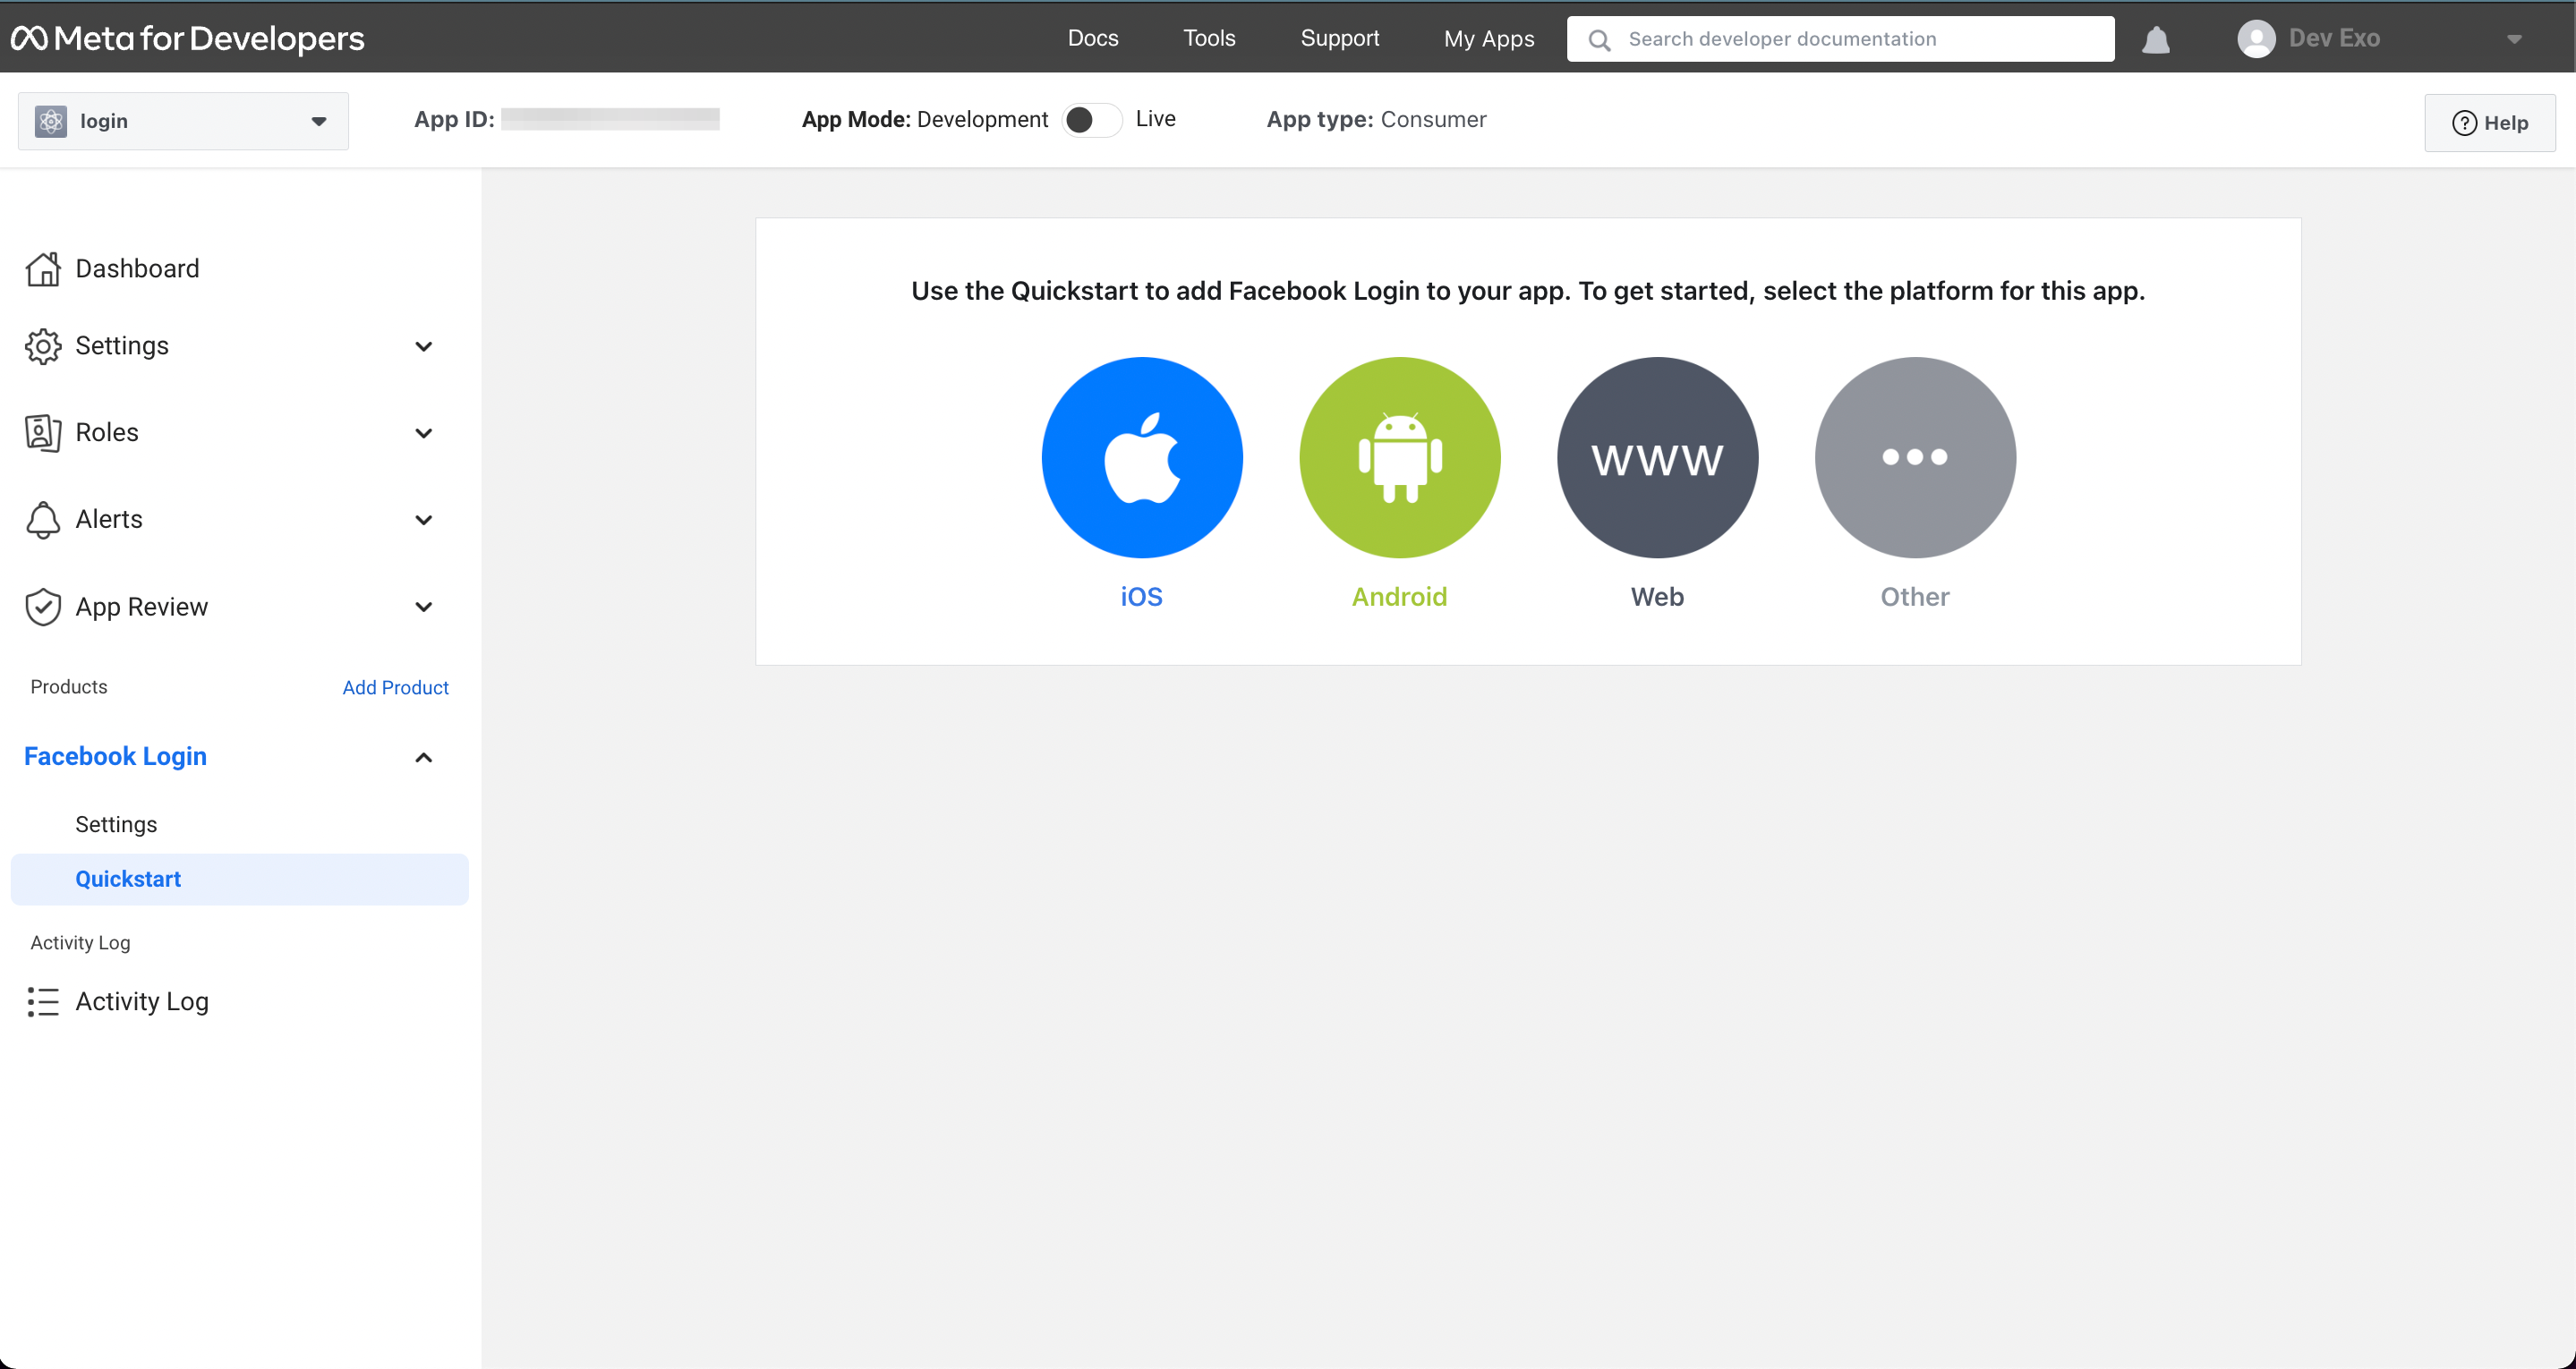
-
Select iOS and follow the instructions.
(1) Set up Your Development Environment: no need to change anything and click
Next.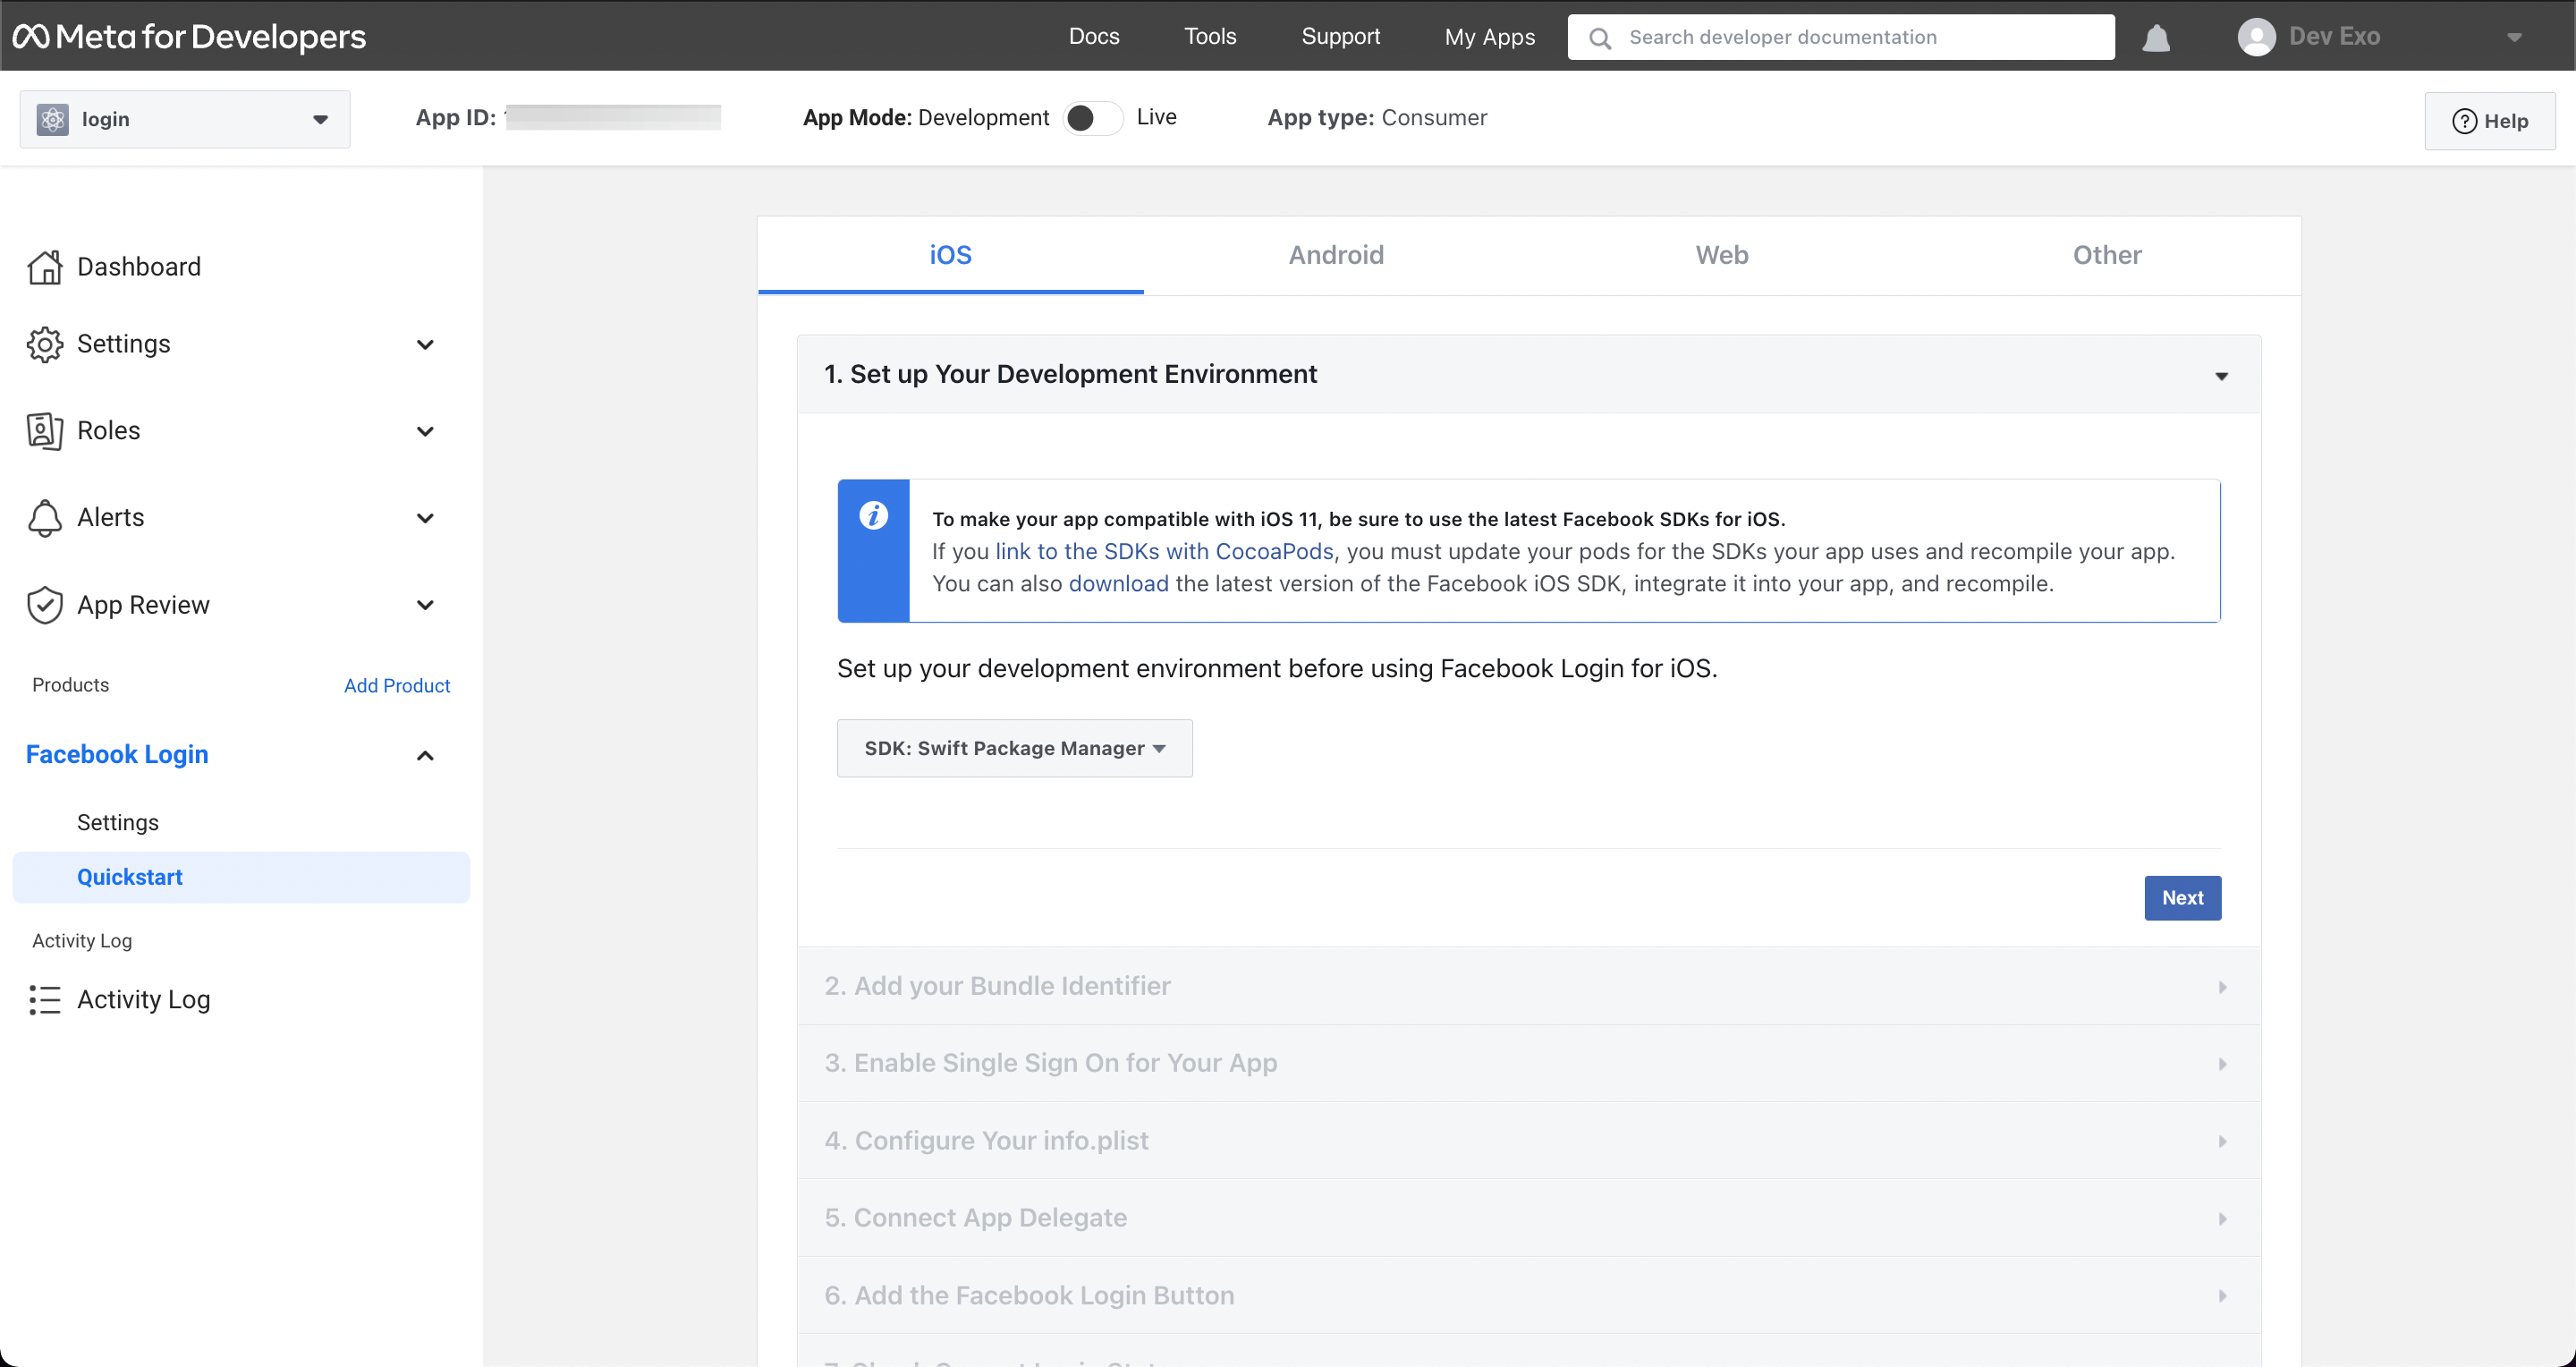
(2) Fill in the Bundle ID, hit
Saveand thenContinue.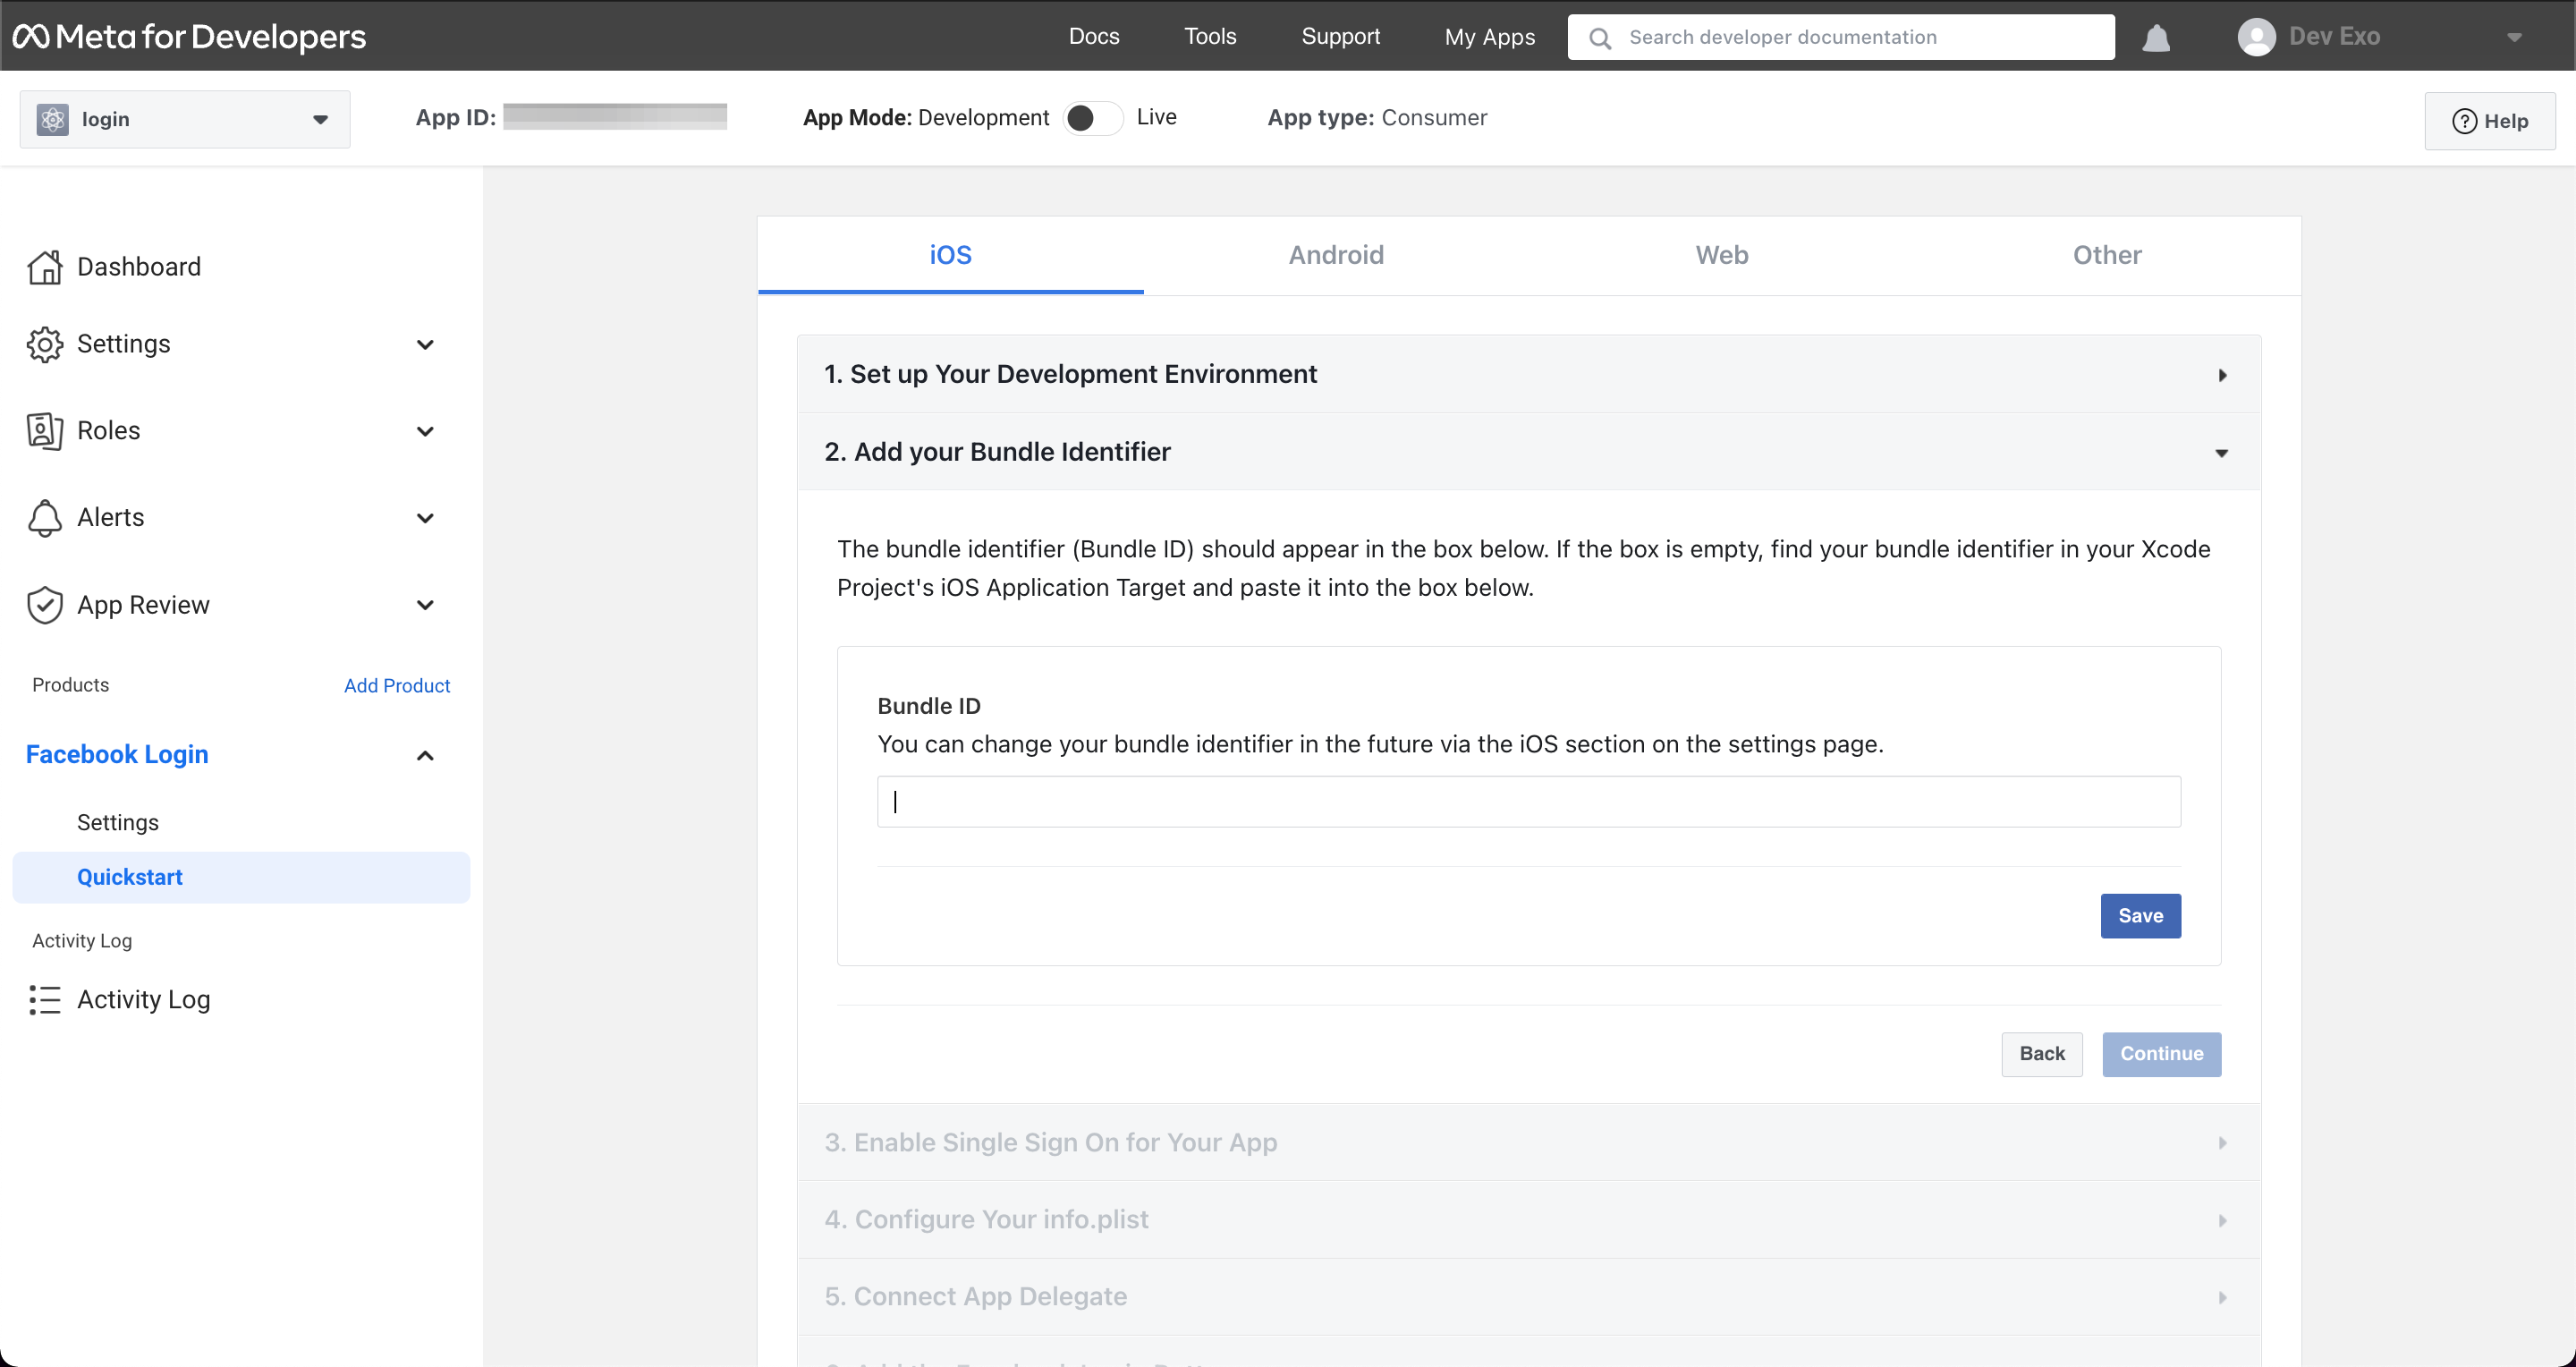
You can find your Bundle ID in your
config.xmlfile on the root of your project.(3) Choose
yesfor Enable Single Sign On. ClickSaveand thenNext.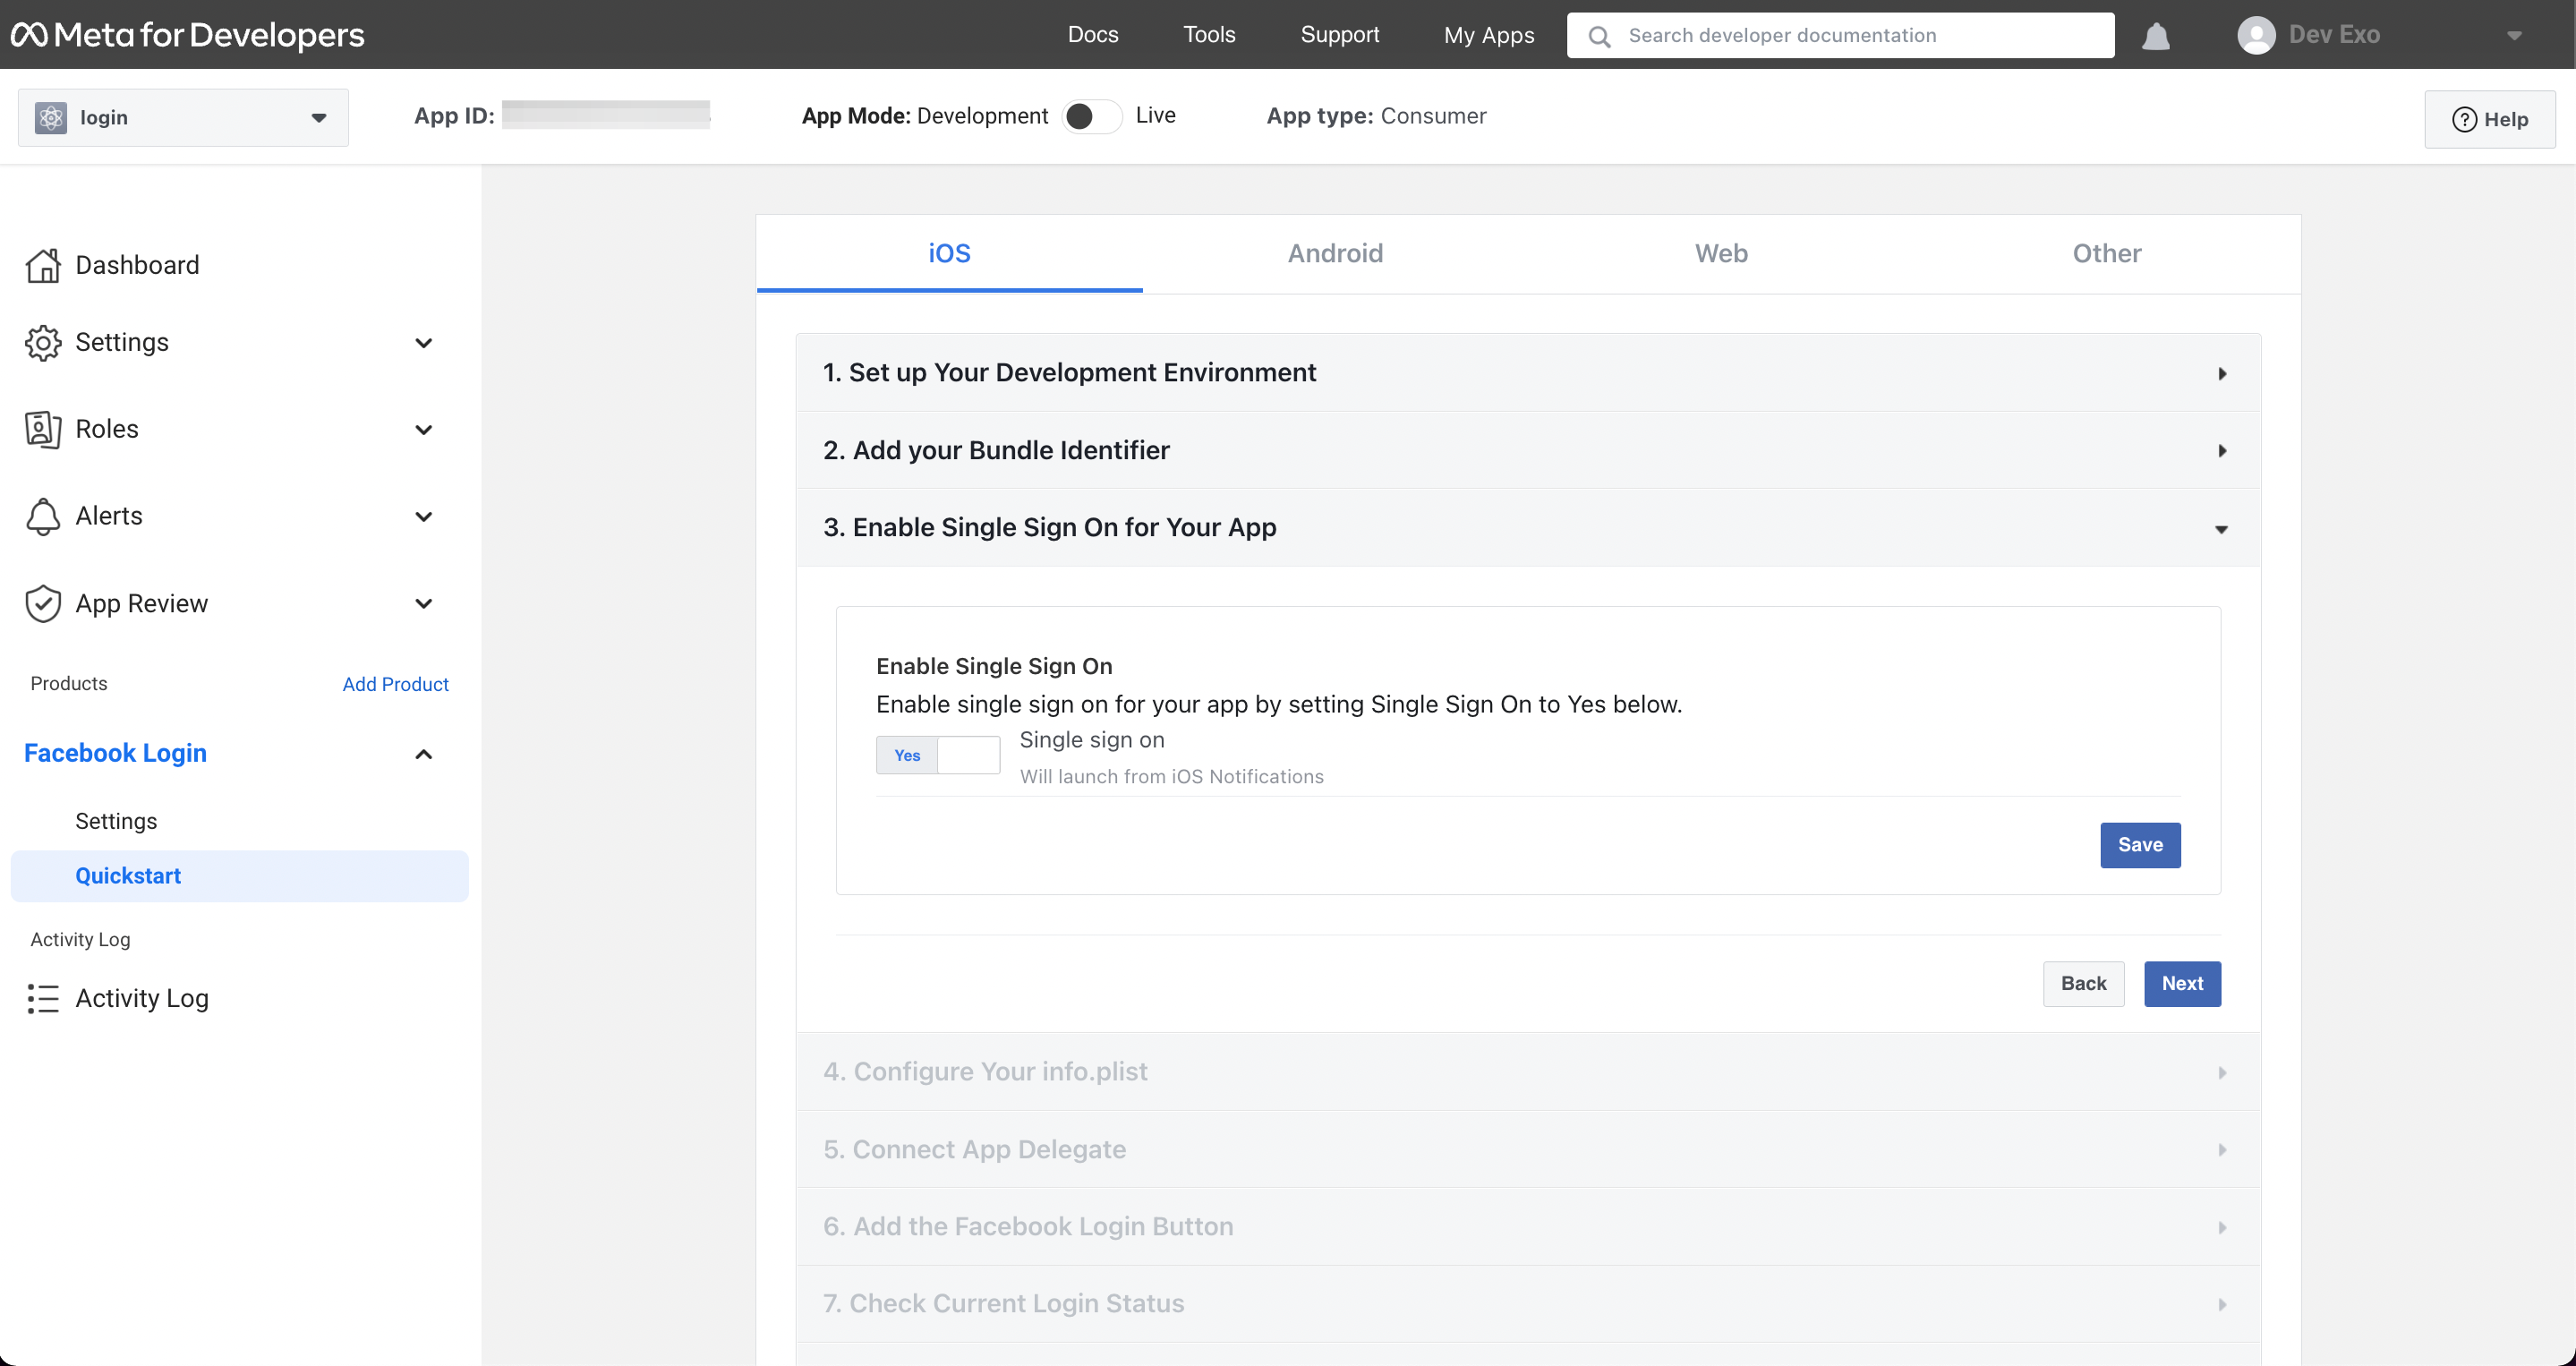
(4) Skip the following questions.
-
Click
Quickstartunder Facebook Login on the left navigation menu. Select Android and follow the instructions.(1) Click
Download the Facebook SDK for Androidand clickNext.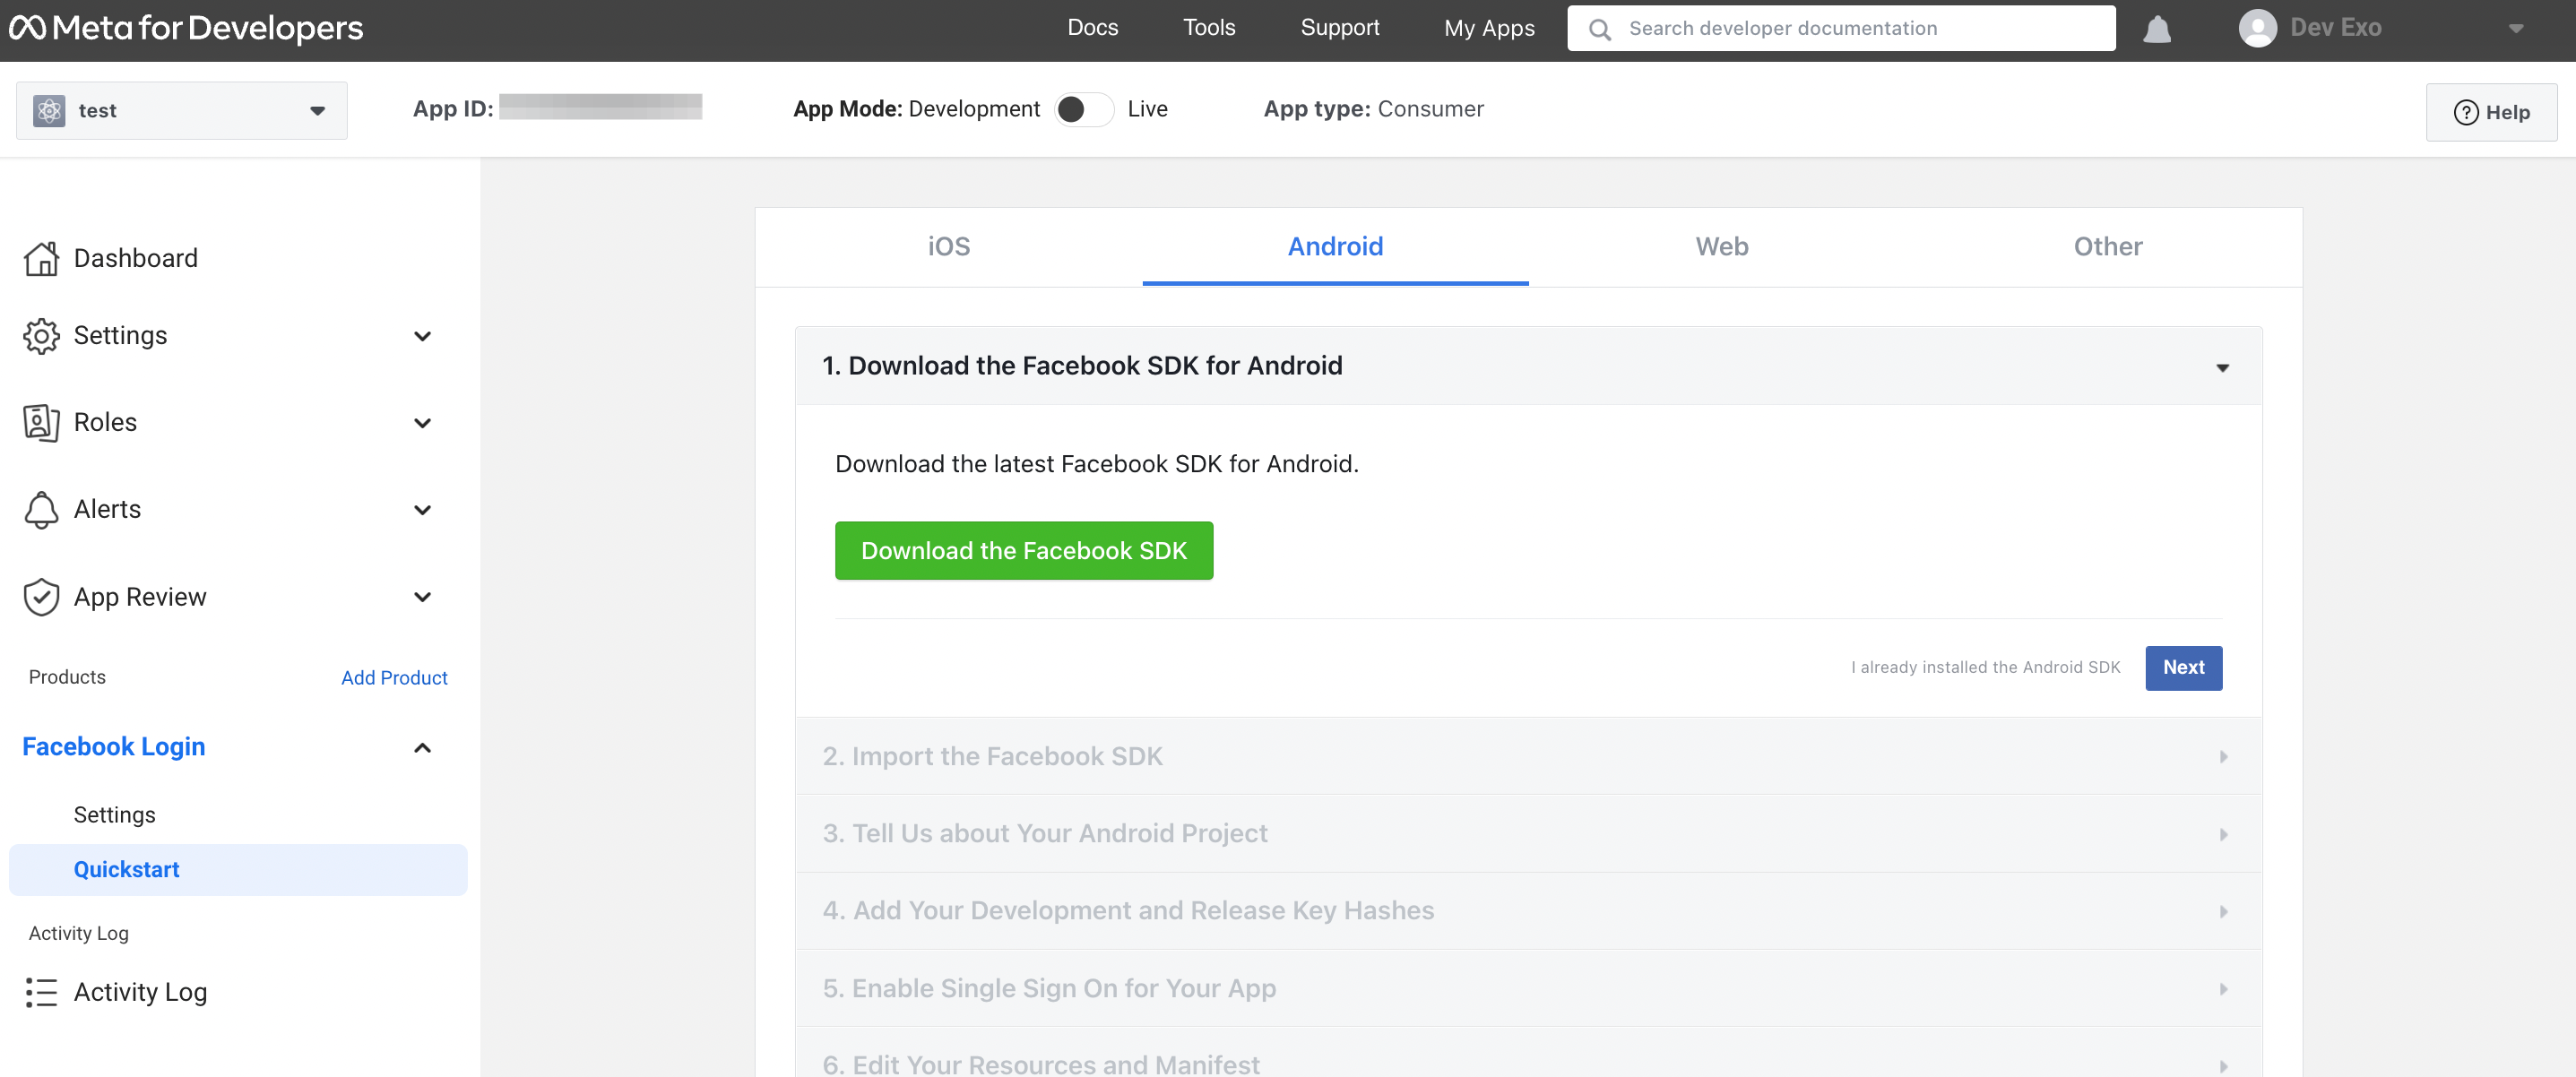
(2) Jump to the 3rd question and fill in the
Package NameandDefault Activity Class Name. ClickSaveand thenContinue.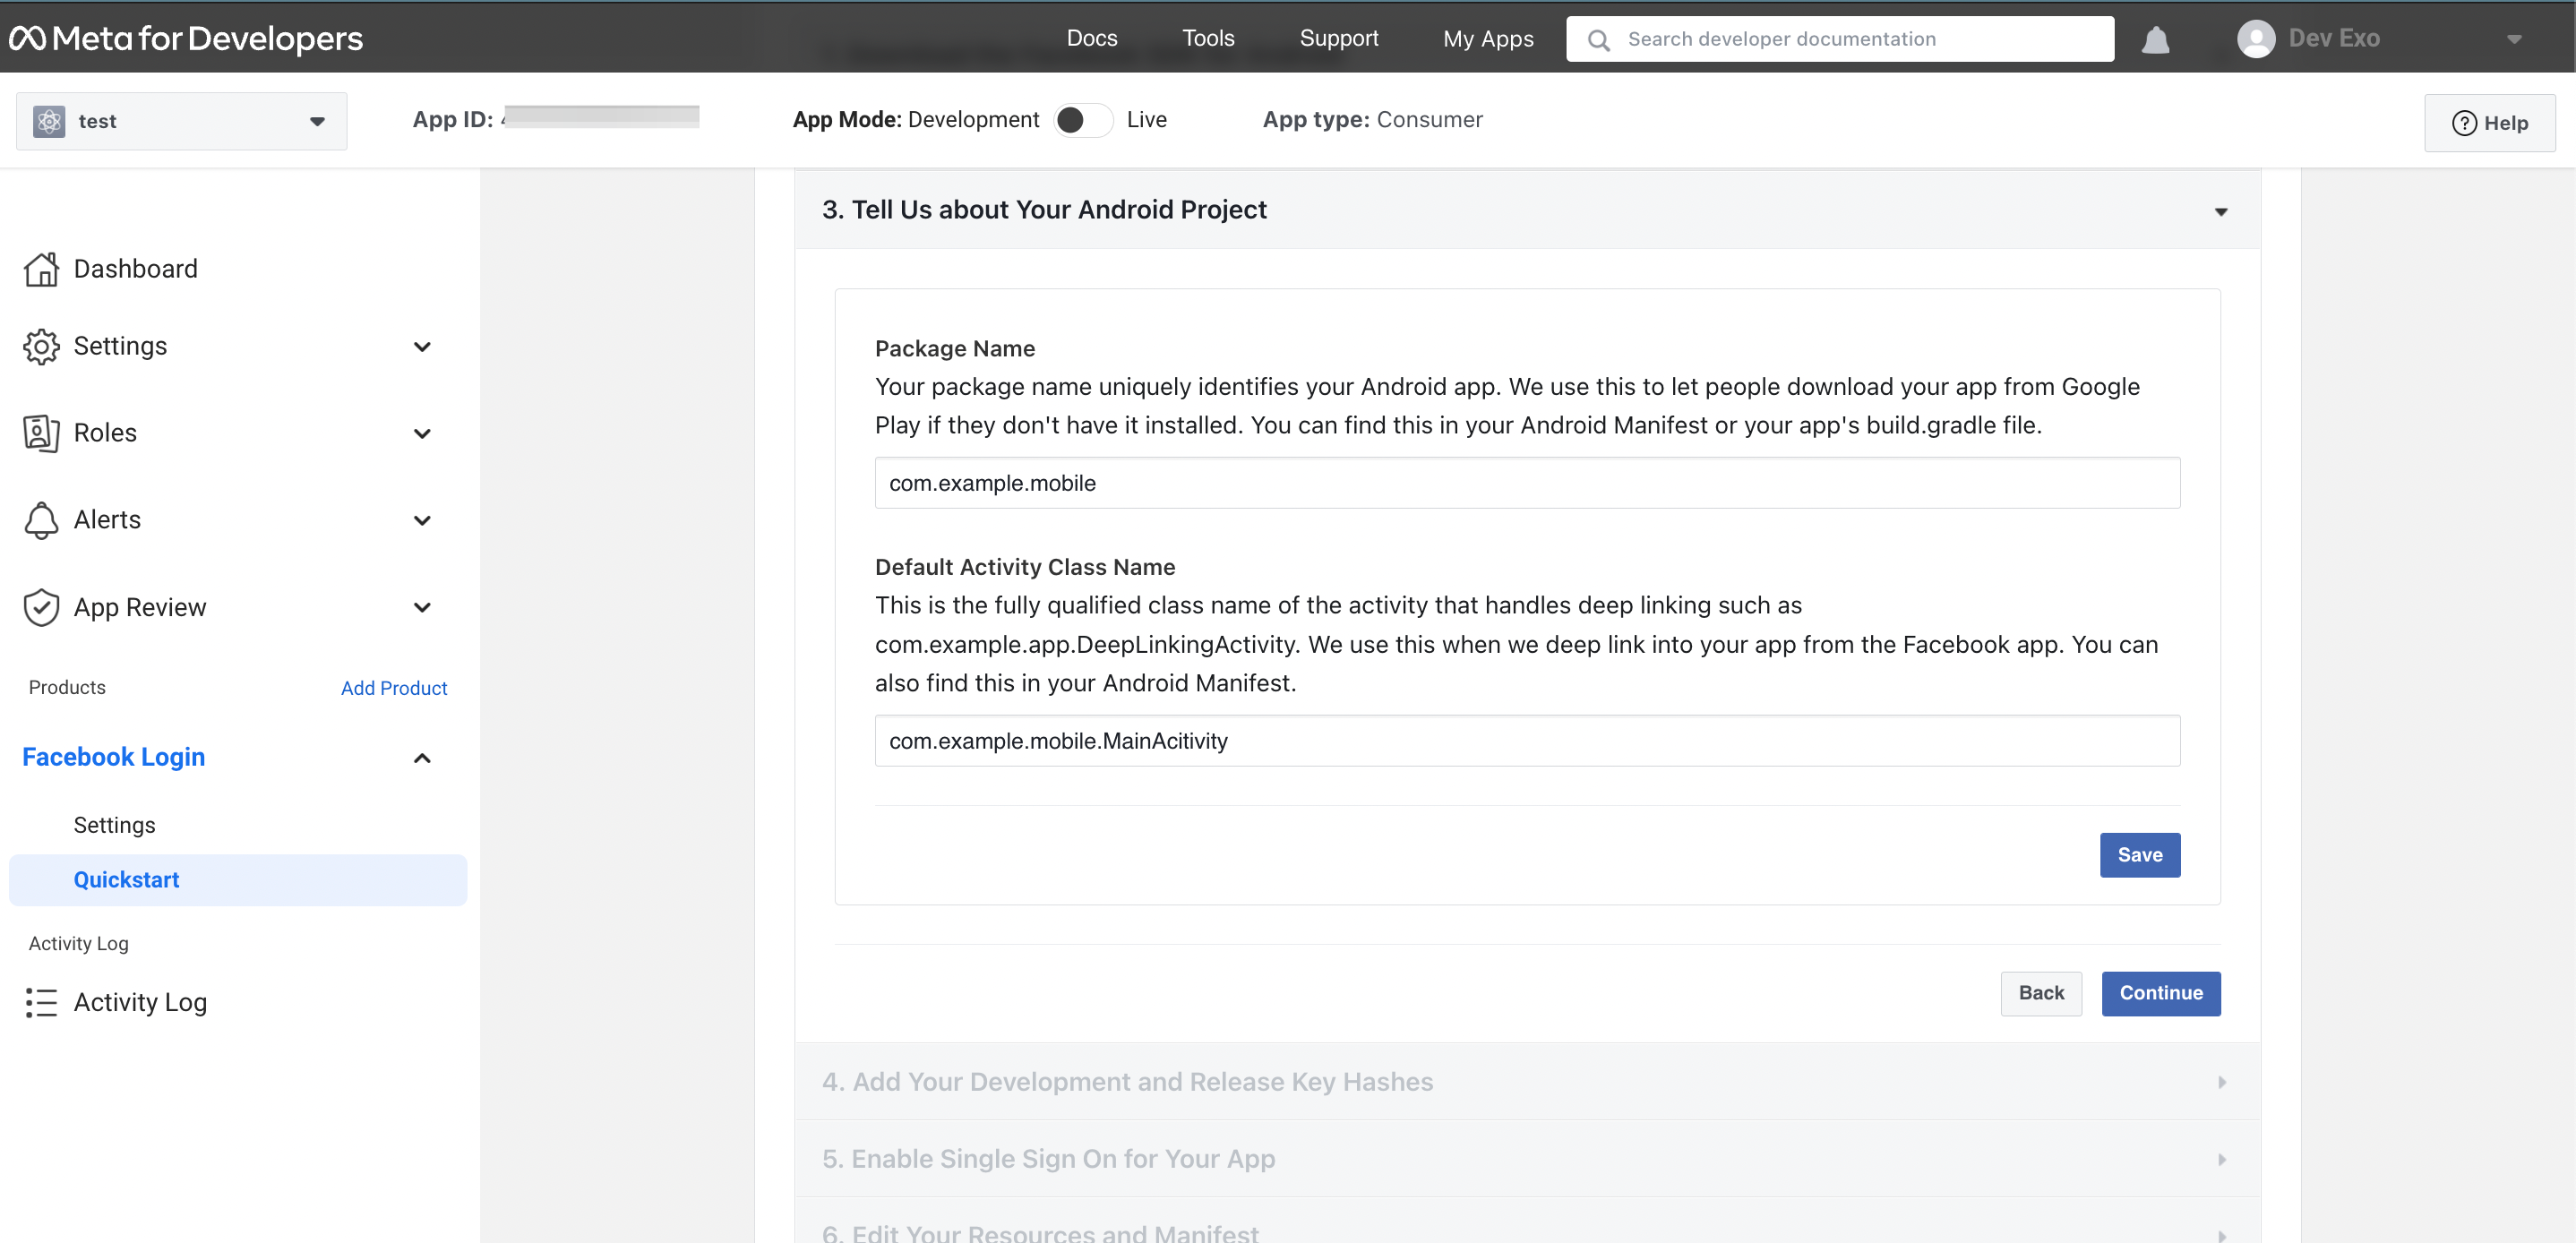
You can find the package name in config.xml file. Default activity class name is your package name plus
.MainActivity. For example, if your package name iscom.example.mobile, then your default activity class name will becom.example.mobile.MainActivity(3) Fill in the
Key Hashes. You can refer here for how to generate a key hash for developer environment.(4) Choose
yesfor Enable Single sing On. ClickSaveand thenNext.(5) Skip the following questions.
Set Up Facebook Login Setting
Steps
-
Click
Settingsunder Facebook Login on the left navigation menu.
-
Enter the following URL in the Valid OAuth redirect URIs field.
https://<my_domain>/api:1/social/handle/Facebook
-
Make sure the
Client OAuth login,Web OAuth login,Use Strict Mode for redirect URIs,Enforce HTTPS,Embedded Browser OAuth Login, andLogin from Devicesare enabled. -
Click
Save Changes. -
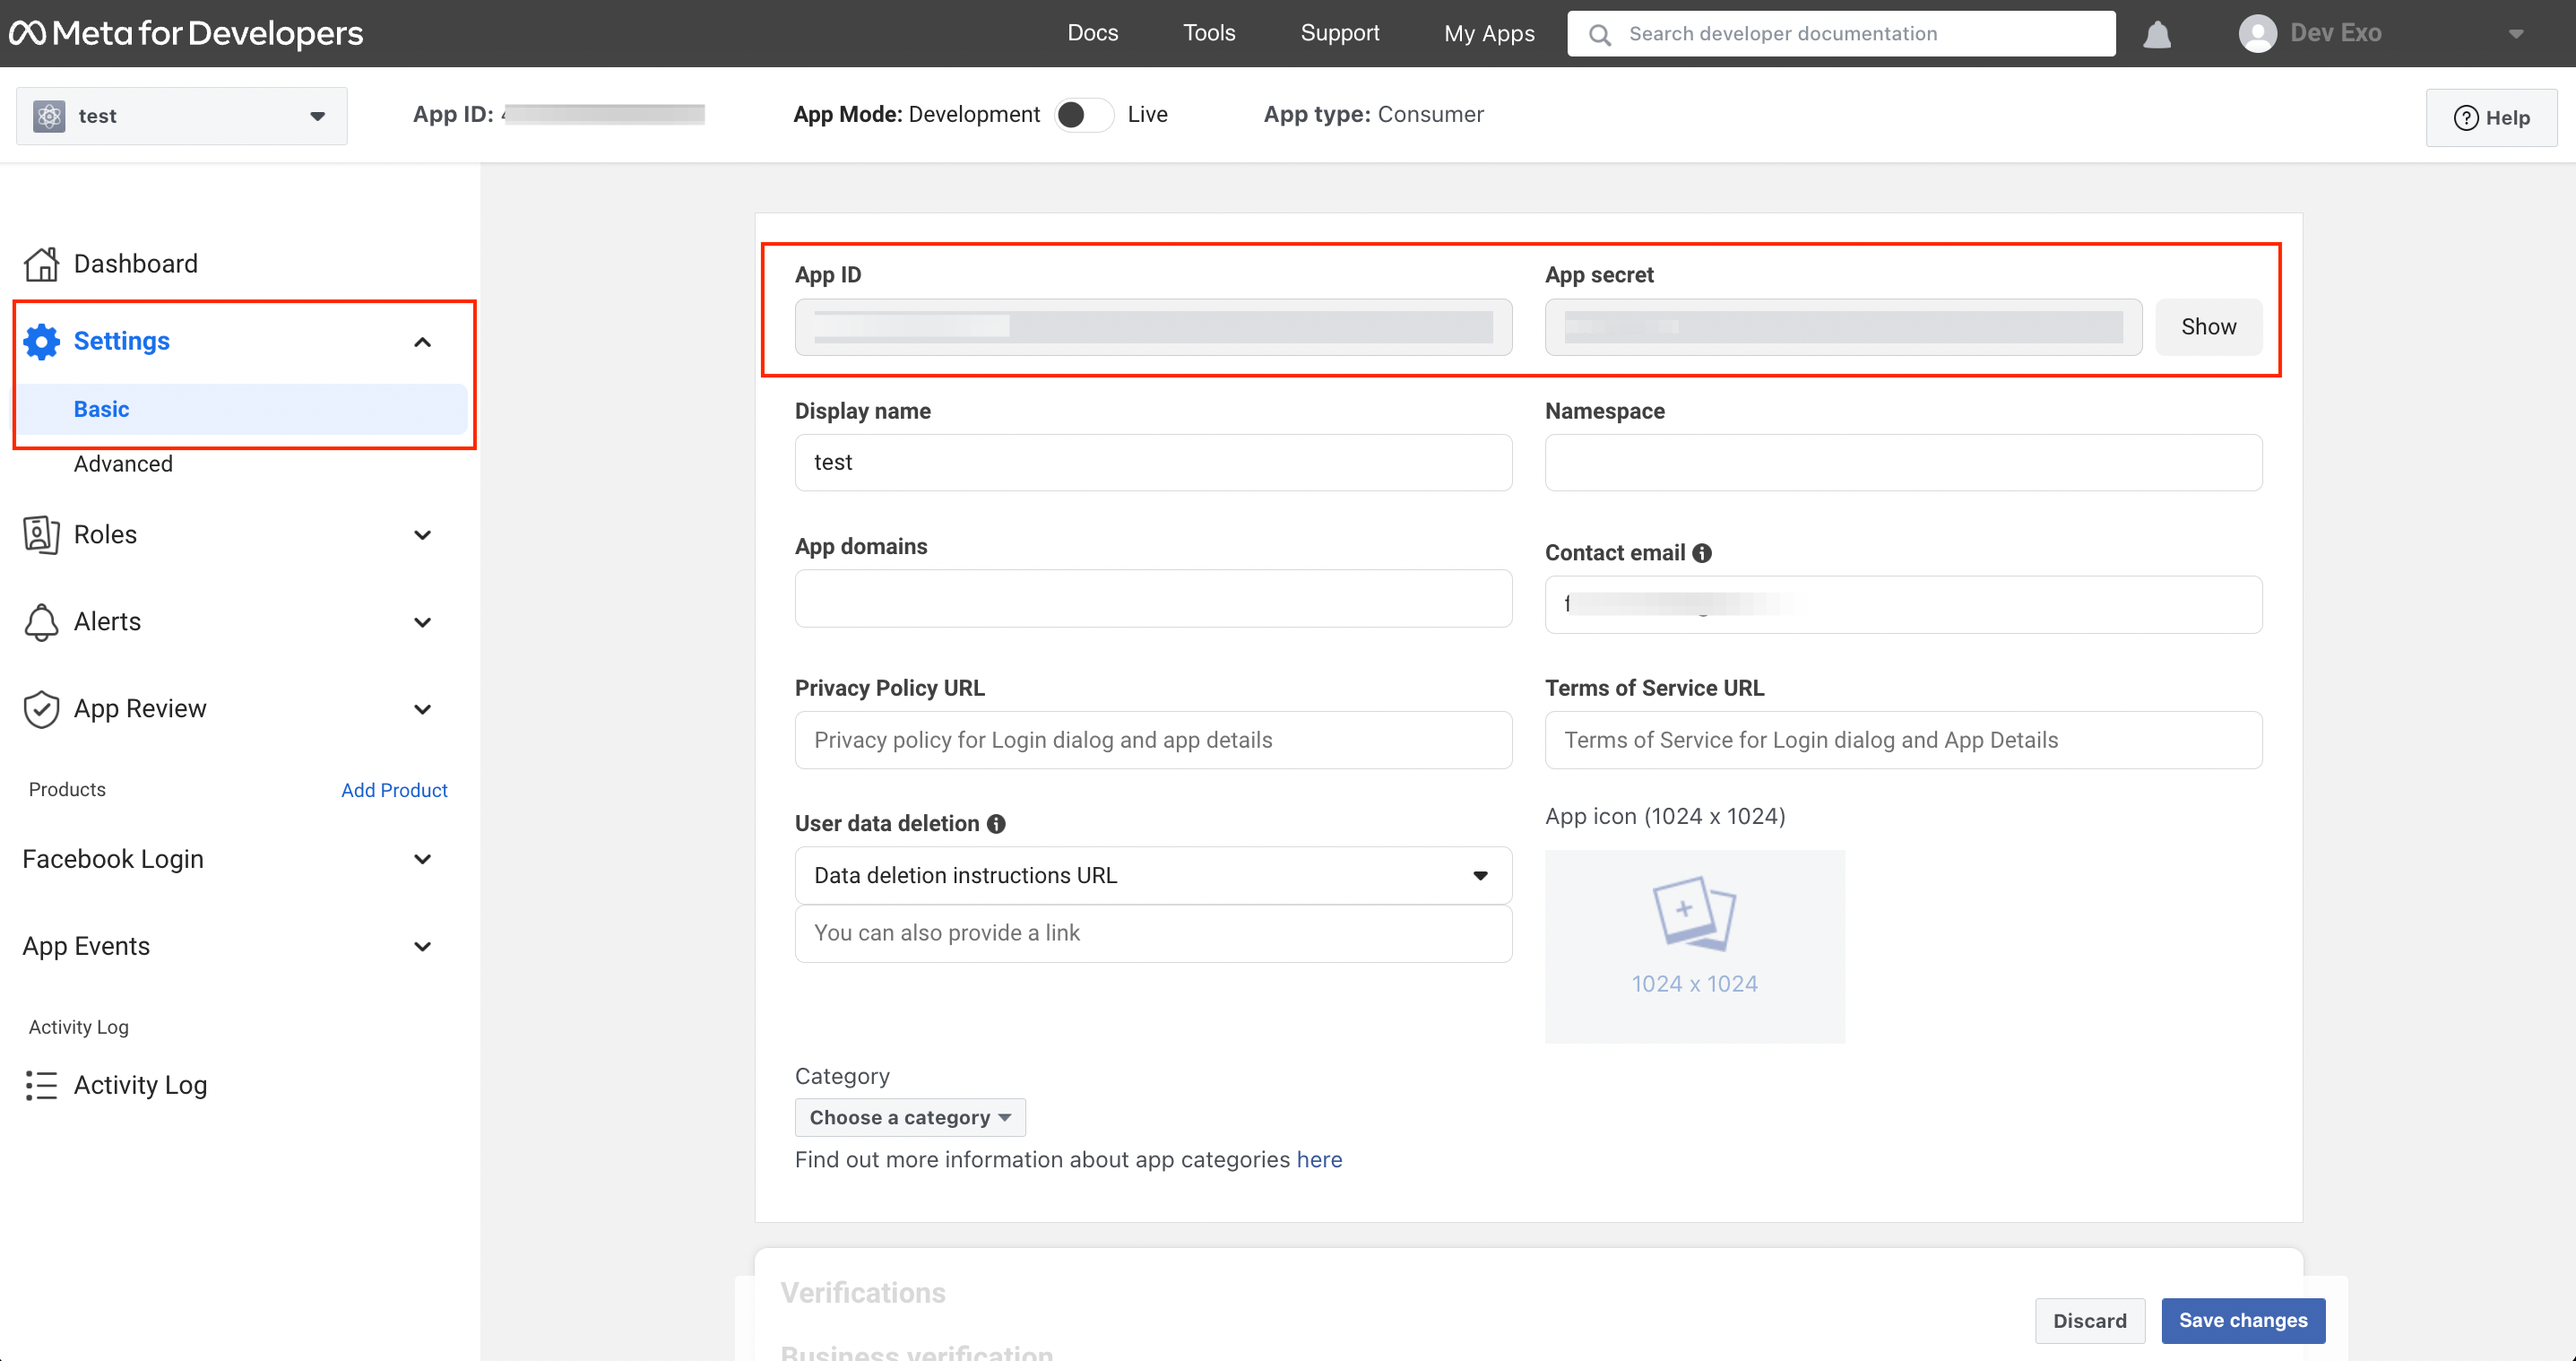
Finally, you must provide your App ID and App Secret to Exosite to enable your solution for Facebook Login. (You can find them on Settings → Basic.)
Update Your App Project
-
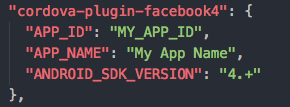
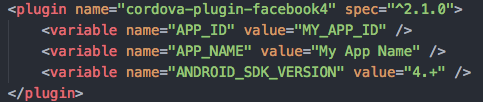
Update the APP_ID and the APP_NAME in your "package.json" and "config.xml" files.

-
Reinstall your app dependencies and platforms. Any time you change your "config.xml" or "package.json", you need to do the following remove commands and then reinstall the dependencies and platforms.
(1) Remove node_modules, plugins and platforms
cd hamv_mobile
rm -rf node_modules
rm -rf plugins
rm -rf platforms
(2) Remove platform
ionic cordova platform rm android
ionic cordova platform rm ios
(3) Reinstall project dependencies
npm install(4) Reinstall platforms
ionic cordova platform add android
ionic cordova platform add ios
Publish Your Facebook App
Steps
-
Go to Meta for developer and select your app.
-
Click
Settings→Basicon the left navigation menu.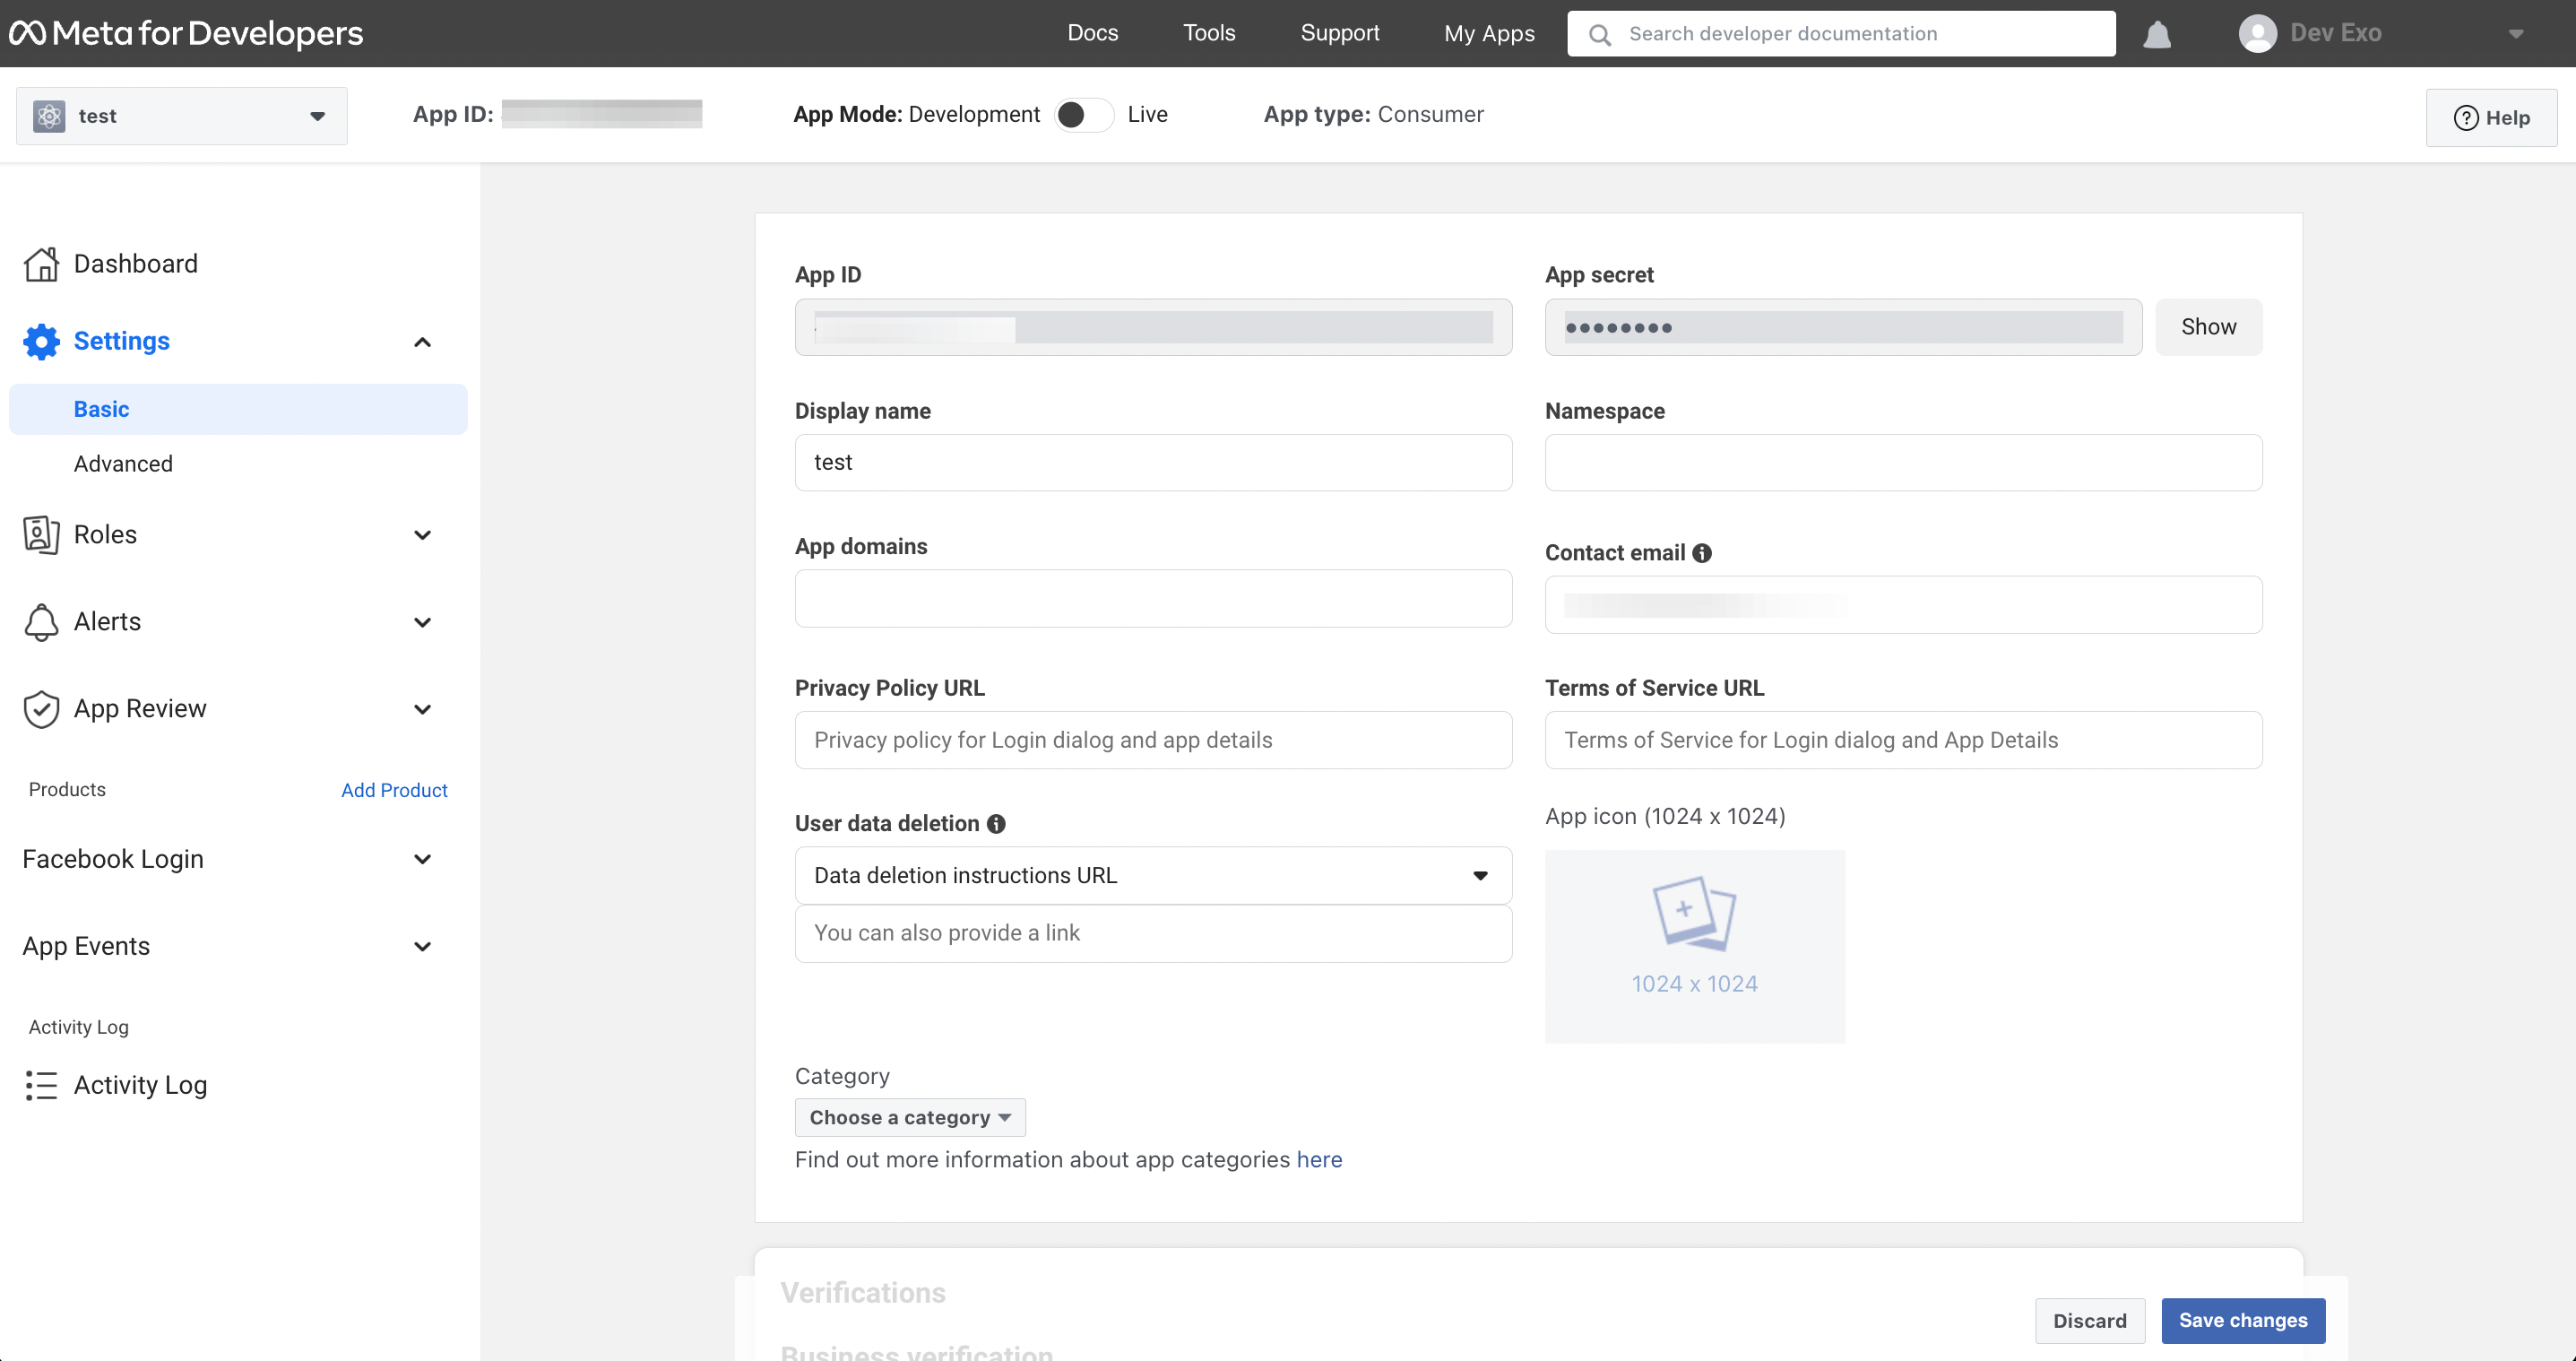
-
Complete the information needed and click
Save Changes. -
Once the settings are done, please switch the App mode to
Live.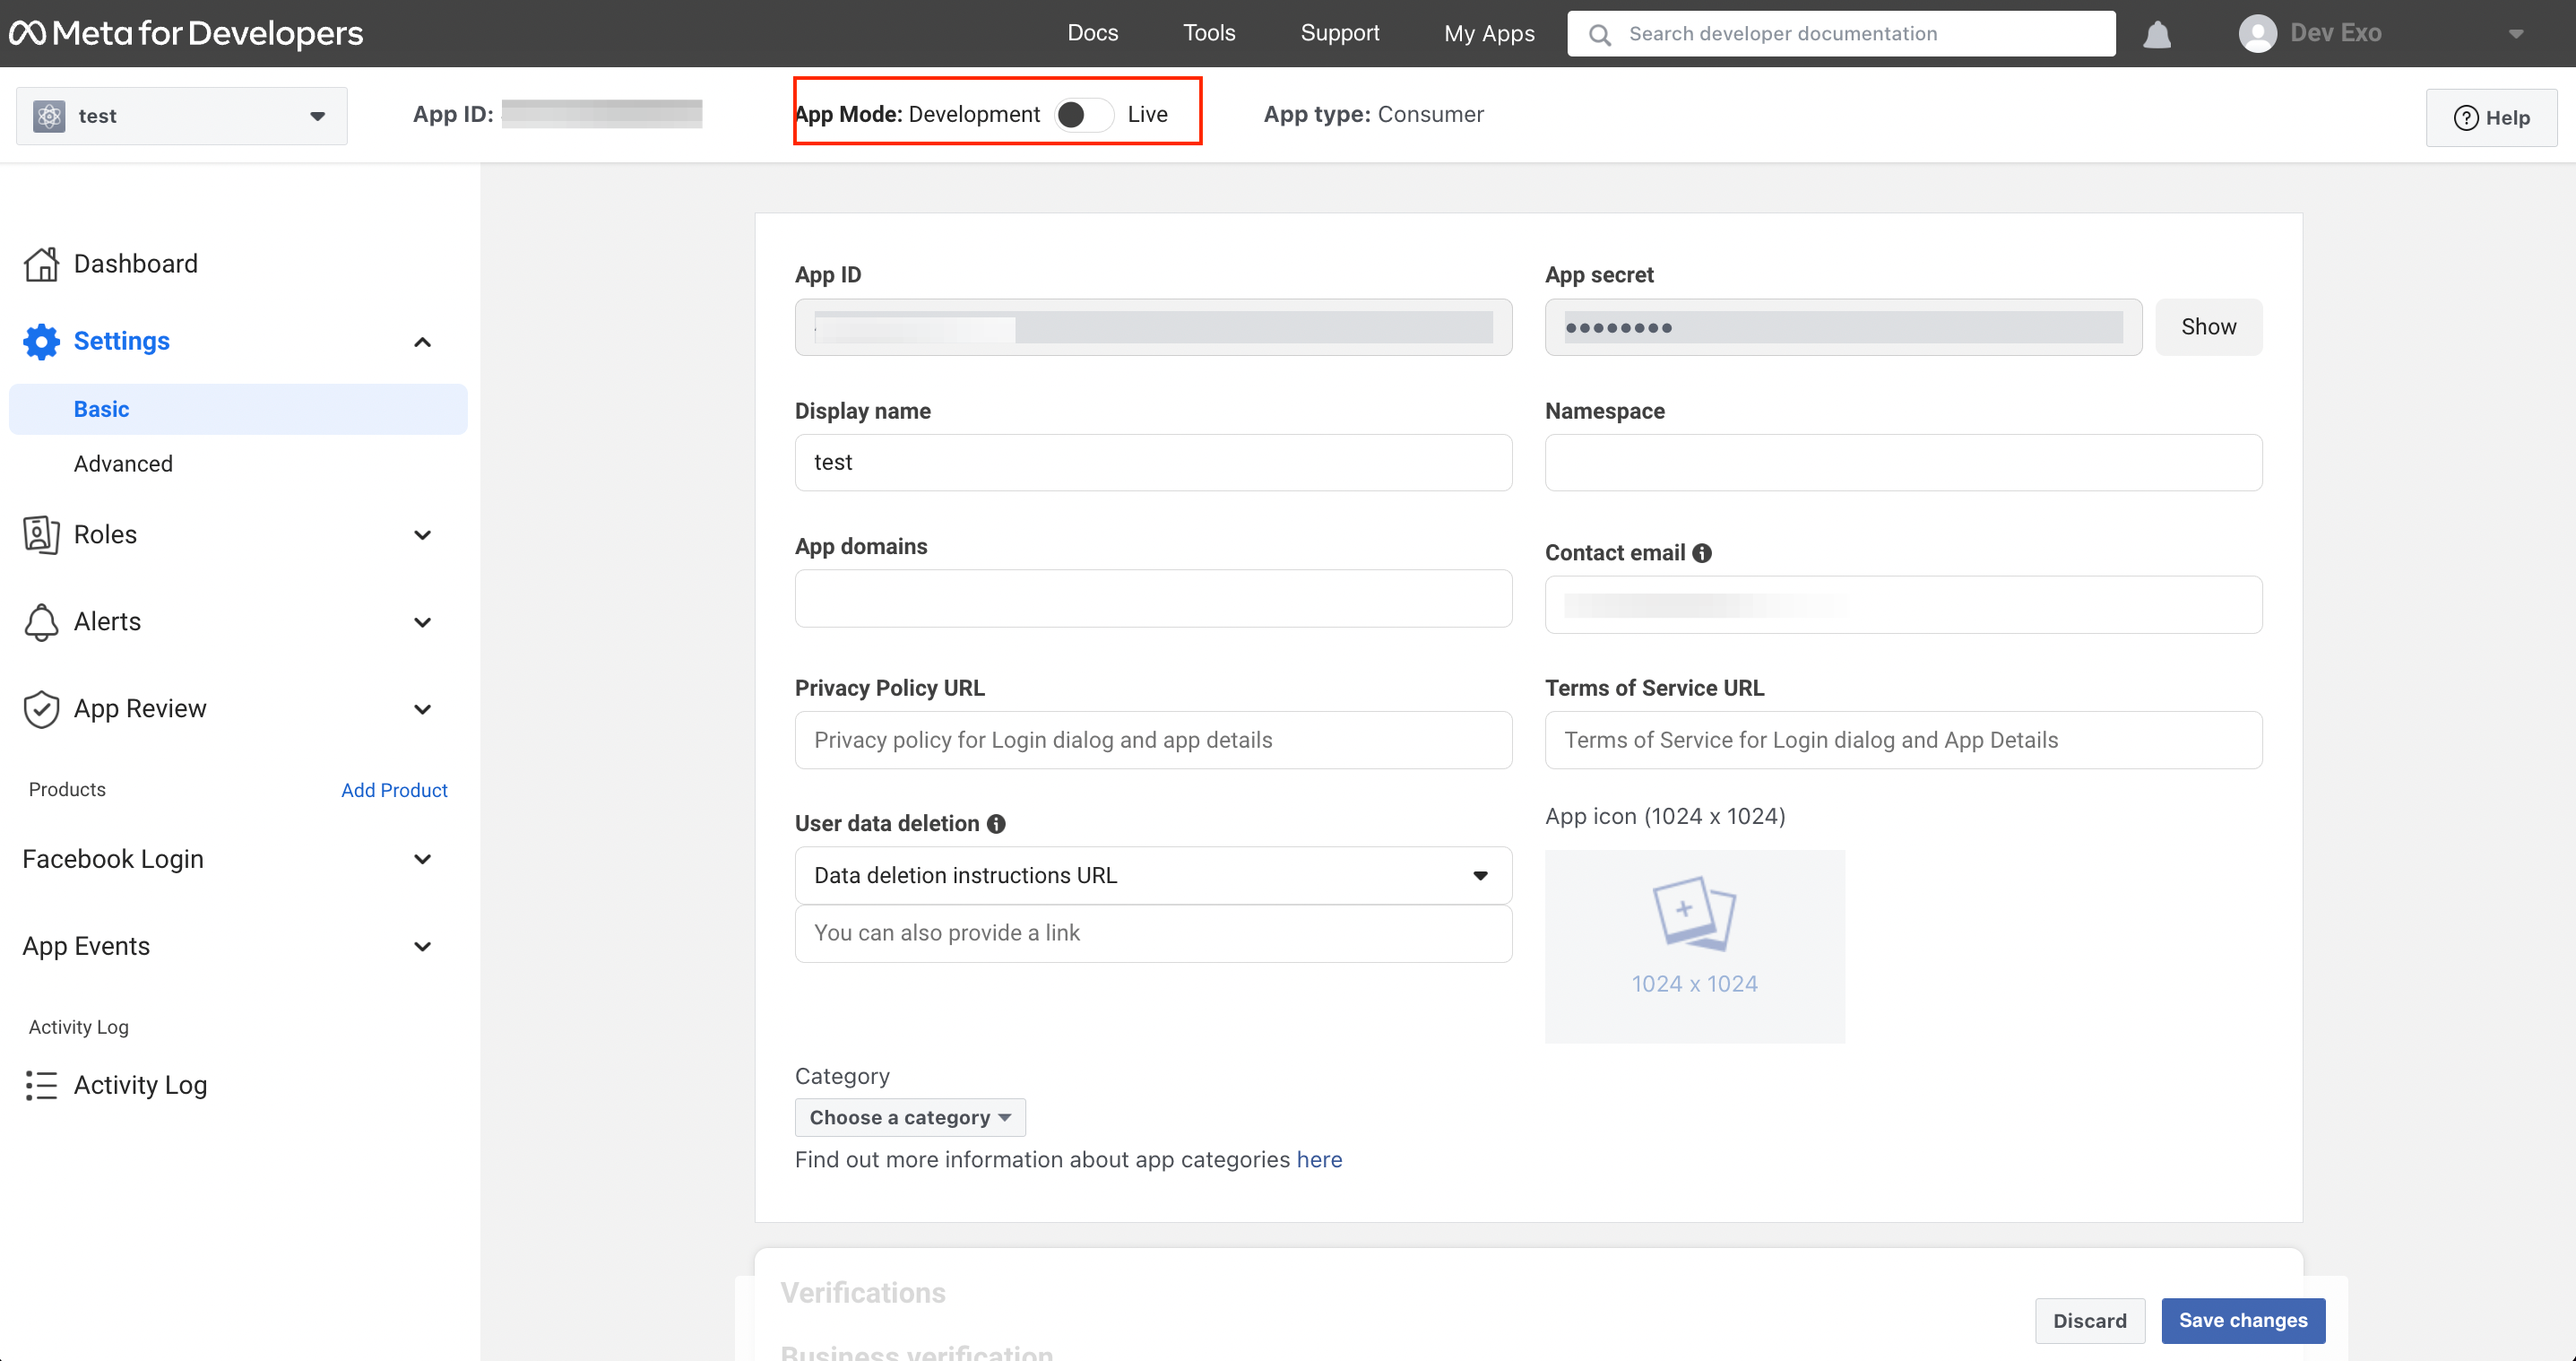
-
Congratulations! Your app can be accessed through Facebook login service.