Enabling Google Login
ExoHome supports Sign in with Google function as default for users logging into the ExoHome app with Google accounts. Please follow the settings and provide the final results to Exosite. We'll assist you with the rest. If you prefer not to provide this login method to the users, please inform Exosite to turn off the related cloud settings.
Prerequisite
- Google developer account
- Firebase developer account
- Release/debug Keystore file generated for building the Android App
Requirements
To enable Google login, you must create a project in Firebase Console and Google Cloud Console. Please make sure the follow settings are completed before you start building your apps:
- Setup in Firebase Console
- Setup in Google Cloud Console
- Download
GoogleService-info.json(Android) andGoogleService-info.plist(iOS) for building APPs. - Provide the
Web client IDandWeb client secretto Exosite team after you finish the above settings.
Setup in Firebase Console
Steps to Create a Firebase Project
-
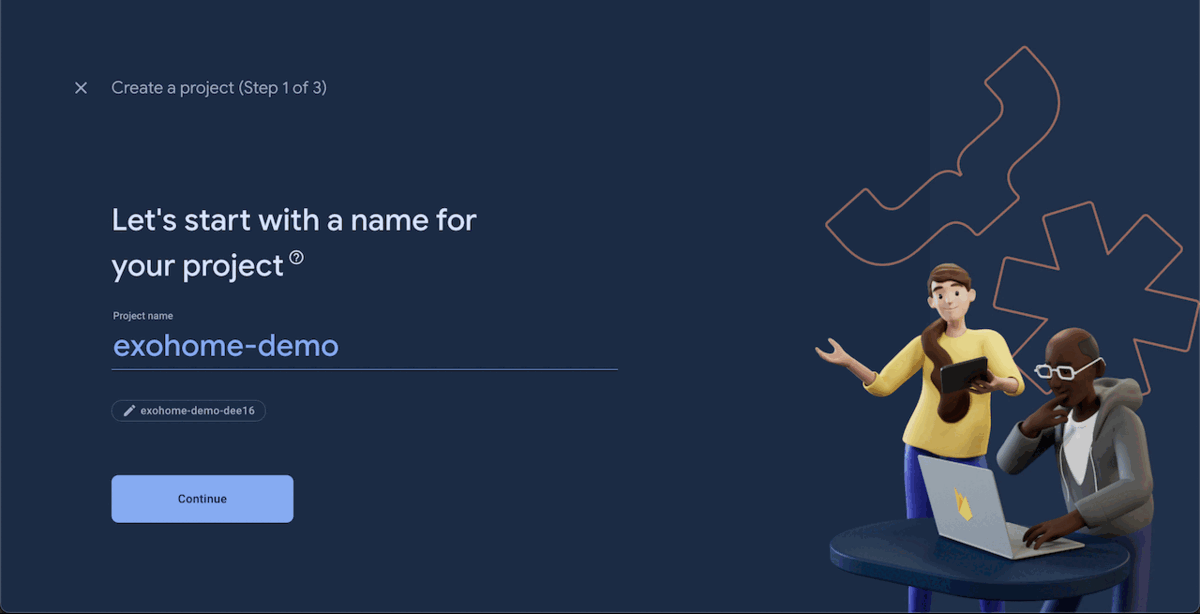
Go to Firebase Console and create a project. Skip this step if you already created one for push notification.
-
Click into
All Productsfrom the side menu and chooseAuthentication.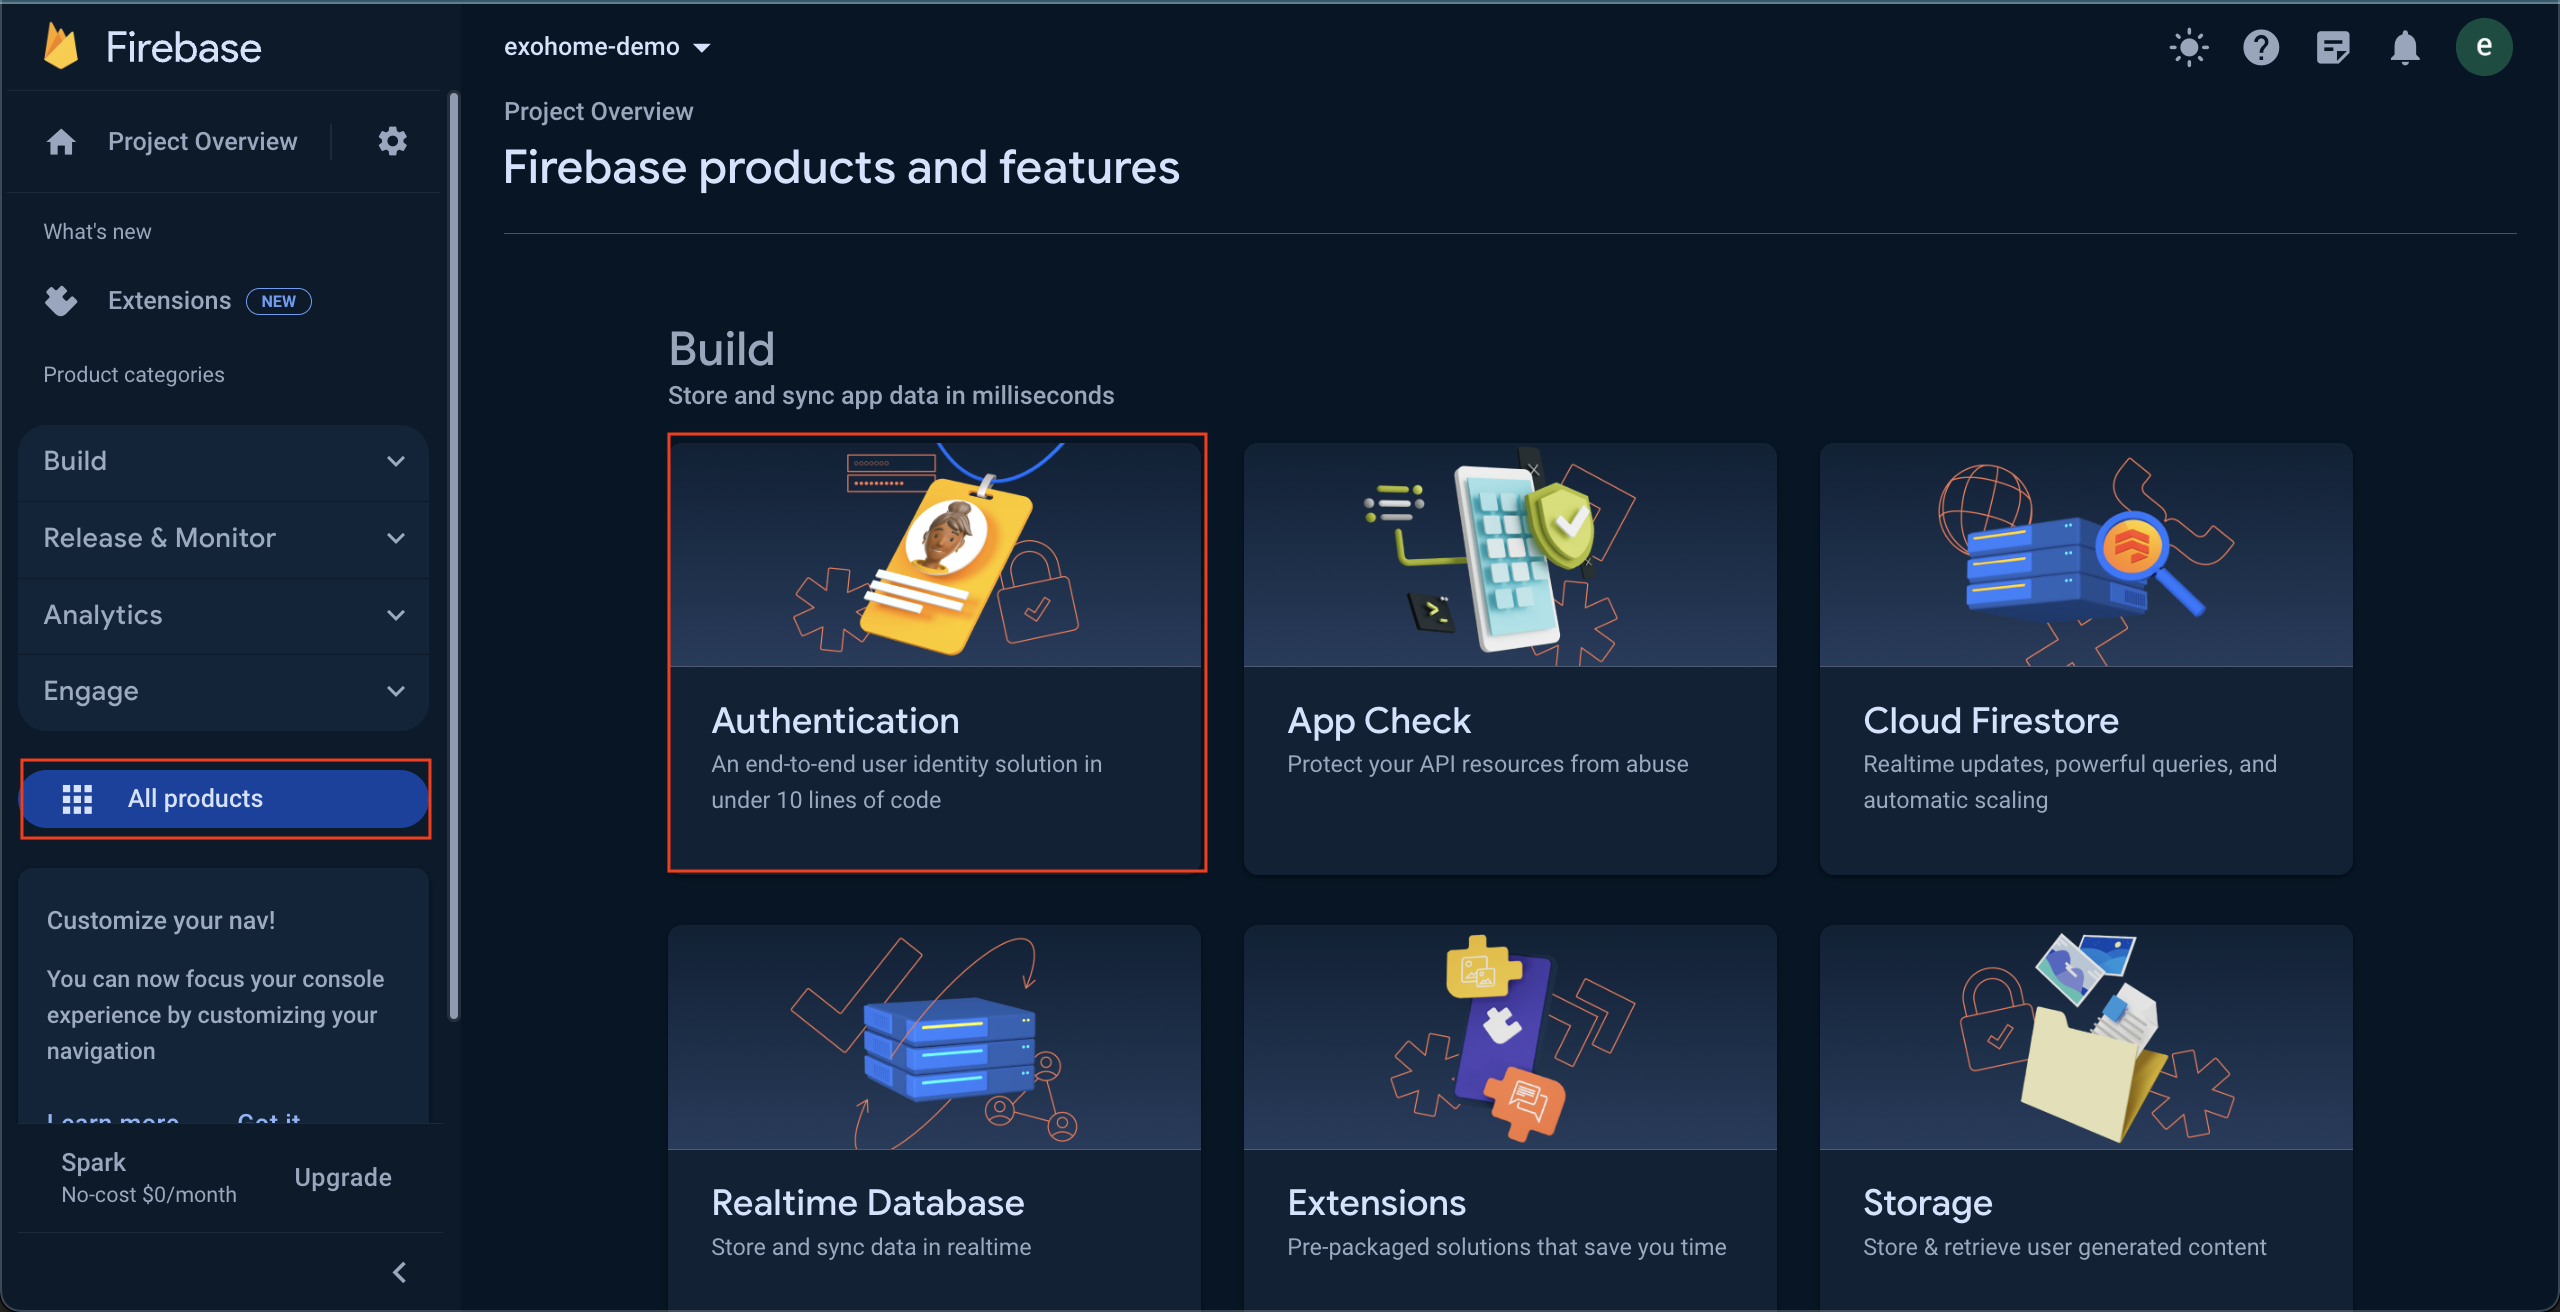
-
In the
Sign-in methodtab, clickGoogleand enable the service. ClickSave.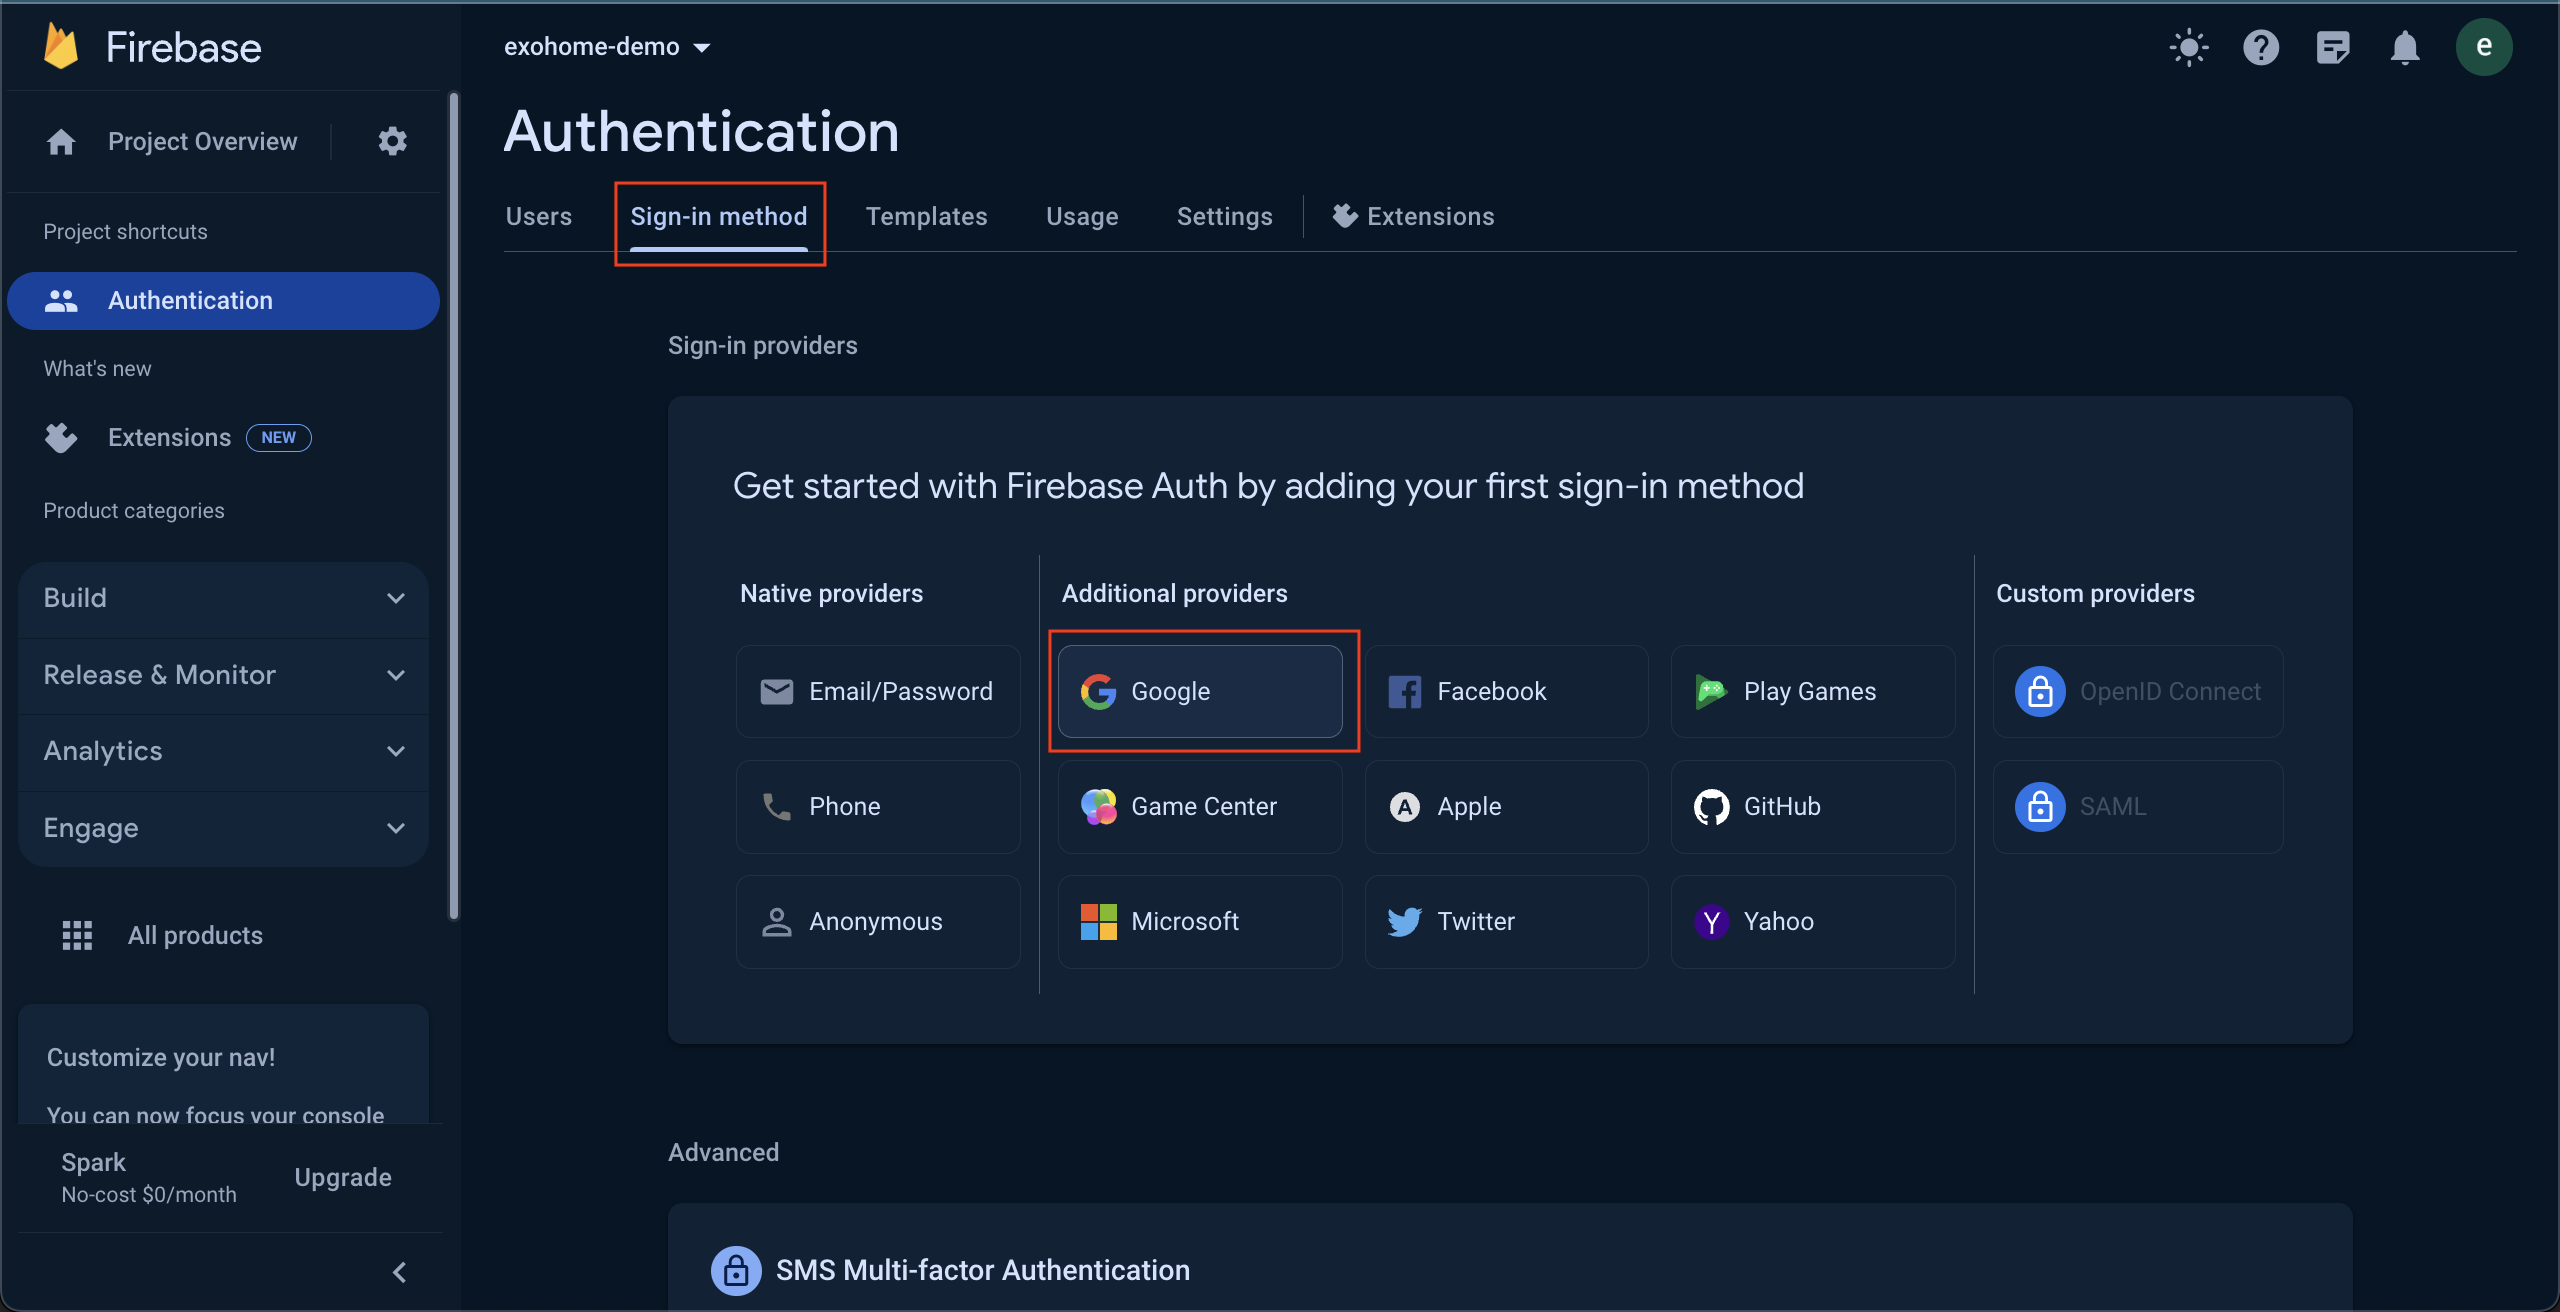
-
You will be able to see the
Web client IDandWeb client secreteafter clicking save button. Please copy the info and provide it to Exosite team.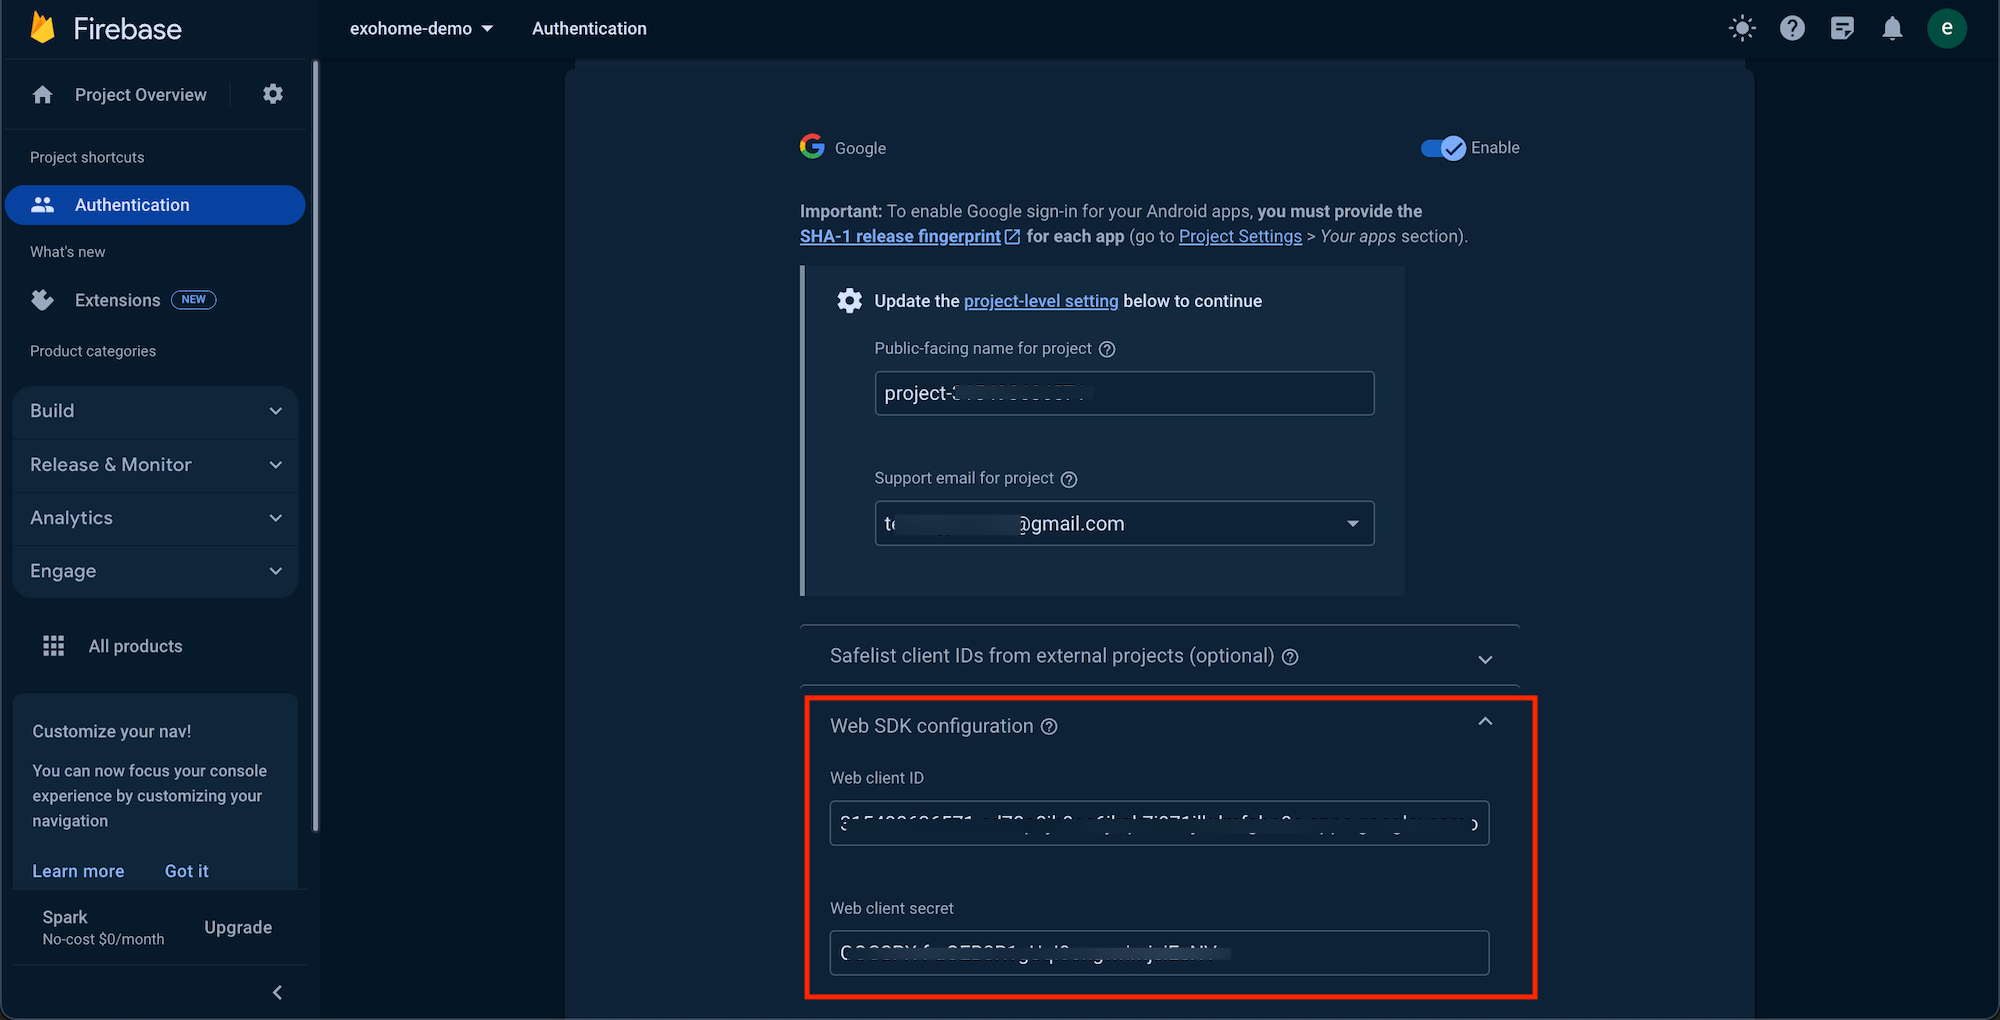
Add iOS APP (skip if you have setup push notification before)
-
Go to
Project settingsand scroll down to the buttom. Create an iOS app by clicking the icon.
-
Download
GoogleService-Info.plistfile and copy it to the ExoHome project root folder before you start to build the iOS App.
Add Android APP
-
You should create Android debug/release keystore file(s) and put them in the
hamv_mobile/keystorefolder.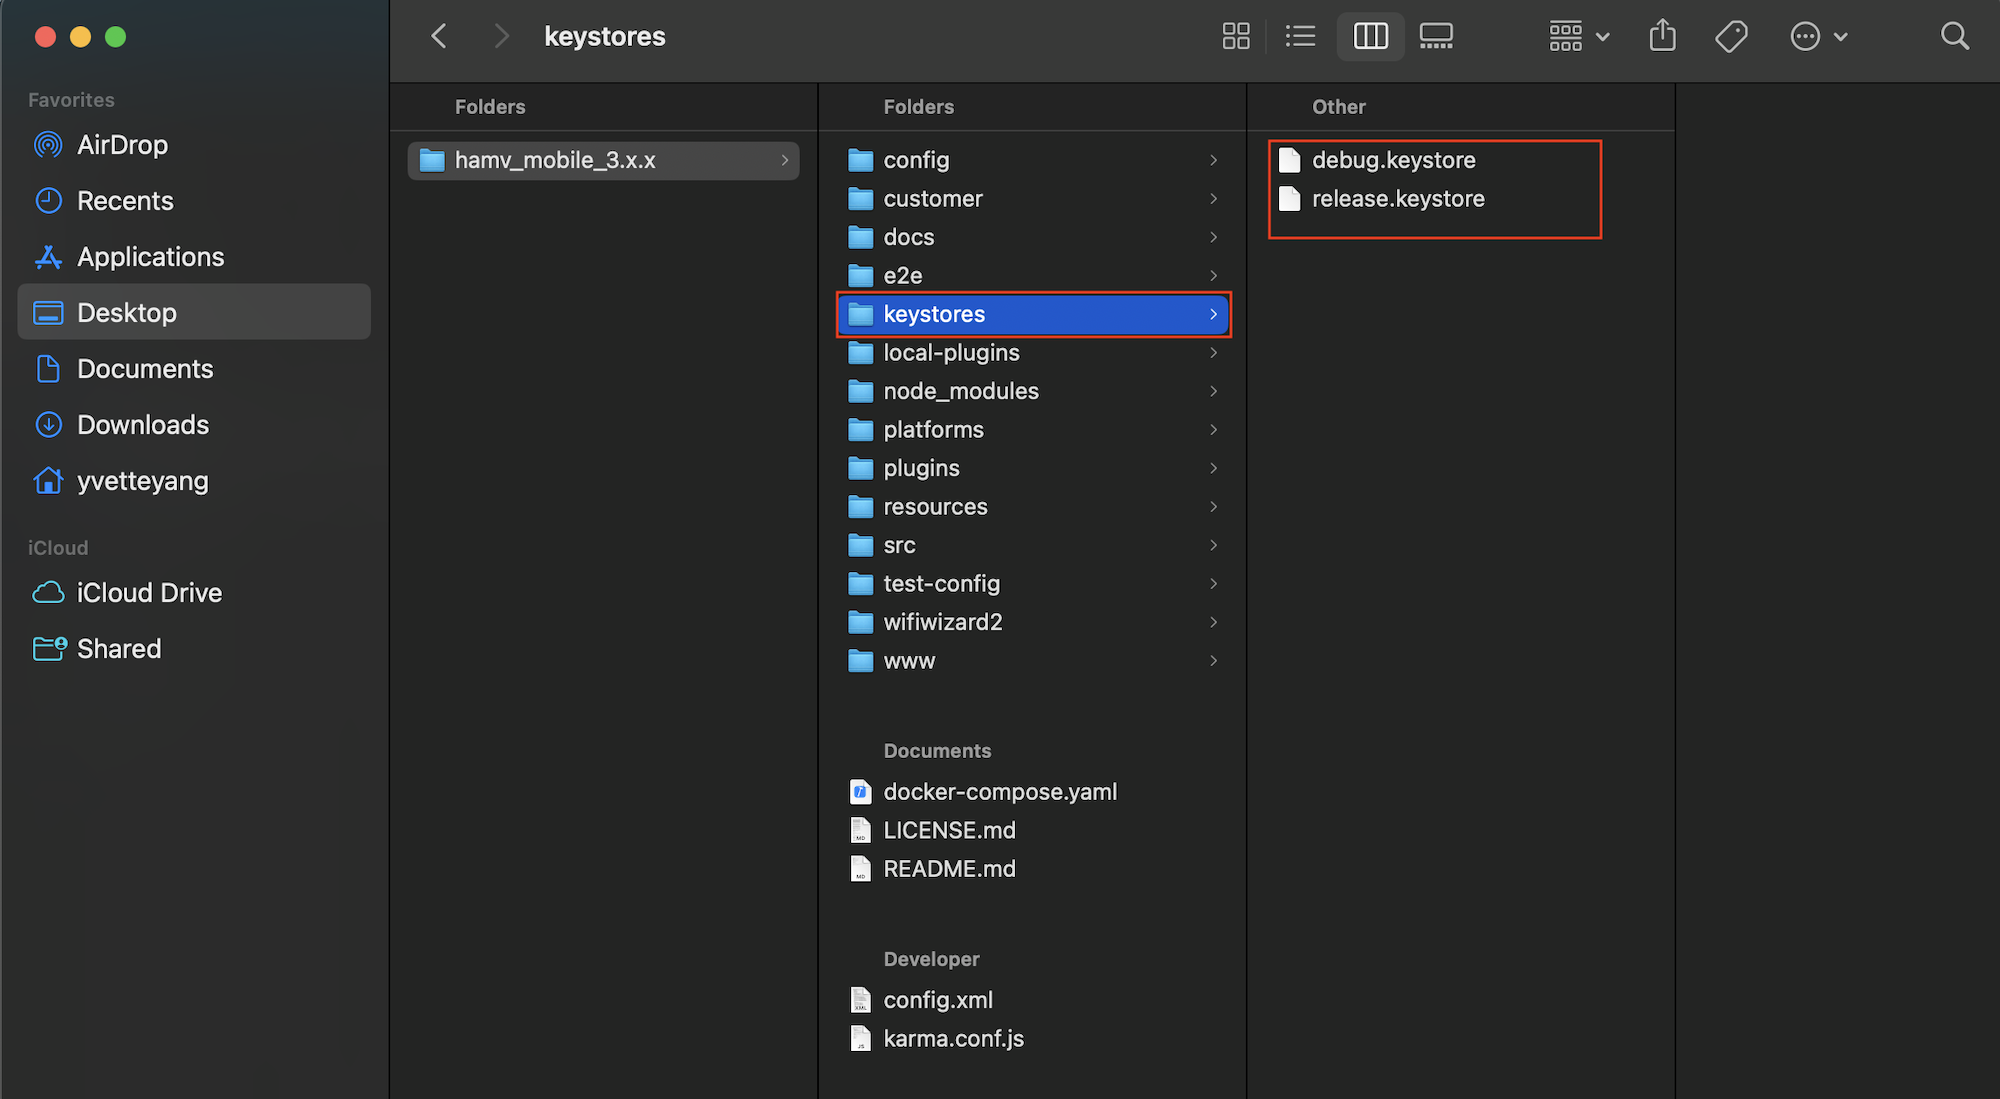
-
Open the terminal and cd to the keystore folder. Run the following command to generate SHA-1 fingerprint certificate. Copy it and save for later settings.
Debug:
keytool -keystore debug.keystore -list -vRelease:
keytool -keystore release.keystore -list -v -
Go to
Project settingsand scroll to the buttom. Create an Android app by clicking the icon (skip this step if you already setup push notification before).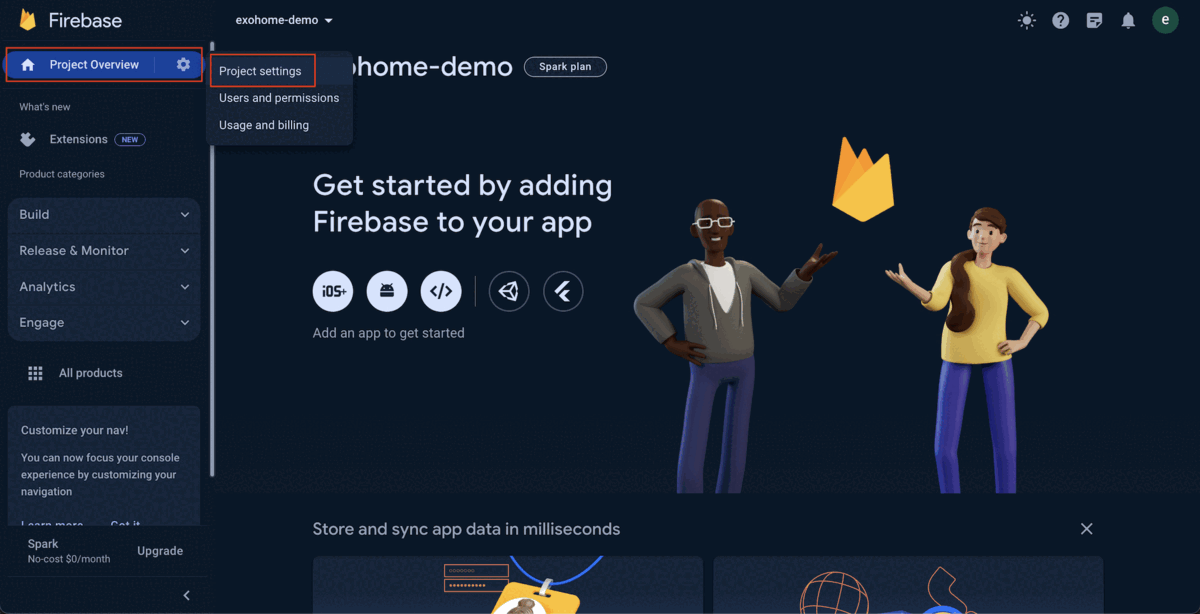
Note
Register the app without filling "Debug signing certificate SHA-1" and keep clicking
Nextbutton to the filnal step. -
Find your Android App and click
Add fingerprint. Paste the SHA-1 you generated in step 2 and save.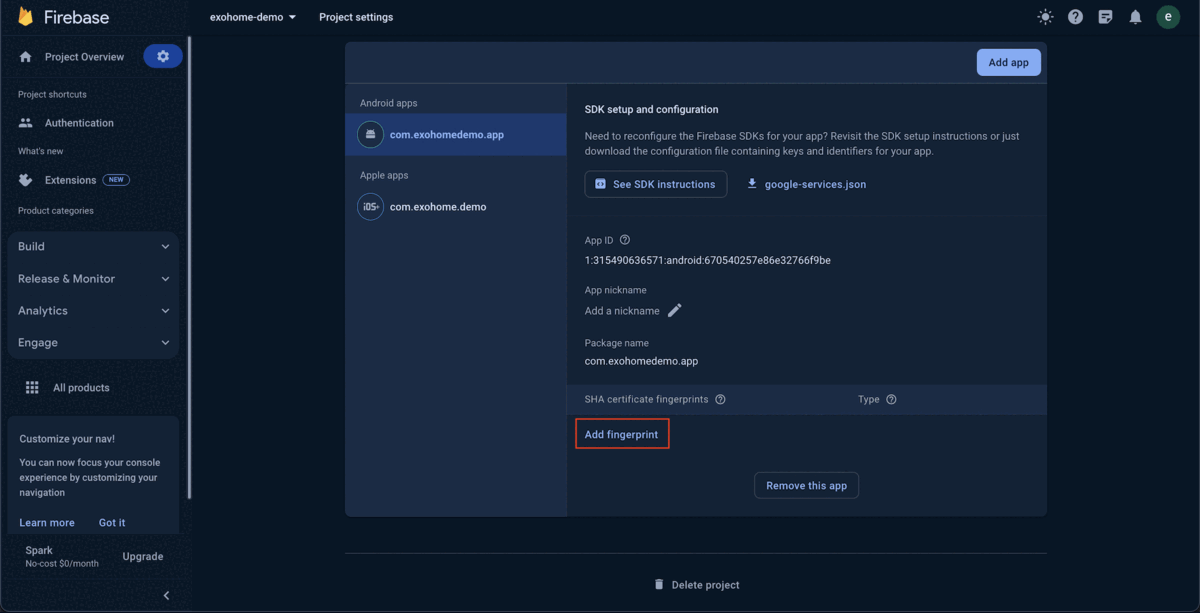
-
Download the
google-services.jsonfile and copy it to the ExoHome project root folder.
Note
If you have previously set up push notification, please download the new google-services.json file and overwrite the old one.
Setup in Google Cloud Console
Steps
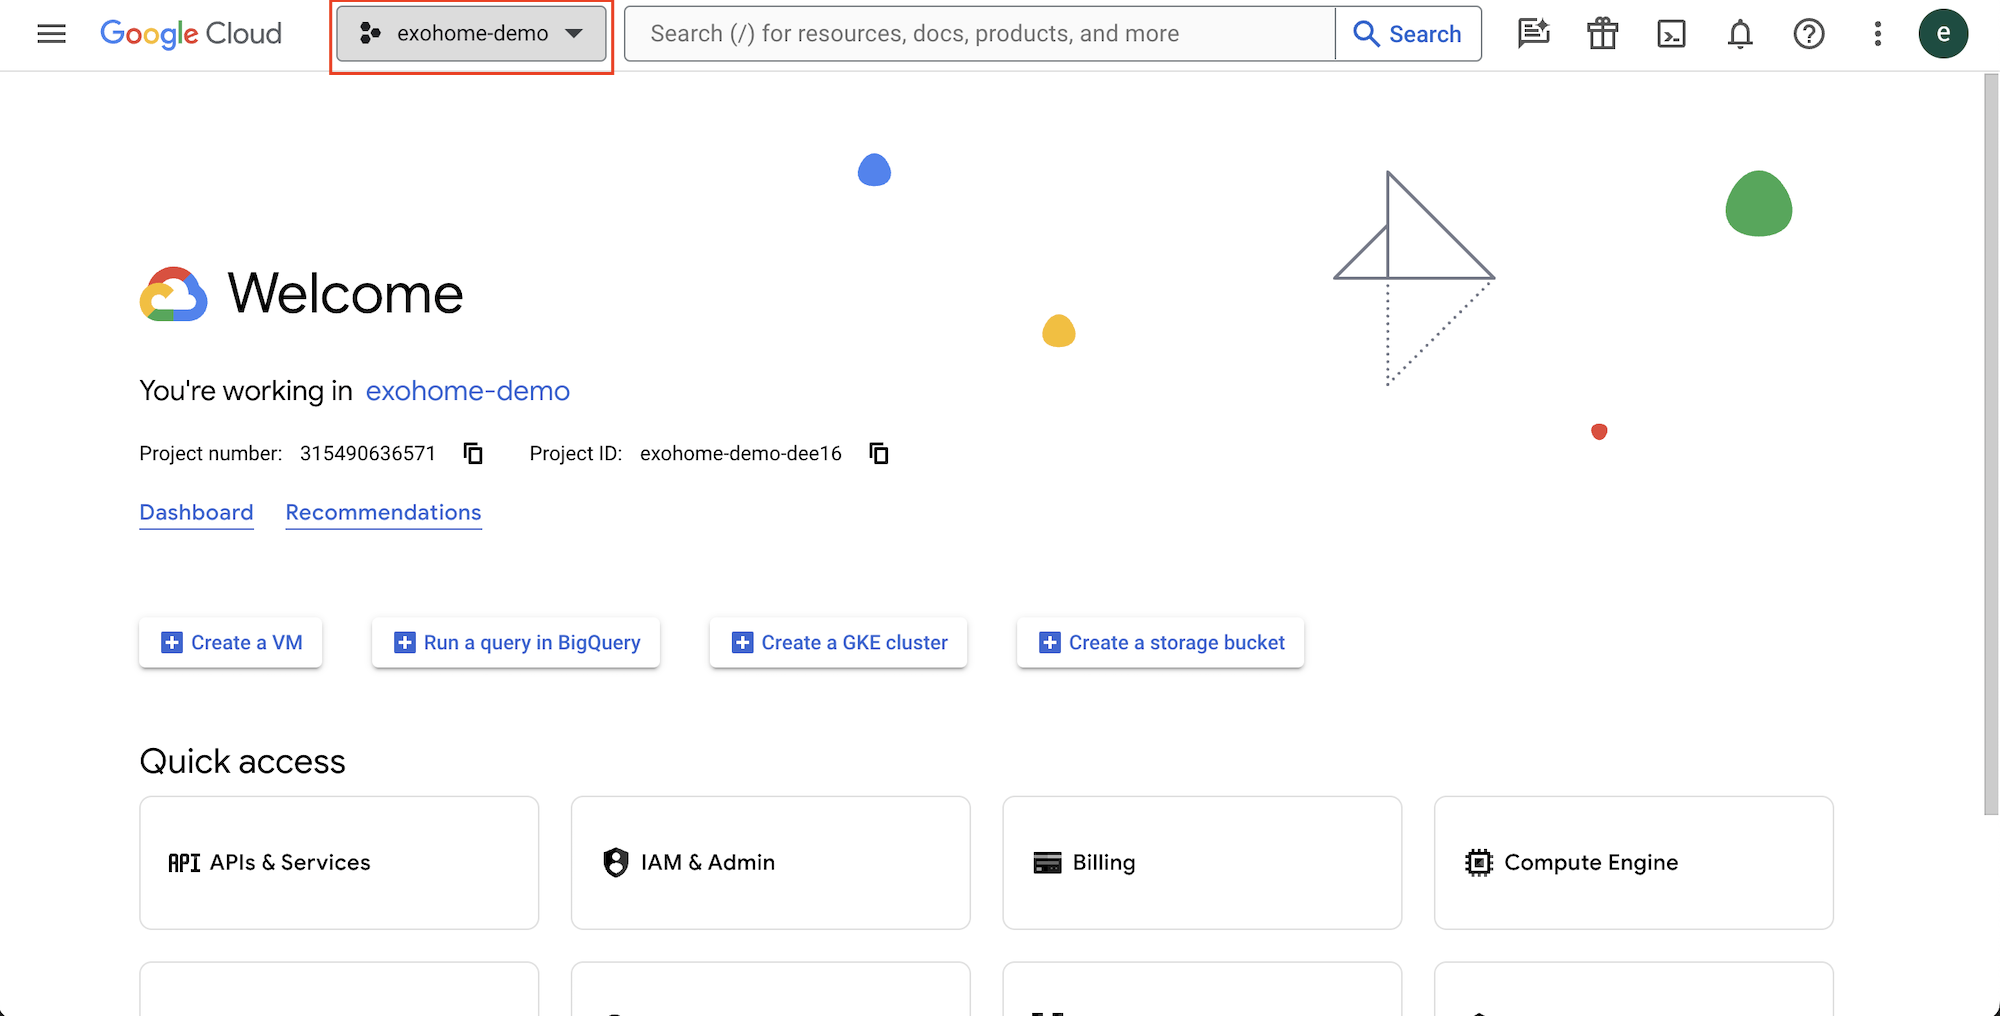
-
Go to Google Cloud Console, where you will also find the project you just created in Firebase. Please choose this project and go to the next step.
-
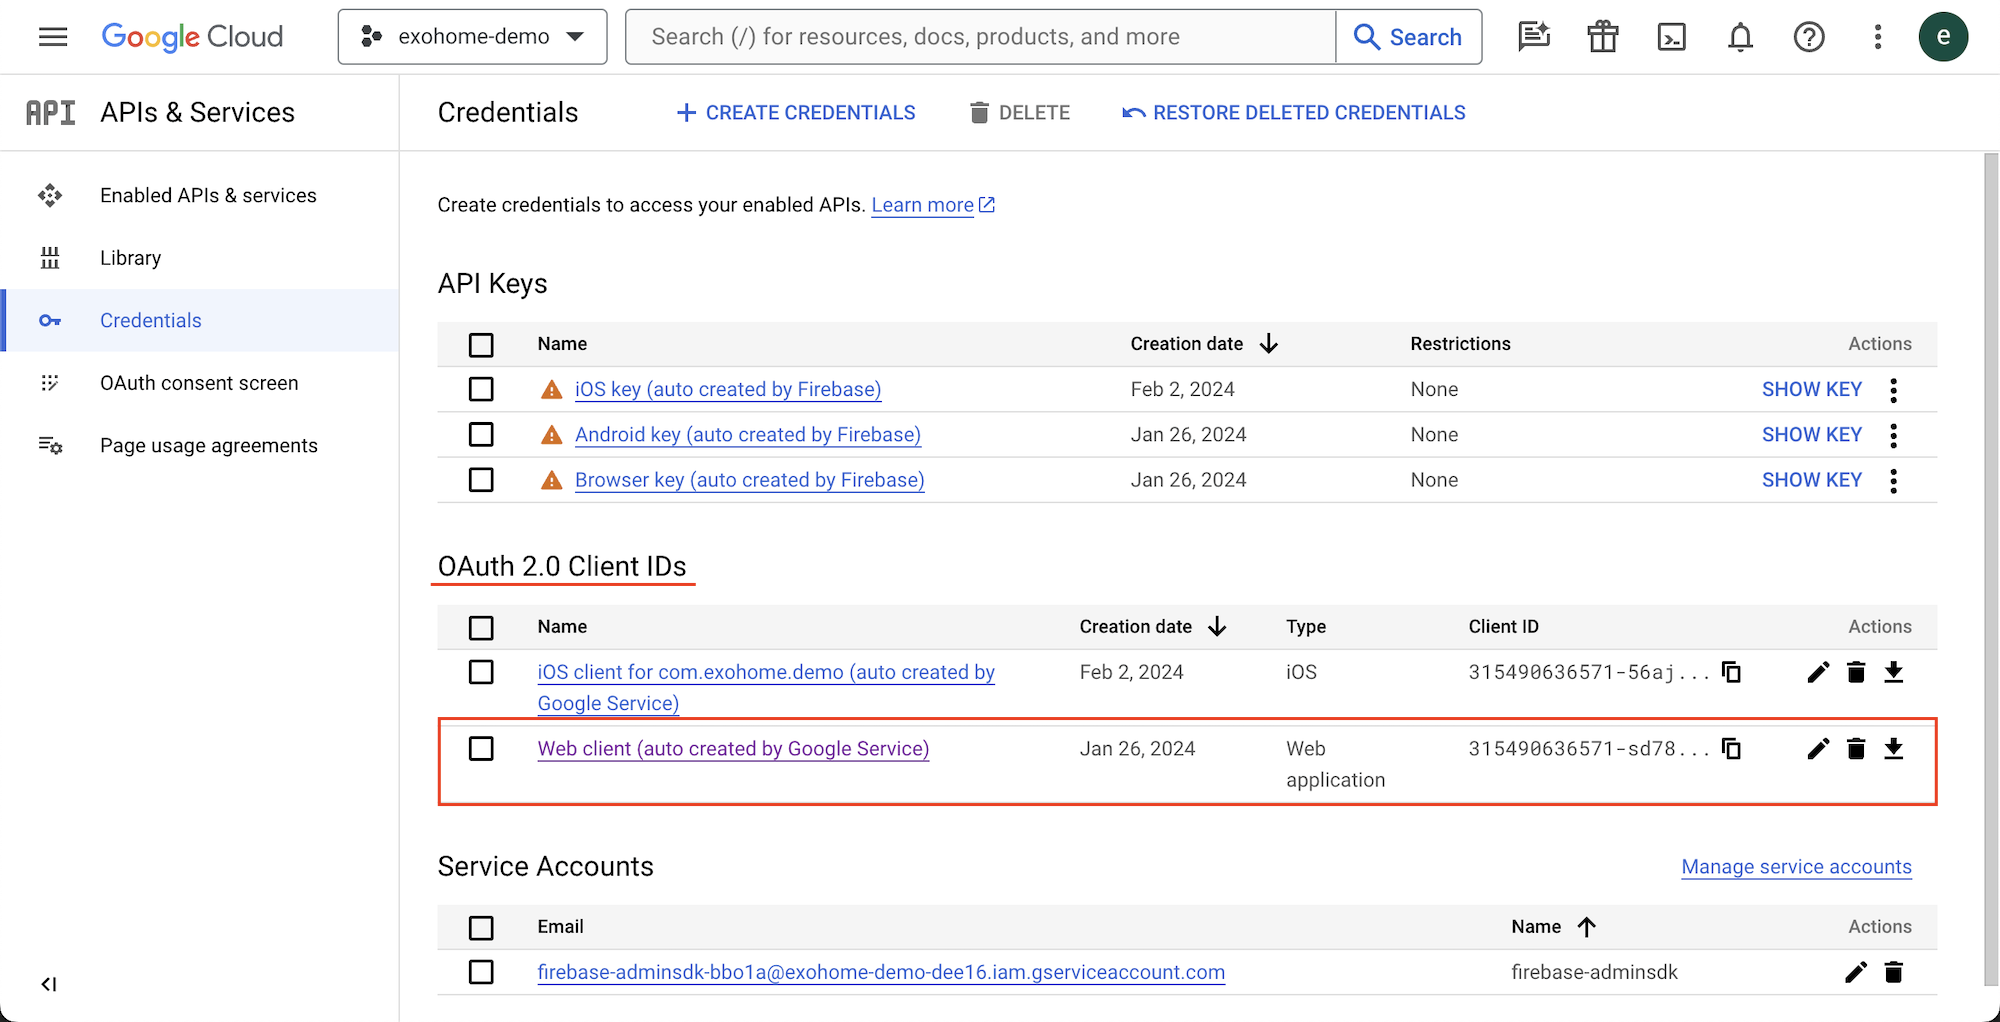
Open side menu and go to
APIs and Services→Credentials. Click intoWeb clientunderOAuth 2.0 IDs.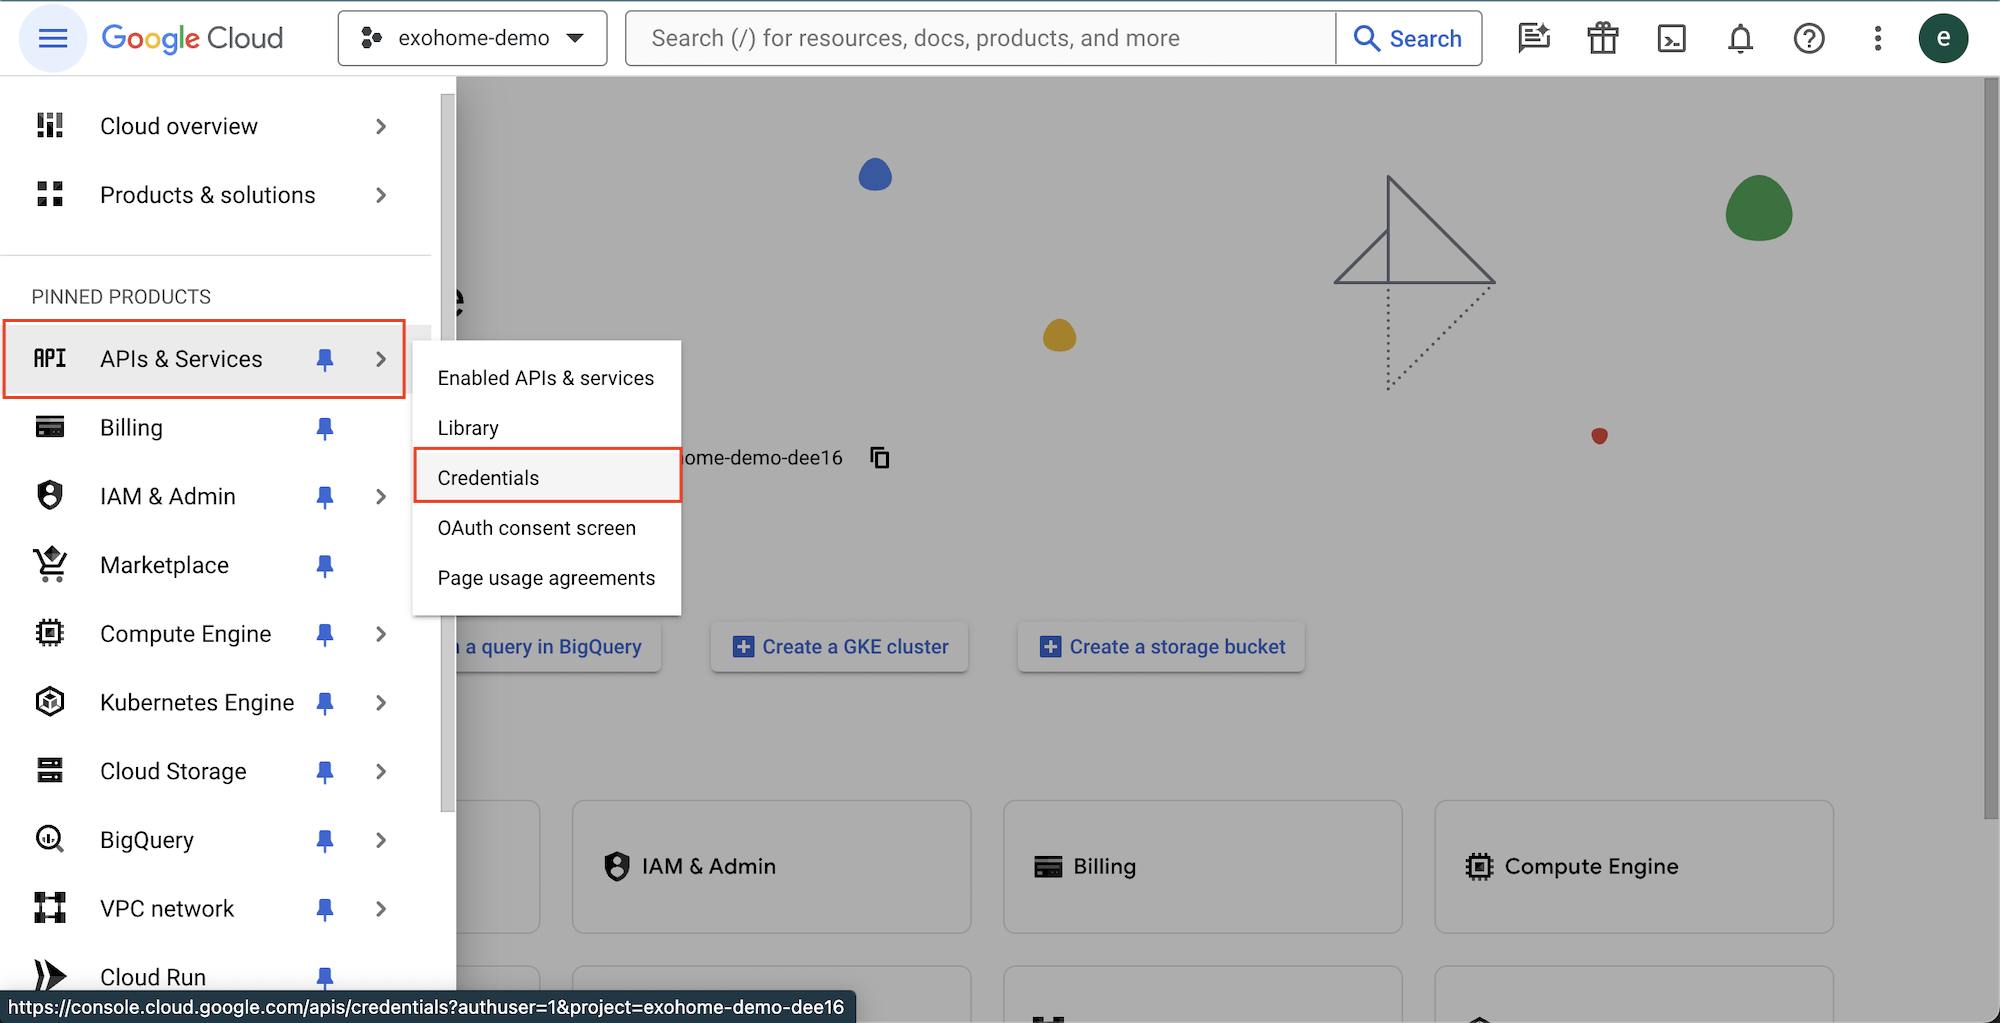
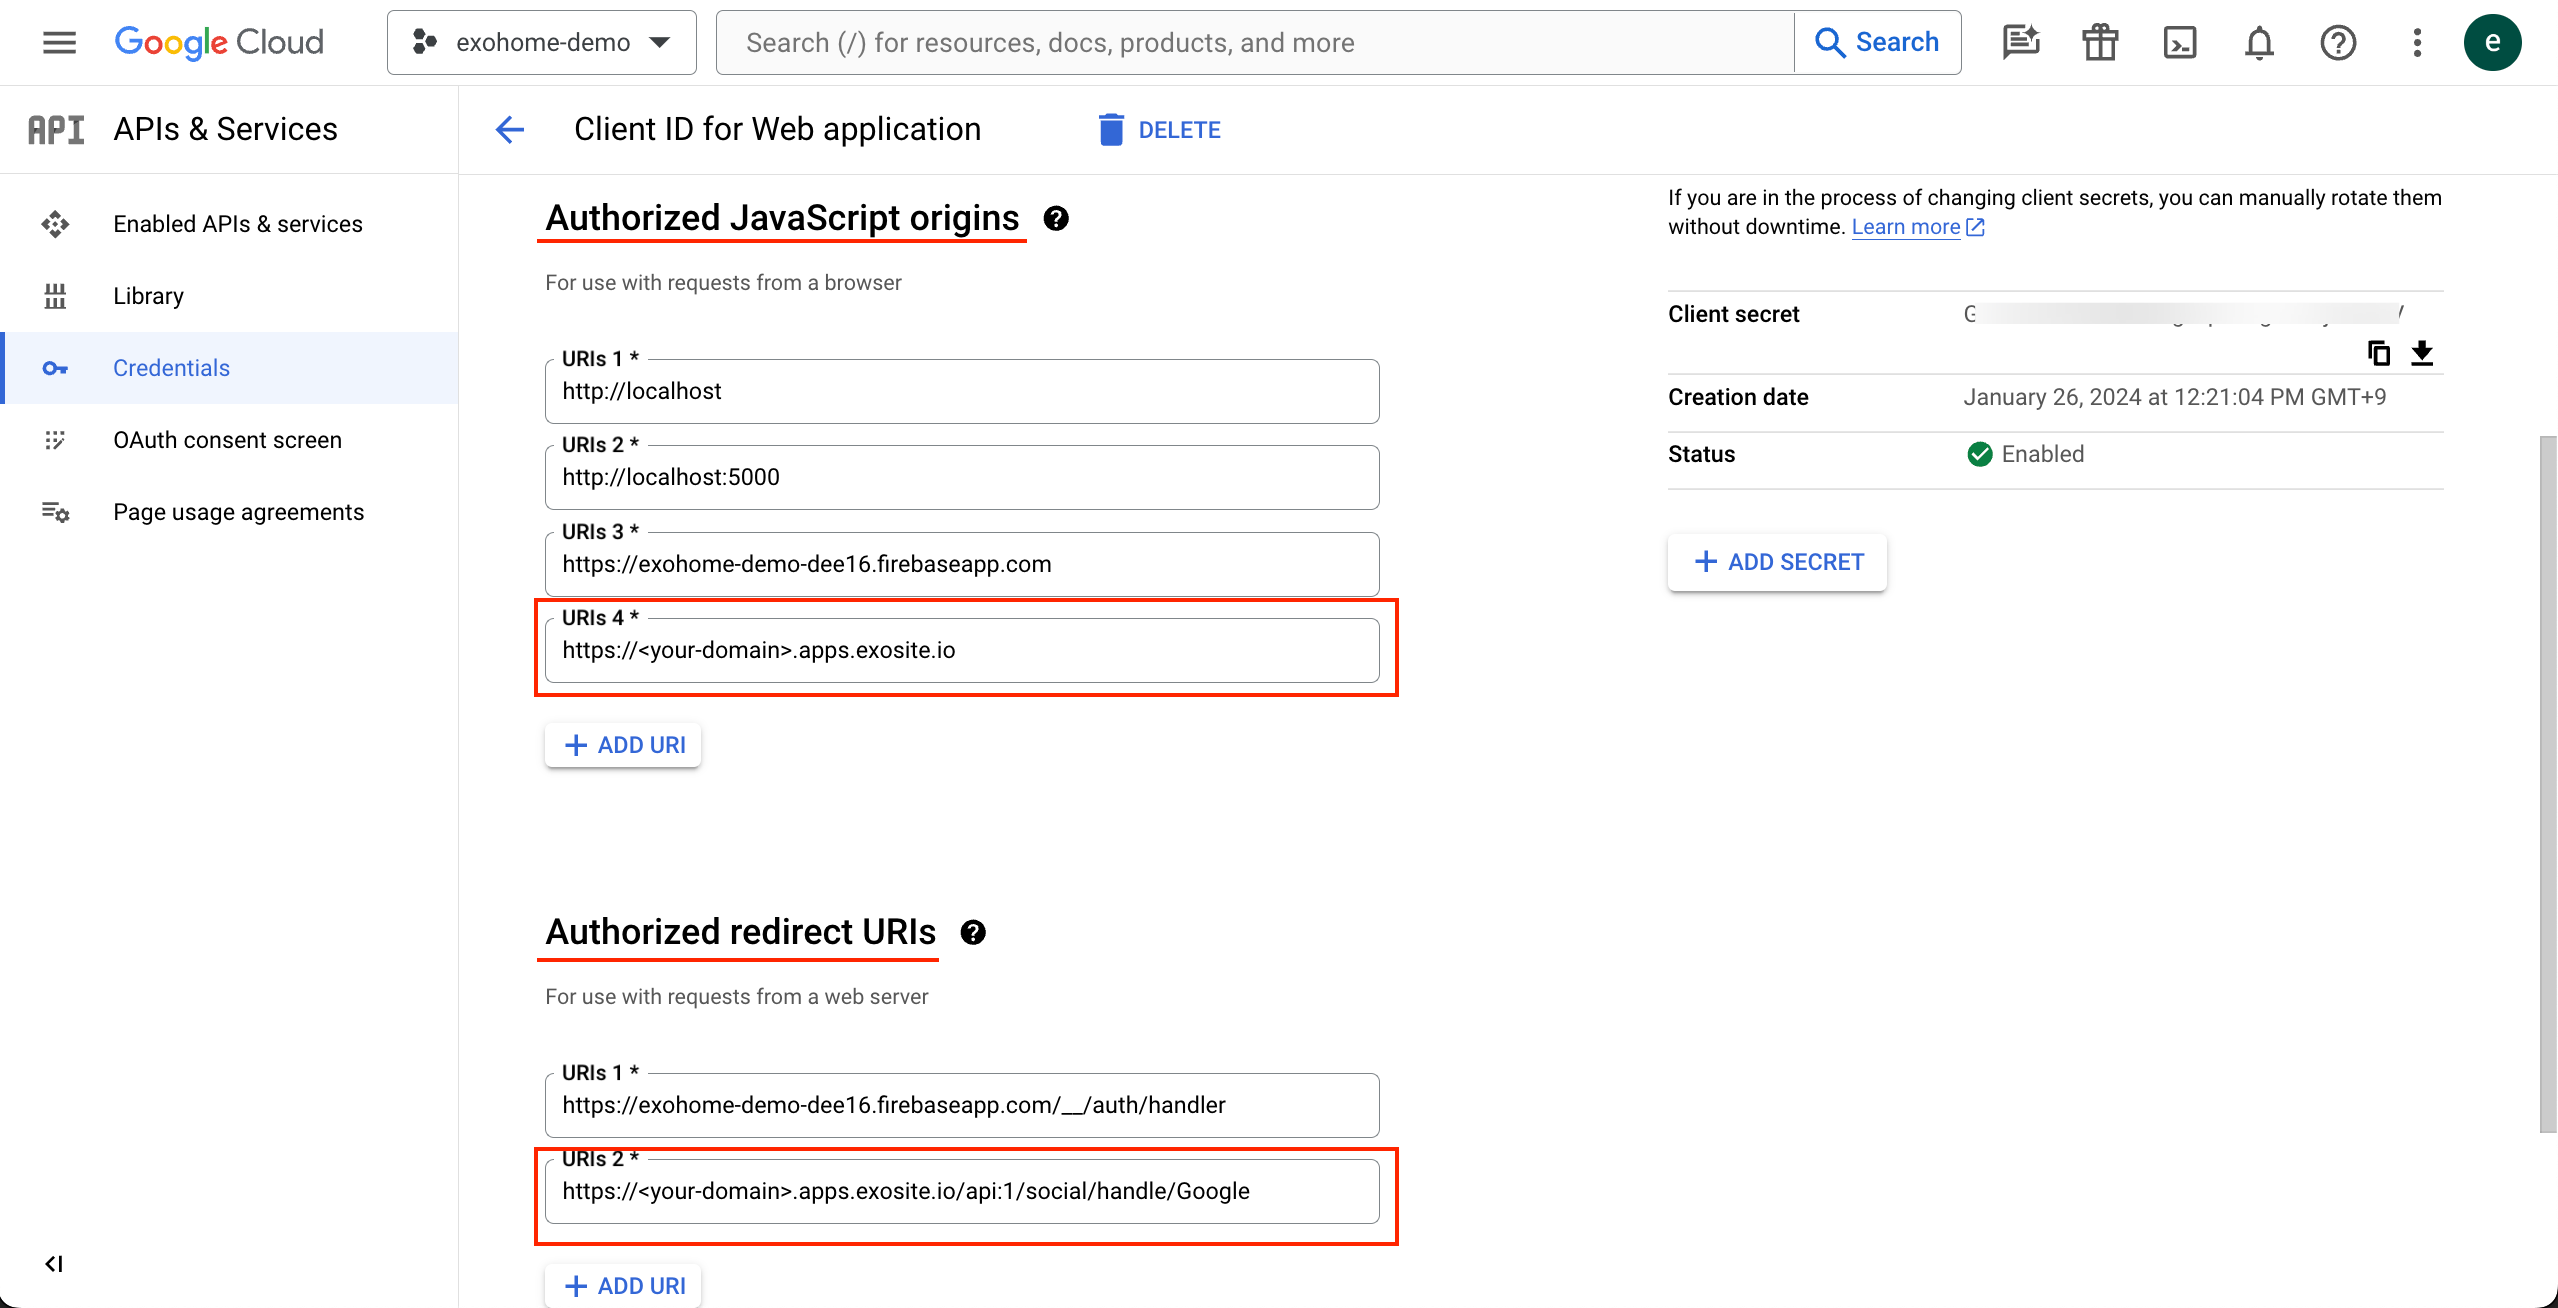
-
Add the following URIs and save.
- Authorized JavaScript origins: https://<your-domain>.apps.exosite.io
- Authorized redirect URIs: https://<your-domain>.apps.exosite.io/api:1/social/handle/Google
-
Go to
OAuth consent screenon the side menu. ClickEDIT APPand fill the required fields.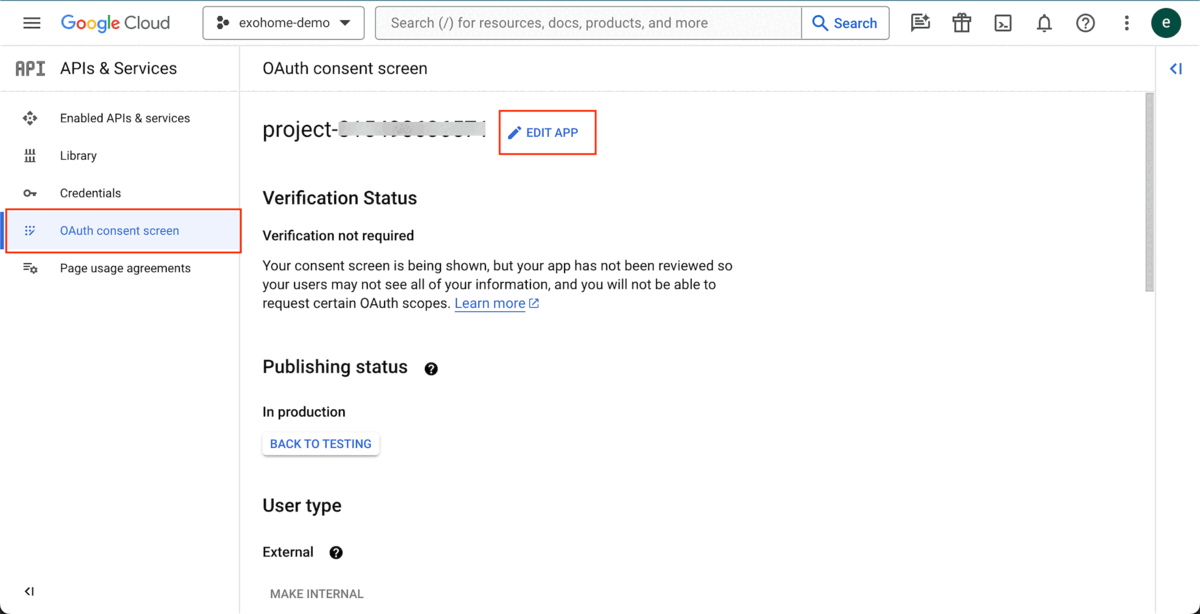
-
Keeps clicking
SAVE AND CONTINUEto the final step. Then clickSAVE FOR VARIFICATION. -
Please check that the
Publishing statusshould be In production and theUser typeshould be External.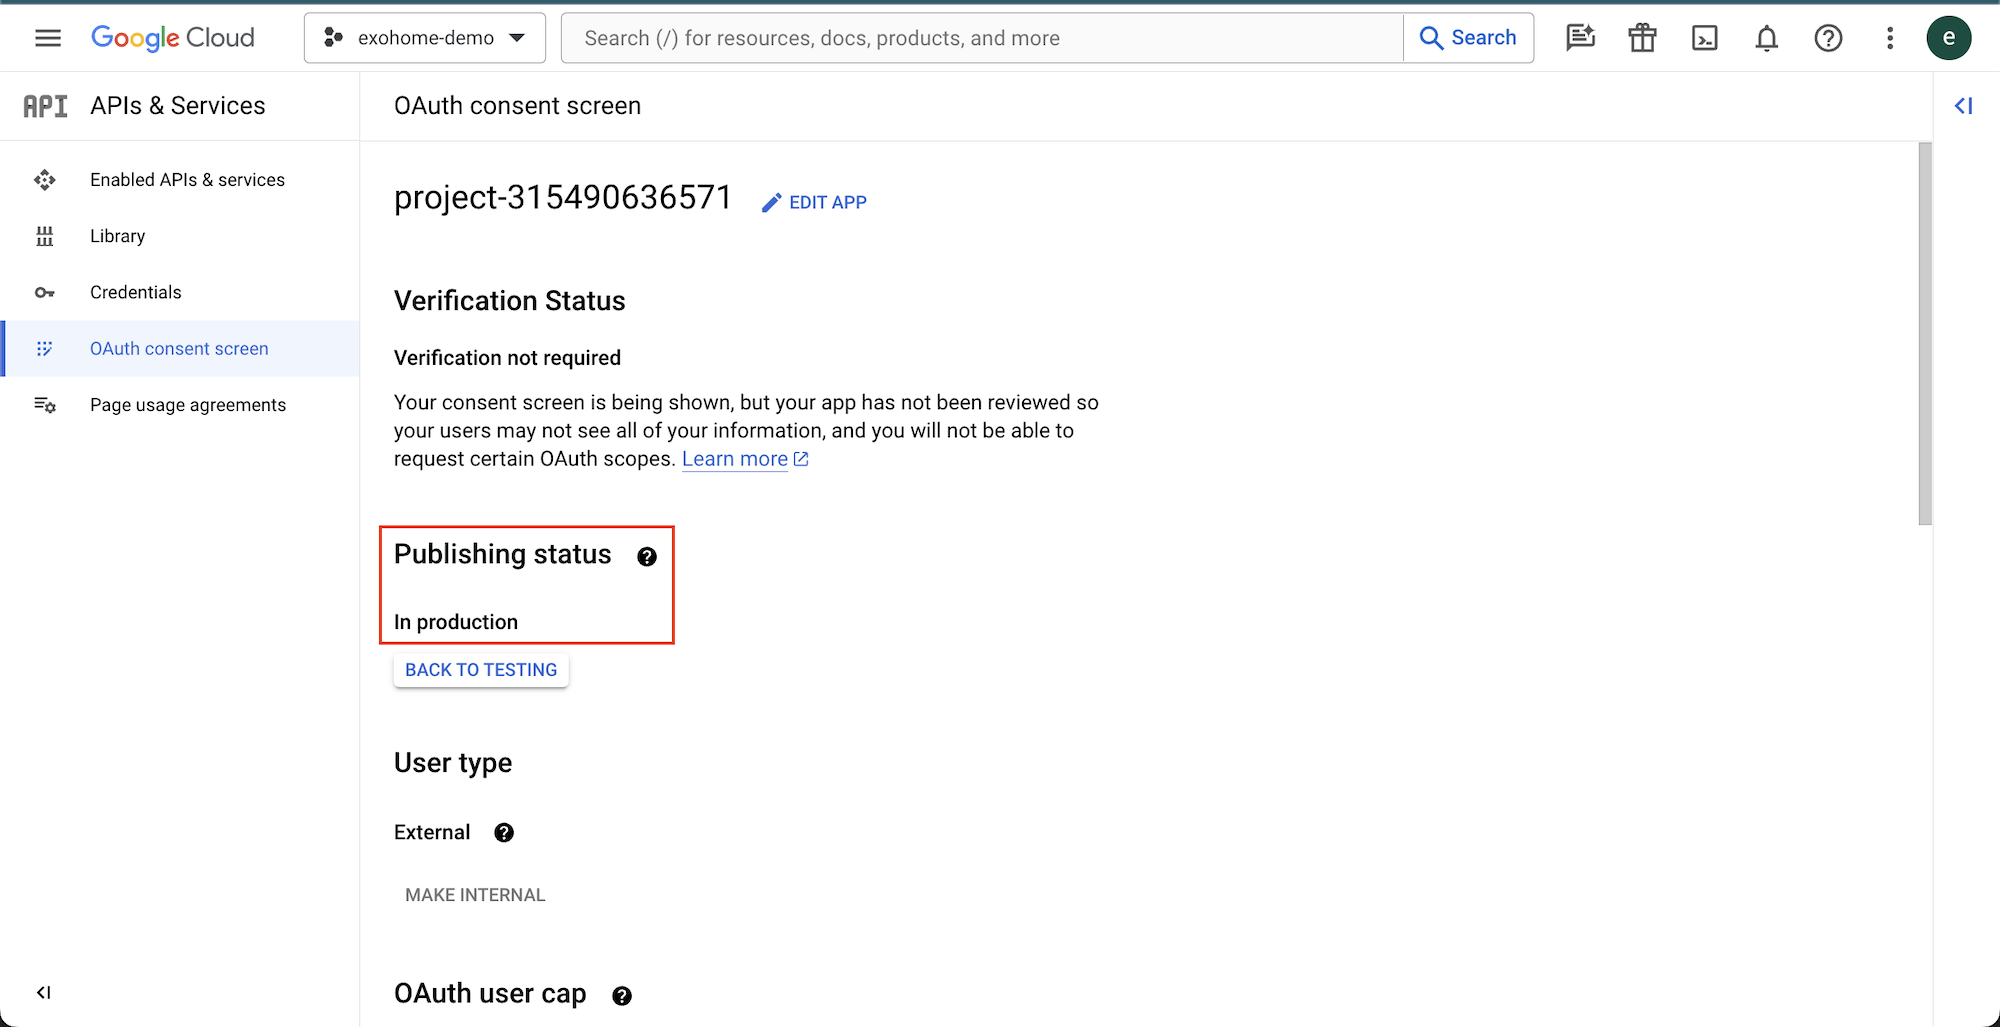
Update Your App Project
Steps
- Open
package.jsonunder project root. -
Add
"@awesome-cordova-plugins/firebase-x": "^6.8.0"under "dependencies" part.
-
Add
"cordova-plugin-firebasex": "16.4.0"under "devDependencies" part.
-
Add the following under "cordova" —> "plugins"
    "cordova-plugin-firebasex": {
        "IOS_STRIP_DEBUG": "true",
        "FIREBASE_ANALYTICS_COLLECTION_ENABLED": "true",
        "FIREBASE_PERFORMANCE_COLLECTION_ENABLED": "true",
        "FIREBASE_CRASHLYTICS_COLLECTION_ENABLED": "true",
        "FIREBASE_FCM_AUTOINIT_ENABLED": "true"
      }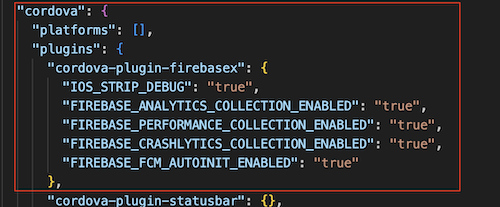
-
Open
app.config.tsfile, under ~/src/app/. Modify thesigninMethodvalue totrue.
Have more questions? Submit a request