Build Android App
Before we start the build App process, please make sure you have the following settings ready:
- Build environment setup (Node, Ionic, Docker Desktop)
- App info setup
- App icon and splash
- (Optional) Firebase for push notification
- (Optional) Language setting
Note
It is highly recommended that you build Android and iOS App in seperate project folders.
Preparing a release Android APP bundle
The Android App Bundle is Android's new, official publishing format. Follow these steps to prepare a release APP Bundle for the Google Play Store.
Steps
-
Open your terminal and cd to the project root.
cd hamv_mobile -
Generate a release keystore.
keytool -genkey -v -keystore <keystoreName>.keystore -alias <keystoreAlias> -keyalg RSA -keysize 2048 -validity <keystoreValidityTime>Note
keystoreName can be any words. e.g., release
keystoreAlias is similar to keystoreName
keystoreValidityTime is validity number of days. e.g., 365
-
(Optional) Generate a key hash for Facebook Login.
keytool -exportcert -alias <keystoreAlias> -keystore <keystoreName>.keystore | openssl sha1 -binary | openssl base64 -
(Optional) Put your release key hash to Facebook developer:
- Go to Facebook for Developers website
- Select your app
- Go to the page Settings/Basic
https://developers.facebook.com/apps/<your APP Id>/settings/ - Find the block "Android"
- Put the key hash that you just generated into the field "Key Hashes"
- Click "Save Changes"
-
Prepare a production release config.
- Copy and paste your
release.keystorefile to<project_root>/keystoresfolder. - Go back to
<project_root>folder and openbuild.json. - Add the
releaseinformation block toandroidscope. EditstorePassword,aliasandpasswordvalues.
Here is an example of a build configuration file:
{ "android": { "debug": { "keystore": "./keystores/debug.keystore", "storePassword": "android", "alias": "androiddebugkey", "password" : "android", "keystoreType": "" }, "release": { "keystore": "./keystores/release.keystore", "storePassword": "<release_keystore_password>", "alias": "<keystoreAlias>", "password" : "<release_password>", "keystoreType": "" } } } - Copy and paste your
-
Build Docker image.
docker-compose build -
Start a Docker container based on the built image.
docker-compose run app sh -
The default build setting is to create
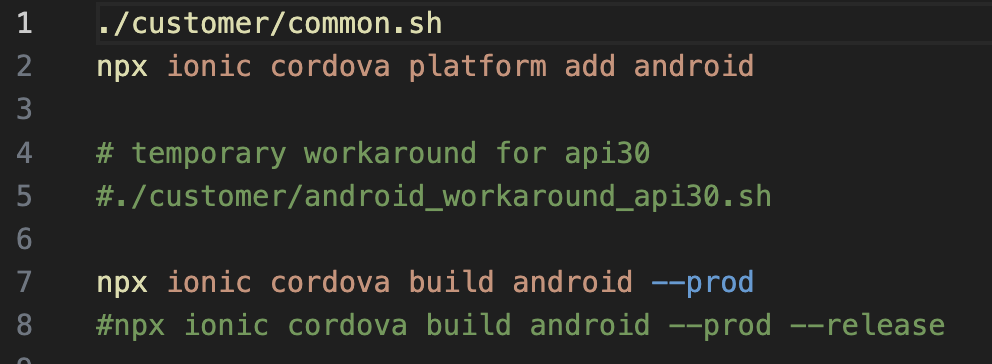
.aabfile. If your need to build.apkfile for testing, please modify hamv_mobile_android.sh file under project root > customer folder. Remove the#fromnpx ionic cordova build android --prodand change the next line to#npx ionic cordova build android --prod --releaseas below example.
-
Execute the following commands to install build environment dependencies under
/work $./customer/hamv_mobile_android.sh -
You should be able to see the “BUILD SUCCESSFUL” message.
Note
If the build failed, please remove the build materials by using this command in Docker container (under
/work $) and repeat step 8 again.rm -rf node_modules/ plugins/ platforms/ .angular/ -
After building process is done, you can find your
android-release.aabunder<project_root>/platforms/android/app/build/outputs/bundle/releasefolder. Orandroid-release.apkunder<project_root>/platforms/android/app/build/outputs/apk/debug > apkfolder.
Now you have your final release binary and you can release this to Google Play Store. See next chapter to publish your app on Google Play Store.
Have more questions? Submit a request