Theming Your App
Theme Management allows you to configure theme settings for your mobile app and emails from the cloud. You can customize the look and feel for the app without changing the app code. The theme of the app and emails will follow the settings on Admin site.
General Settings
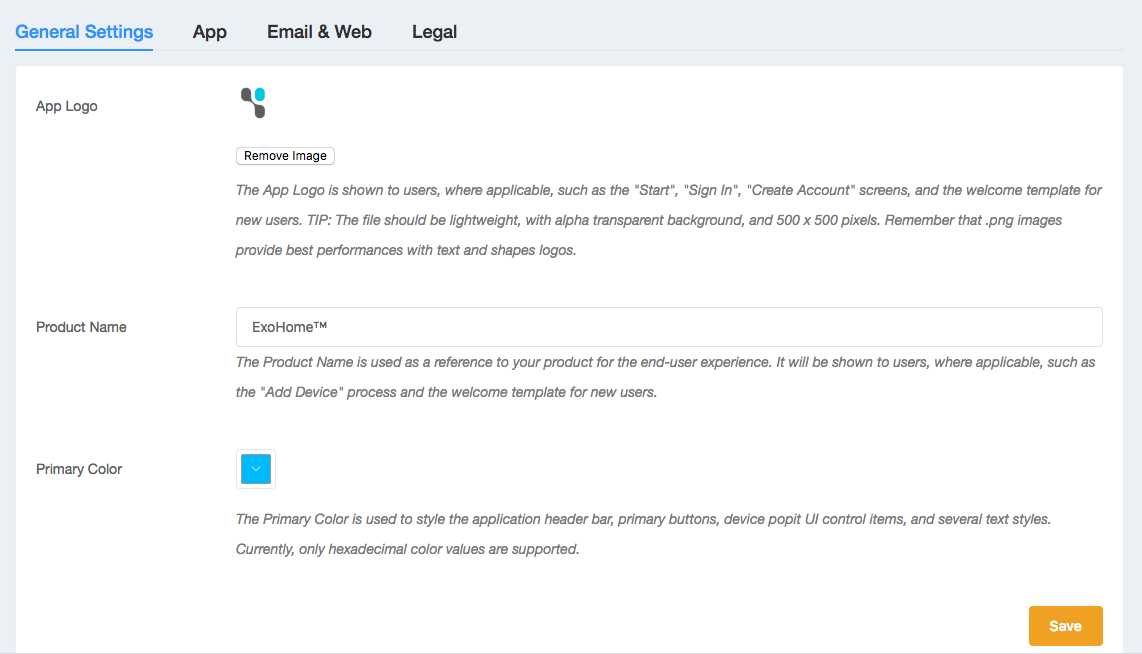
- App Logo: This represents the logo image shown in the "Start", "Sign In", "Create Account", "Forgot Password" and "Legal" pages and also emails.
- Product Name: This represents the name of your product. It will be shown in the app, for example the "Add Device" screens, the landing pages for new and invited users, the sharing messages and so on.
- Primary Color: The primary color is used to style the application header bar, primary buttons, device popit UI control items, some graphics and several text styles. Currently, only hexadecimal color values are supported.
- Save: Click this button to update the General Settings config.
App
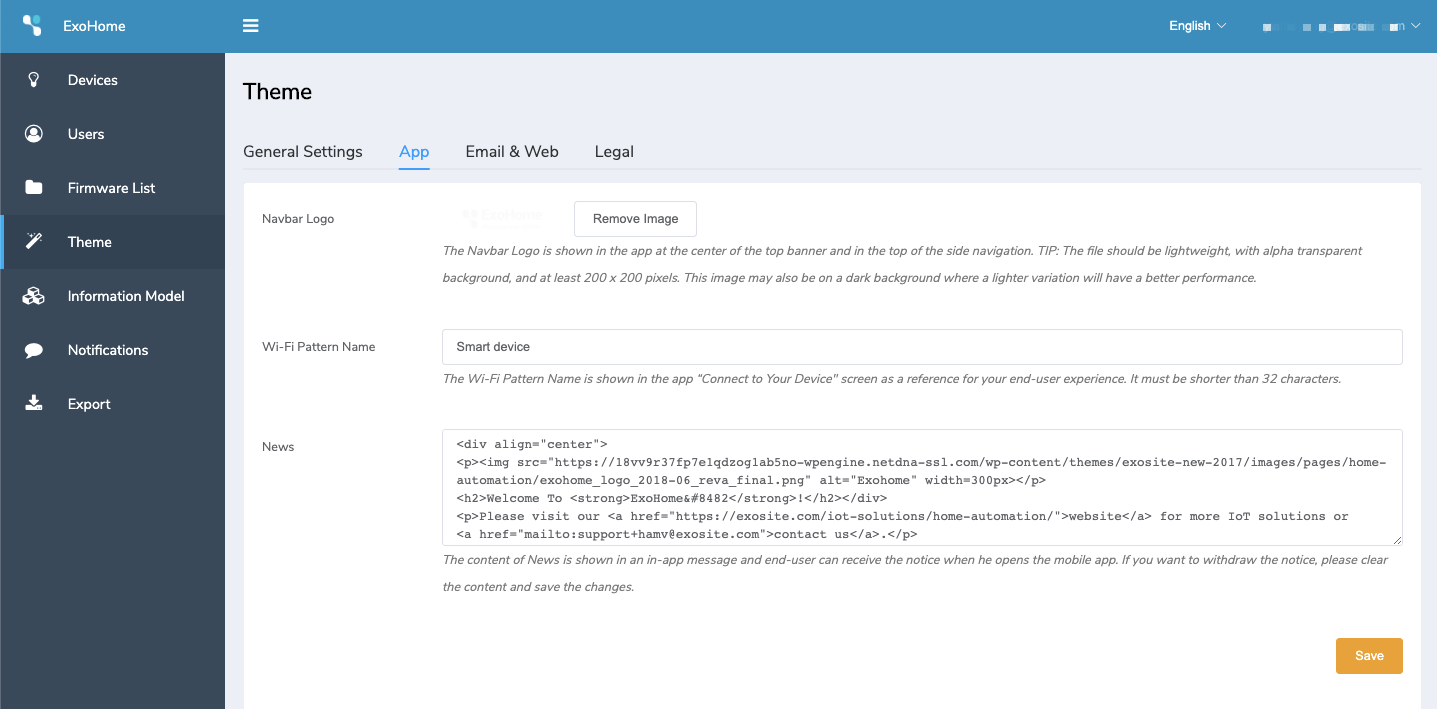
- Navbar Logo: This represents the logo image shown in the center of the top banner and in the top of the side navigation.
- Wi-Fi Pattern Name: This represents the pattern for SSID of your device. It must be shorter than 32 characters and will be shown in the "Connect to Your Device" screen if value provided in this field. Otherwise, it will follow the settings in the theme and app config file and if both the theme and the app config file are empty, the Product Name will be shown.
- News: This function allows admins to provide up-to-date news for end-users when opening APP. It shows only once to the same APP user. You are able to edit content in html format. But please note that CSS style is not supported in this editor.
- Save: Click this button to update the App config.
Email & Web
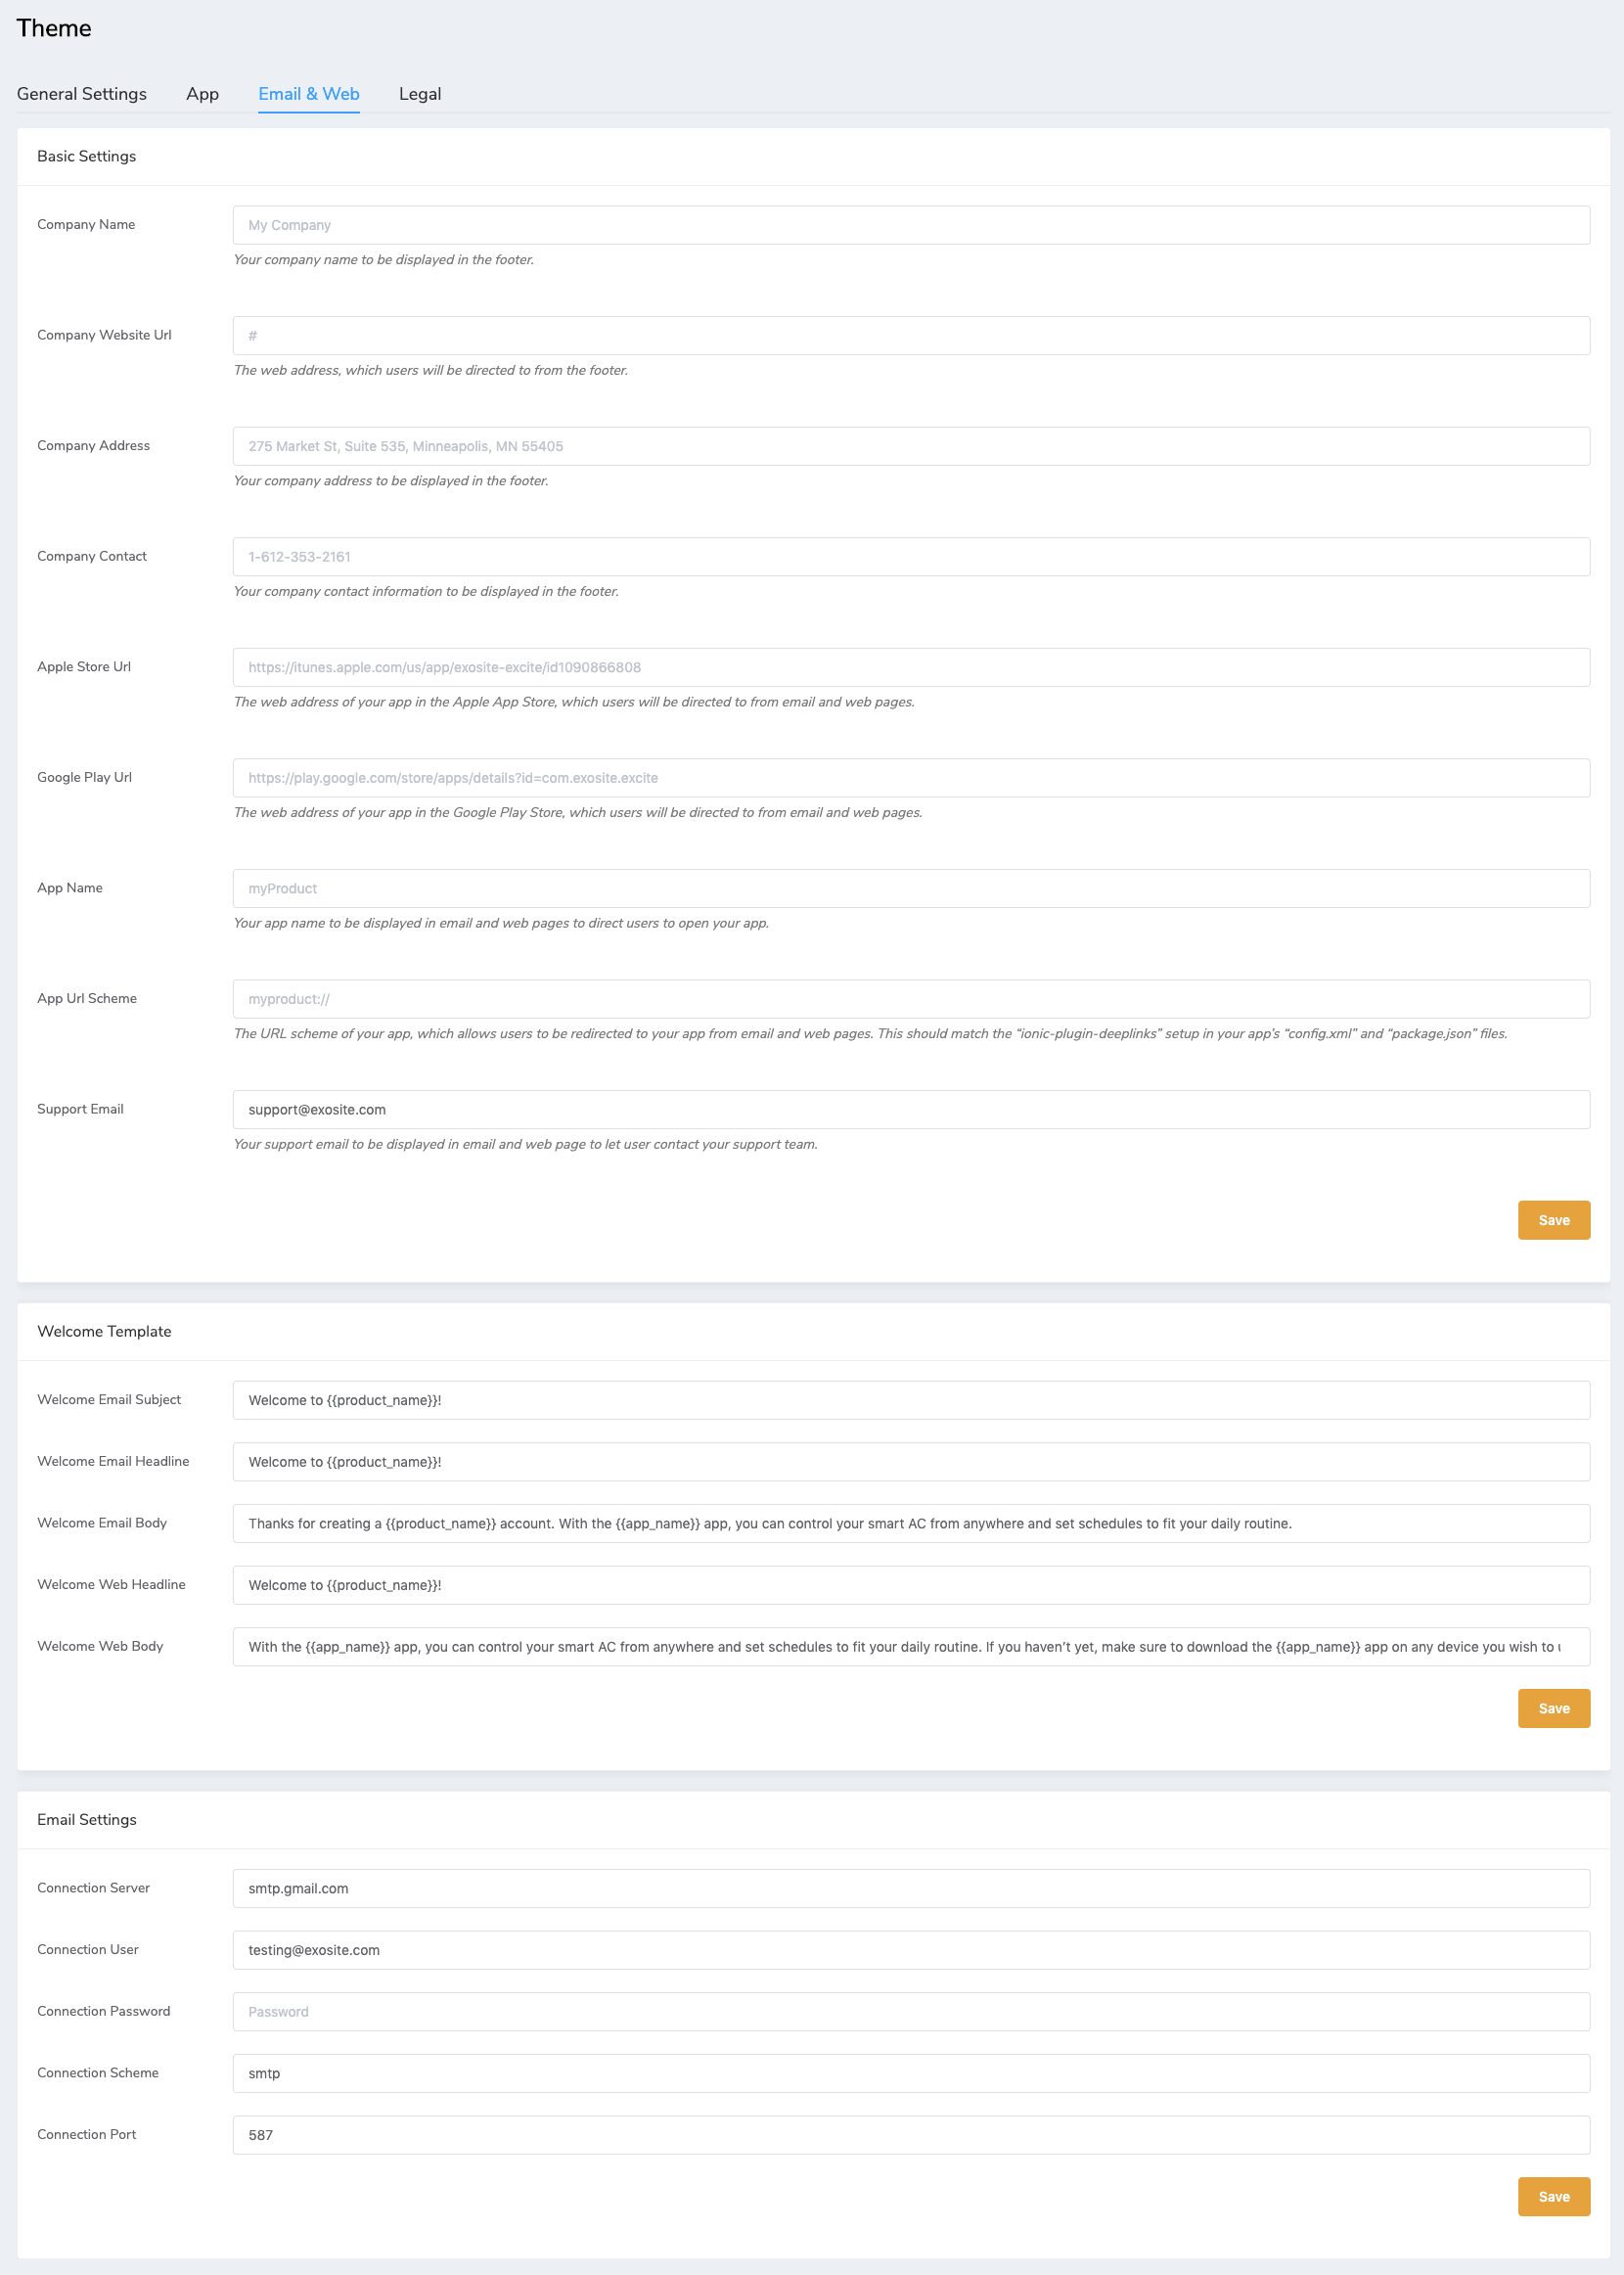
Basic Settings
1. Company Name: This represents the name of your company. It will be shown in the emails like the welcome email new users receive, the landing page for password reset, the footer of legal policies page and so on.
2. Company Website Url: This represents the website link of your company and goes with "Company Name". When user clicks "Company Name", it will direct user to the company website url you set.
Note: Please add the complete Url to this fields. For example, https://exosite.com/iot-platform/.
3. Company Address: This represents the address of your company. It will be shown in the emails like the welcome email new users receive, the landing page for password reset, the footer of legal policies page and so on.
4. Company Contact: This represents the contact number or email of your company. It will be shown in the emails like the welcome email new users receive, the landing page for password reset, the footer of legal policies page and so on.
5. Apple Store Url: This represents the url of your app in the Apple Store. It will be shown in the welcome email new users receive and the landing page for invited users.
6. Google Play Url: This represents the url of your app in the Google Play. It will be shown in the welcome email new users receive and the landing page for invited users.
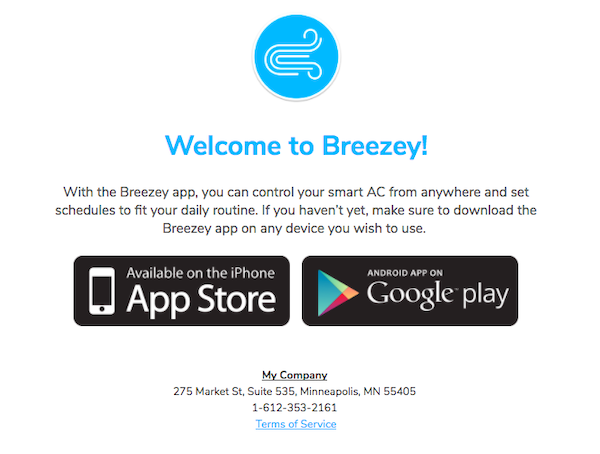
7. App Name: This represents the mobile app name of your product. It will be shown in emails like the welcome email new users receive, the landing page for password reset, the landing page for invited users and so on.
8. App Url Scheme: This represents the deeplink url scheme of your app. It must match what you set in the app, if not, you can not direct user to your mobile app by clicking "Open App" and "Claim Device" button.
Note: Unlike the RFC, scheme and host name in the Android framework is case-sensitive. As a result, you should always specify schemes using lowercase letters. See Android - Data Element.
9. Support Email: This represents the support email of your company. When end user clicks "Send Feedback" button, an email will be sent to the mail address defined here.
10. Save: Click this button to update the Basic Settings config.
Welcome Template
1. Welcome Email Subject: This represents the subject of the welcome email.
2. Welcome Email Headline: This represents the title of the welcome email. It will be shown under the app logo in the welcome email.
3. Welcome Email Body: This represents the description of the welcome email.
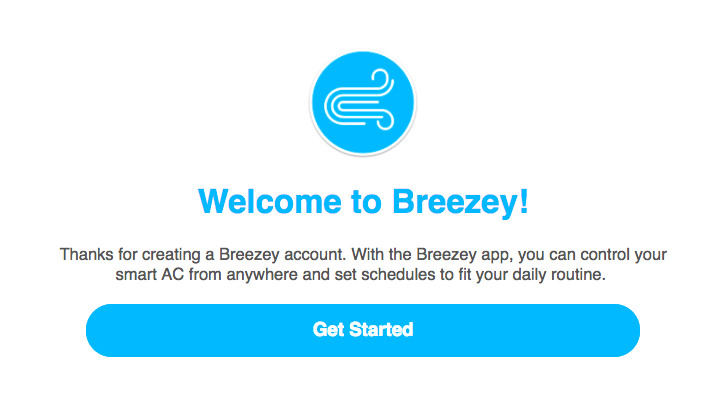
4. Welcome Web Headline: This represents the title of the welcome web page.
5. Welcome Web Body: This represents the descriptions of the welcome web page.

6. Save: Click this button to update the Welcome Template config.
Email Settings
Default email sender of ExoHome solution is sent from Exosite email address. You can update the email sender by redefining your SMTP server configuration.
- Connection Server: This represents the simple mail transfer protocol (smtp) server that email sent from.
- Connection User: This represents the user account of email sender.
- Connection Password: This represents the password of email sender account.
- Connection Scheme: This represents the protocol of connection to the server, smtp or smtps.
- Connection Port: This represents the port of connection to server.
- Save: Click this button to update the Email Settings config.
Legal
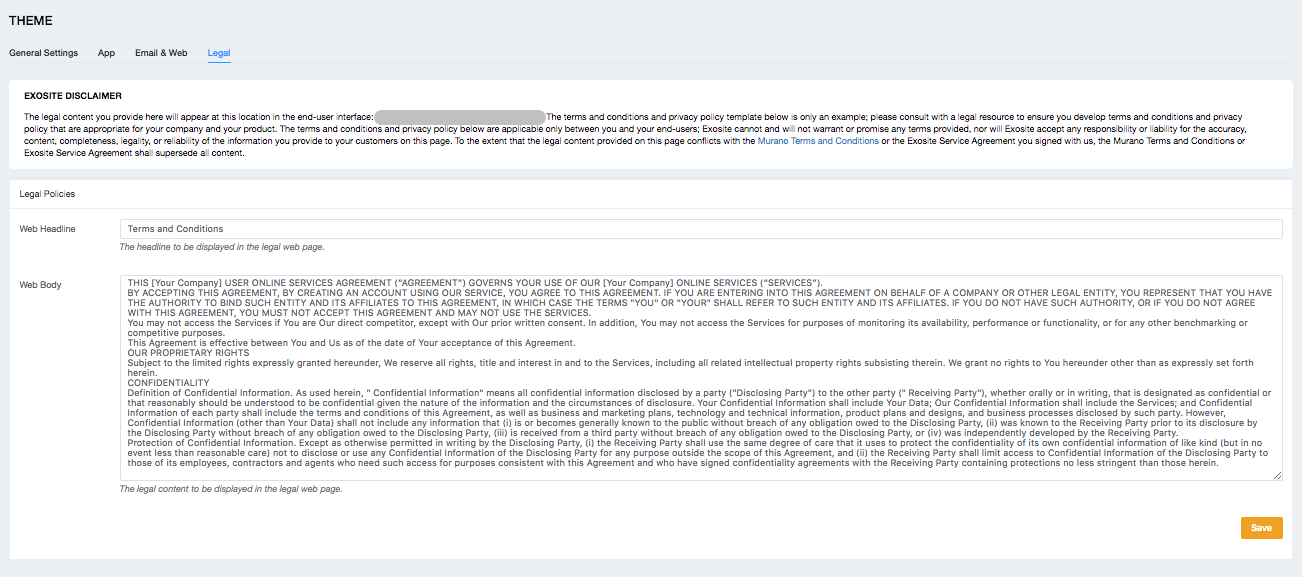
Legal Policies
The legal content you provide here will appear at this location in the end-user interface:https://yourcompany.apps.exosite.io/#/legal. The terms and conditions and privacy policy template below is only an example; please consult with a legal resource to ensure you develop terms and conditions and privacy policy that are appropriate for your company and your product. The terms and conditions and privacy policy below are applicable only between you and your end-users; Exosite cannot and will not warrant or promise any terms provided, nor will Exosite accept any responsibility or liability for the accuracy, content, completeness, legality, or reliability of the information you provide to your customers on this page. To the extent that the legal content provided on this page conflicts with the Murano Terms and Conditions or the Exosite Service Agreement you signed with us, the Murano Terms and Conditions or Exosite Service Agreement shall supersede all content.
- Web Headline: This represents the title of the legal policies page. This is a required field.
- Web Body: This represents the legal policies of your company. This is a required field.
- Save: Click this button to update the Legal Policies config.
Note: Copy the URL for legal to your Facebook, Alexa and Google Home settings as your ToS and privacy policy.
Note:
- When updating your theme, any currently open apps will need to close and reopen to download the latest settings.
- "App Logo" image recommendations:
- Recommended image size: 500 x 500 pixels
- Minimum resolution: at least 200 x 200 pixels
- For non-square logos where width is greater than height, only the height needs to follow the recommended length.
- Recommended image format: PNG with alpha transparent background, or JPG on white background
- "Navbar Logo" image recommendations:
- Recommended image size: at least 200 x 200 pixels
- For non-square logos where width is greater than height, only the height needs to follow the recommended length.
- Recommended image format: PNG with alpha transparent background.
Have more questions? Submit a request